LibGDX Beginner Tutorial: Sprite Sheets & Physics with Box2D

This tutorial is for libGDX beginners, explaining how to create sprite sheets, use sprites in your game and add game physics.
- Creating a new project
- Using Gradle to import & manage dependencies
- Creating sprite sheets
- Using sprites
- Creating physics collision shapes
- Editing physics parameters
- Using physics in your game
Create a new LibGDX application
Start by downloading the setup app that LibGDX provides, as well as the Android SDK. I won't go into details about how to set up the SDK since Android already provides in depth guides for that.
Run the tool and make sure that you have the Desktop and Android subprojects, as well the Box2D extension selected. Use whatever you'd like for the project's name, package, and game class. See the screenshot below for an example.
It doesn't hurt to have more subprojects or extensions selected. Those included in the example below are just the minimal requirements for this tutorial.
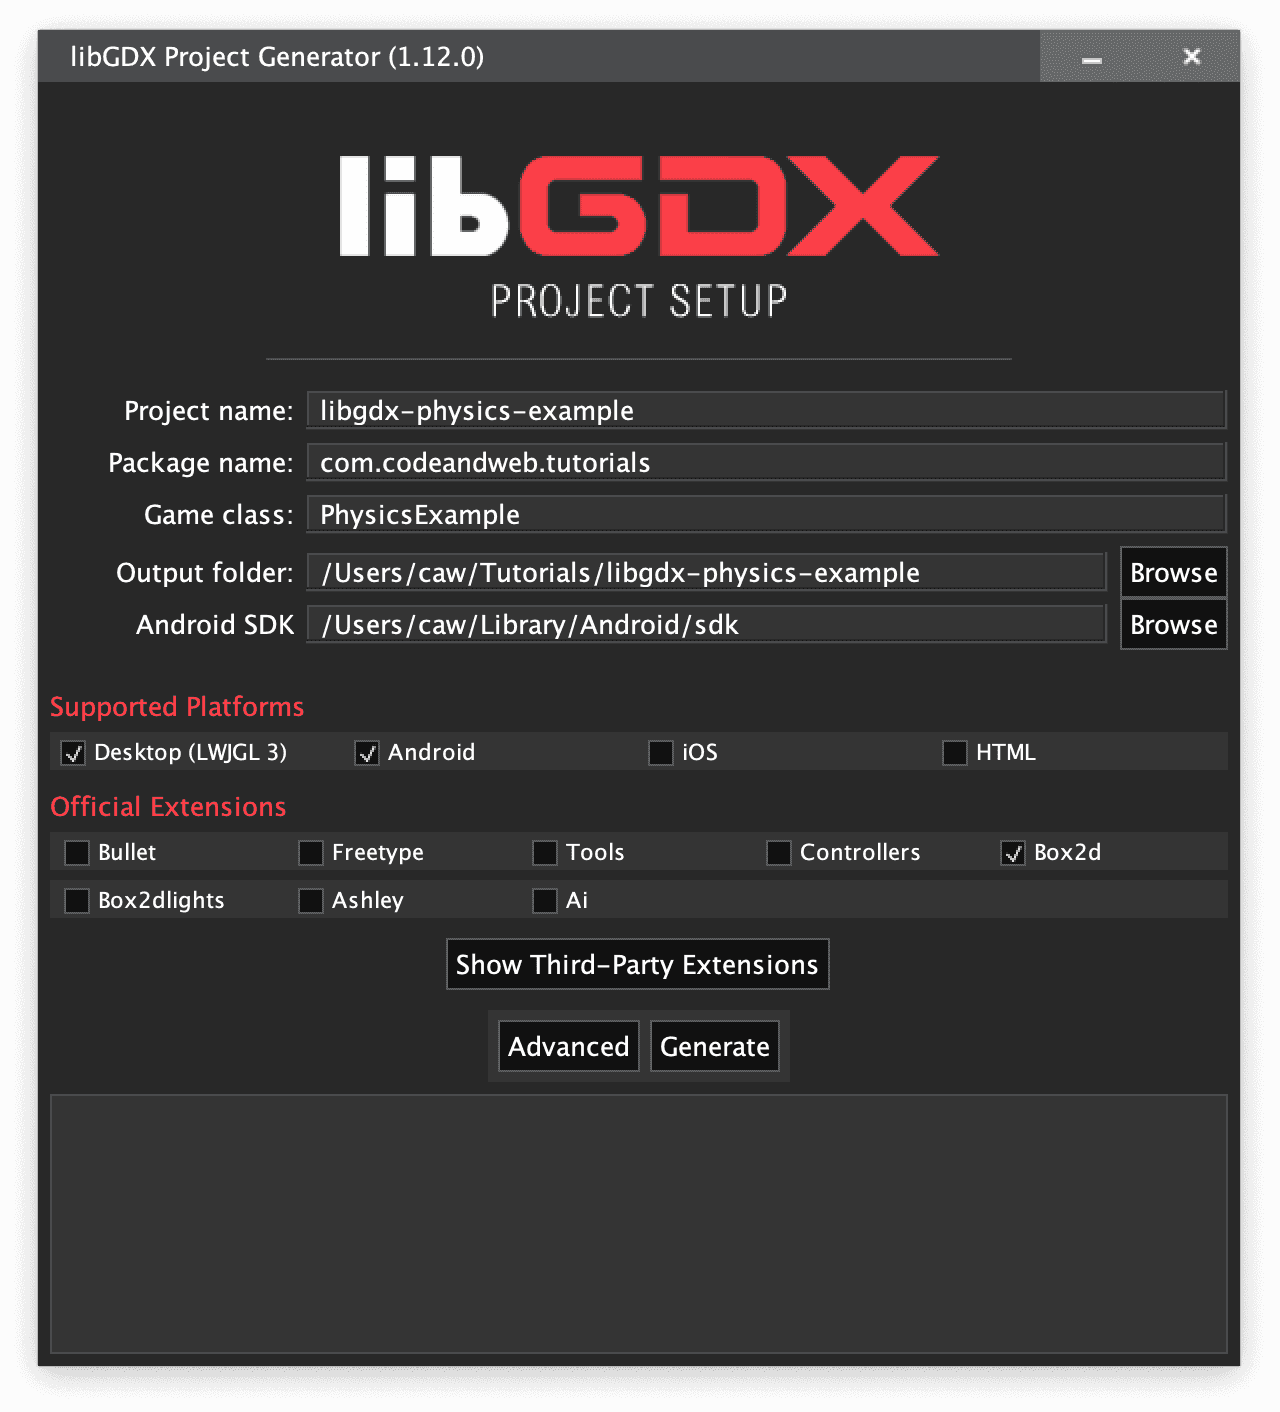
Click Generate to create the new empty project. The setup app might detect newer build tools or a more recent Android API than the recommended version. Decline the usage of a more recent version to avoid potential compatibility issues.
Configuring the project in Android Studio
After you generate the application with the setup tool, open Android Studio, or whichever editor you prefer. Just keep in mind that this guide is written with Android Studio in mind, so you may have to make some adjustments to get it to work with another editor.
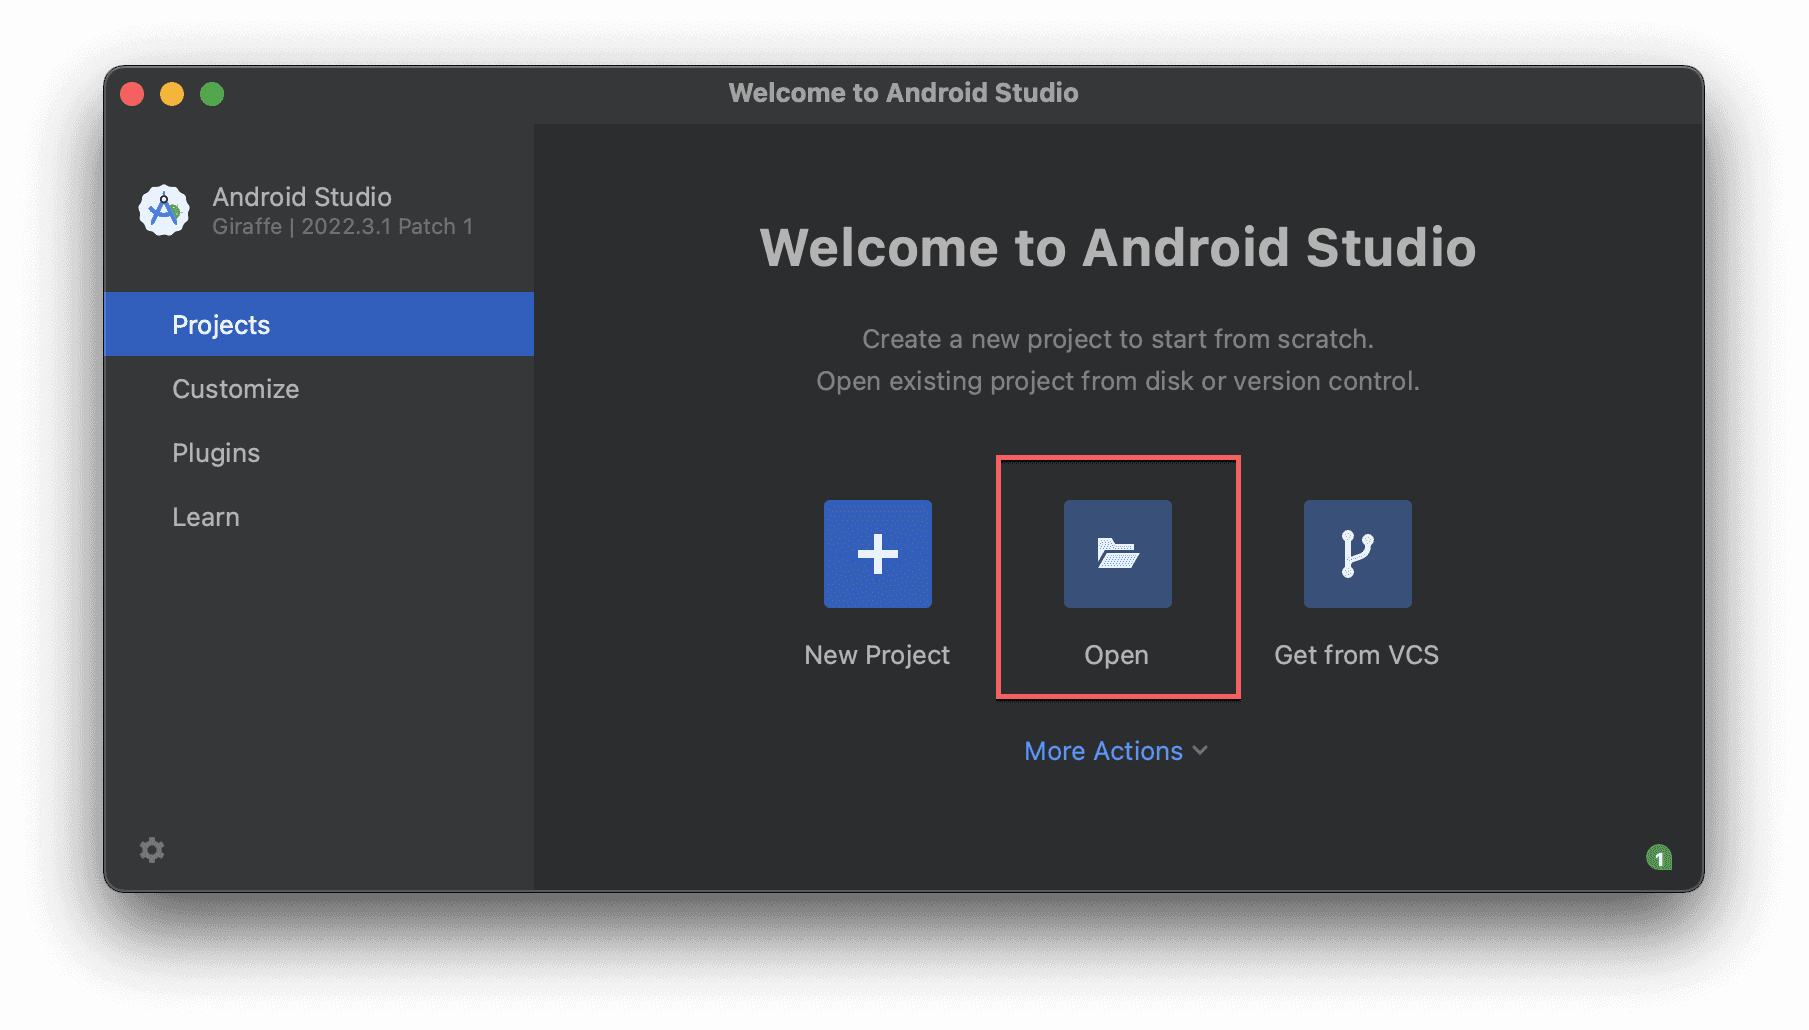
Import the project using Open:
Open the project tab, and select the Android view:
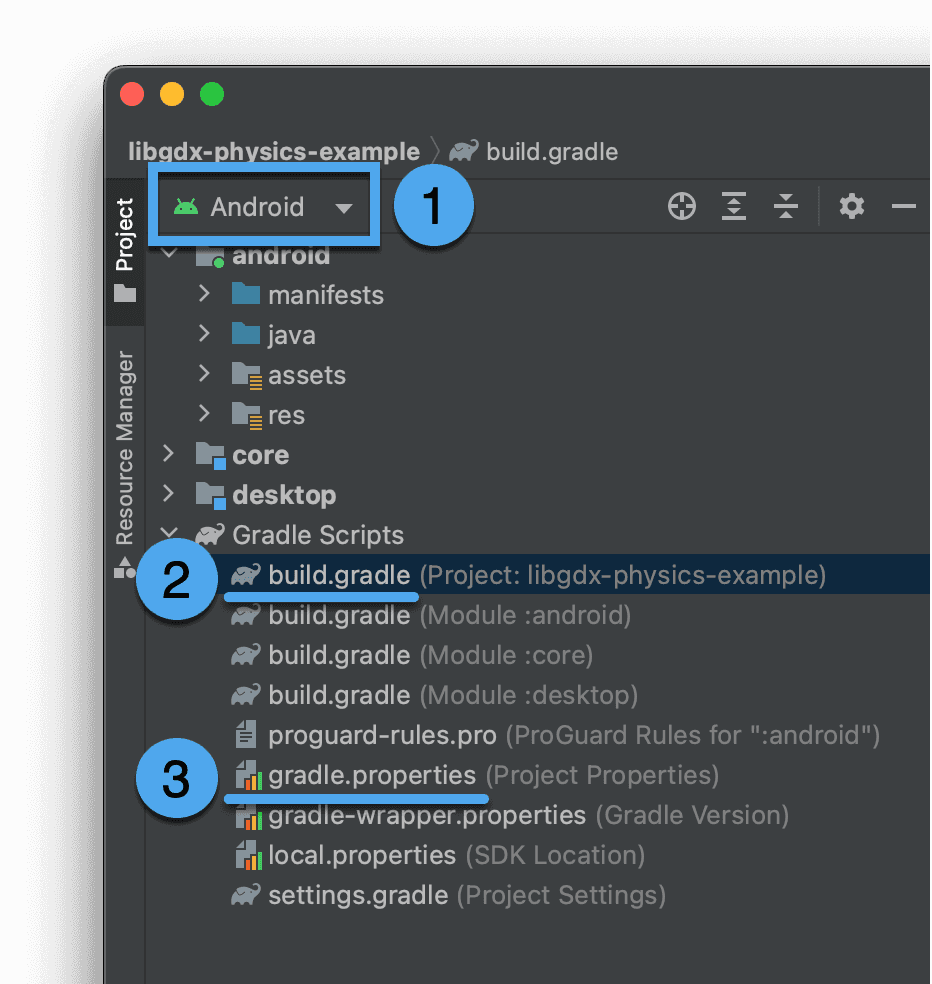
Expand the Gradle Scripts tree node, and open the project's build.gradle file. This is the build.gradle file that is found in your project's root path. Notice that it has Project to the right of it while the others say Module.
Scroll down until you find the project(":core") section, and add this
line into the dependencies:
implementation "com.codeandweb.physicseditor:gdx-pe-loader:1.1.0"Replace 1.1.0 with the current version of the plugin, which you can find on
The Central Repository.
Next, open the gradle.properties file and append the following line:
android.useAndroidX=trueWhen you save the build files, Android Studio will tell you that the Gradle files have changed, and ask if you want to sync the IDE. Click Sync Now in the notification that appears at the top of the editor window. This will download the gdx-pe-loader dependency and install it in your project for you.

Setting up run configurations
Next we need to tell Android Studio how to start the desktop version of our app, so we don't have to test it out with an Android device every time we make a small change to our code.
From the Run menu, select Edit Configurations. Click the + in the top-left corner of the window, and select Gradle to add the Gradle task which launches the desktop application.
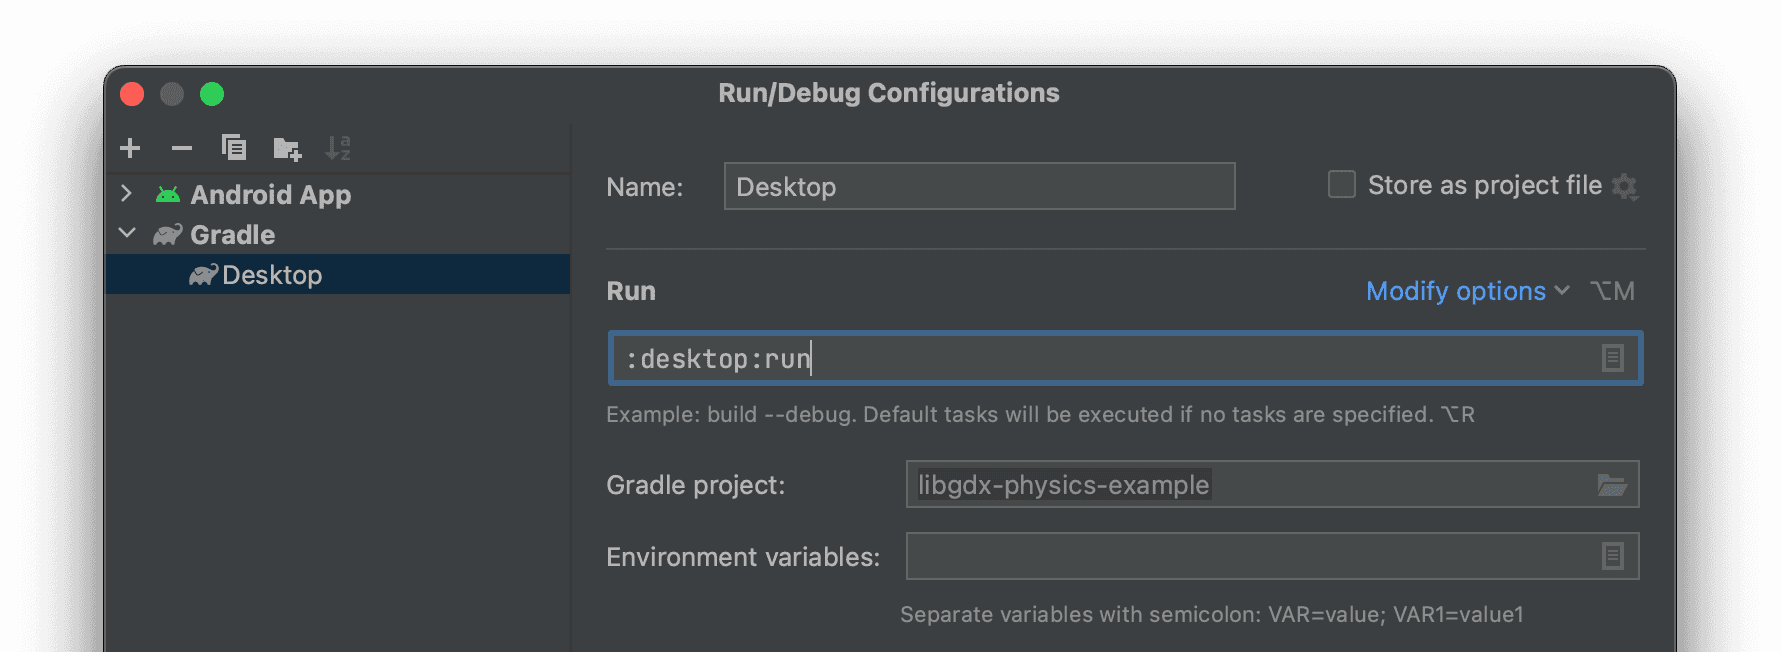
Change the following values for the configuration:
- Change the Name to "Desktop"
- Enter the gradle task name
:desktop:runin the Run field - Save the new configuration with Ok
You can now run the desktop application to check that everything is working. To do that just select the Desktop configuration and click the play button in Android Studio's toolbar.

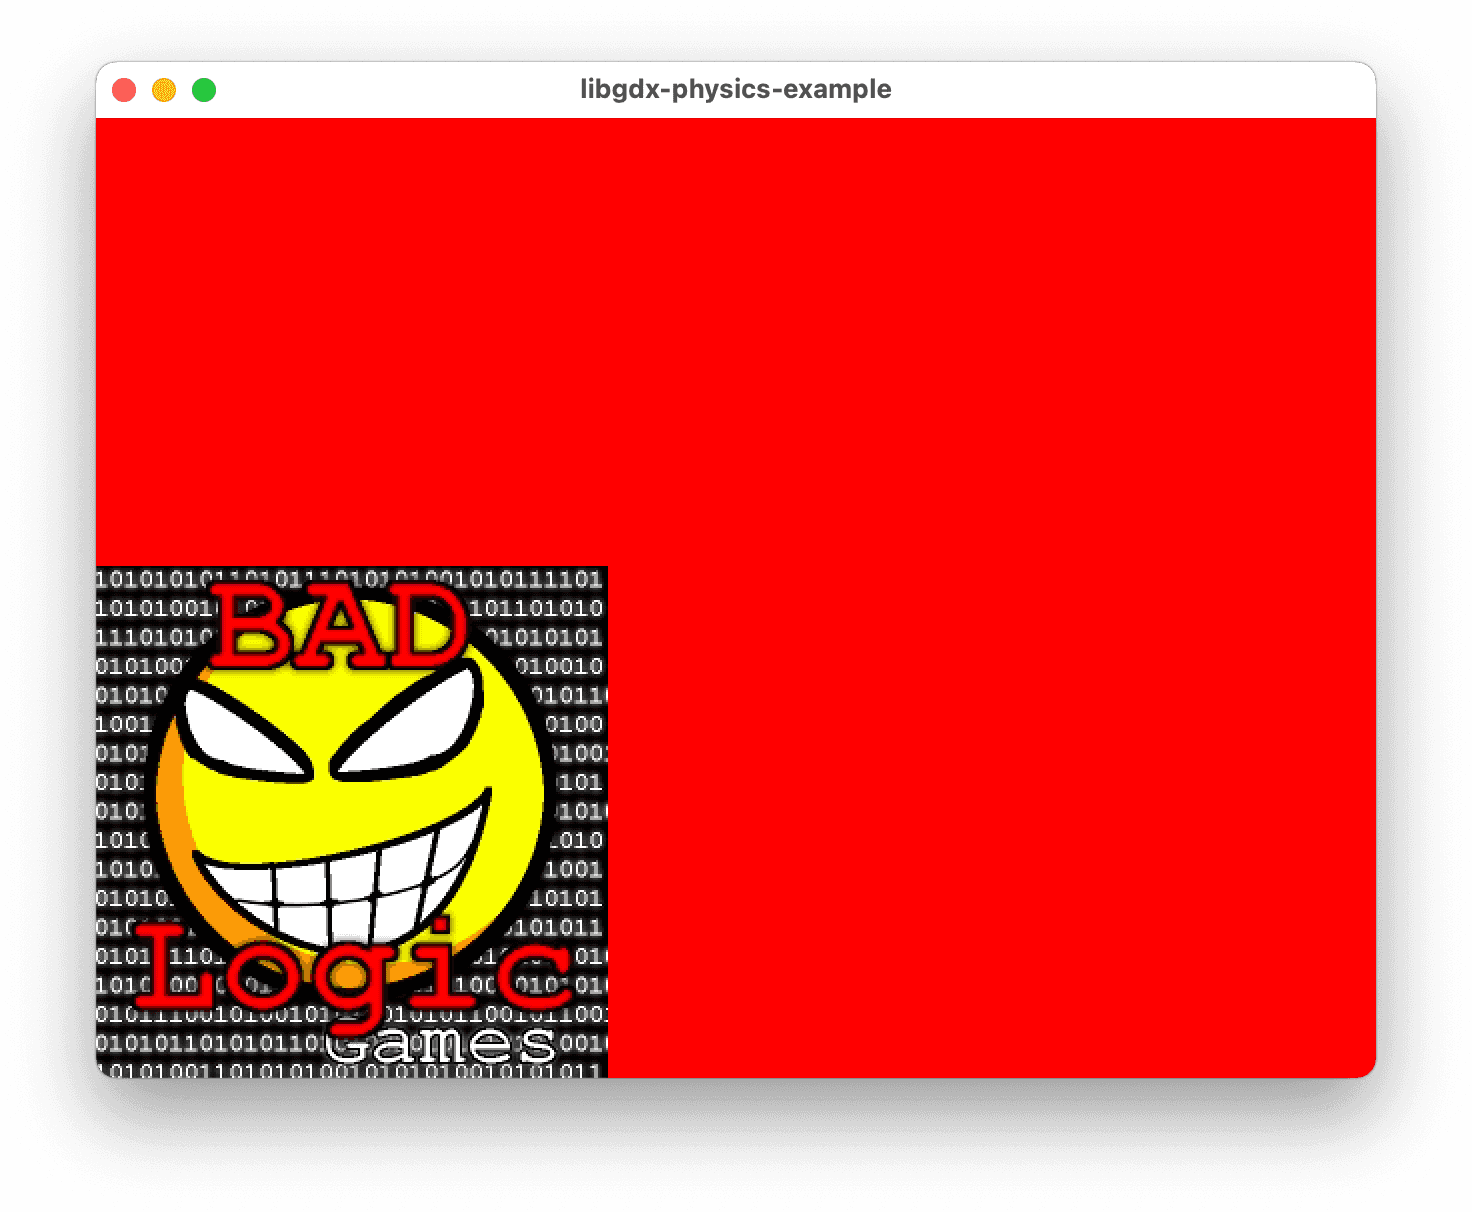
After the project builds, you should see this window:
Some notes on LibGDX
There are three modules in the application:
- android
- core
- desktop
The android and desktop modules contain code to launch the application on those two platforms. If you checked the ios or html options in the LibGDX set up app, then you will have a module for each of those as well.
All the code we'll be writing is going into the core module. The assets for our project, such as images, sprite sheets, and the PhysicsEditor XML data, will be placed under assets.
If you open up the PhysicsExample class found in the core module, it should look
something like this:
package com.codeandweb.tutorials;

import com.badlogic.gdx.ApplicationAdapter;
import com.badlogic.gdx.graphics.Texture;
import com.badlogic.gdx.graphics.g2d.SpriteBatch;
import com.badlogic.gdx.utils.ScreenUtils;

public class PhysicsExample extends ApplicationAdapter {
    SpriteBatch batch;
    Texture img;

    @Override
    public void create () {
        batch = new SpriteBatch();
        img = new Texture("badlogic.jpg");
    }

    @Override
    public void render () {
        ScreenUtils.clear(1, 0, 0, 1);
        batch.begin();
        batch.draw(img, 0, 0);
        batch.end();
    }

    @Override
    public void dispose () {
        batch.dispose();
        img.dispose();
    }
}
This is the sample code provided by LibGDX. It provides a SpriteBatch, which
is used to draw sprites, and a sample texture that it draws on the screen.
One thing that's very important to realize when working with LibGDX, is that
you cannot instantiate most LibGDX classes outside the create() method.
As a Java programmer, you might instinctively want to do something like this:
// BAD EXAMPLE
final SpriteBatch batch = new SpriteBatch();
final Texture img = new Texture("badlogic.jpg");
Go ahead and try that now to see what happens. You should get an UnsatisfiedLinkError. This is because LibGDX uses a native library, which needs to be loaded into memory before we can start working with it. So the only safe place we have to instantiate LibGDX objects is in the create method.
LibGDX has its own way of cleaning up
after itself. This is because when writing a game in Java, keeping tabs on when
the garbage collector runs is very important. Letting the garbage collector
decide when to clean things up in a game is a bad idea. It could cause lag and
memory leaks that could severely impact the performance of your game.
That's why it's recommended to implement a dispose method which releases the memory,
as you can see in the code above.
You can read more about how that works on the LibGDX wiki in their article on memory management
Adding our game's assets
We are going to be using TexturePacker for managing our games assets. This is a professional sprite sheet packer and image optimization tool. Go ahead and download a copy of that now if you don't already have one.
Outside of Android Studio, in your operating system's native file manager, create a directory in the root folder of your project named raw-assets. It's a good idea to keep your unmodified assets separate like this. It makes it a lot easier to update our sprites down the road if we have the raw assets that they were created from, rather than having to edit a sprite sheet directly.
Now download raw-assets.zip and extract it into that folder. It has all the raw assets we'll be using in this tutorial.
The first thing we should do with these assets is creating a sprite sheet. We'll be using TexturePacker for this. Open the app now, and drag the raw-assets into the left panel. You should end up with a new sprite sheet that looks like this:
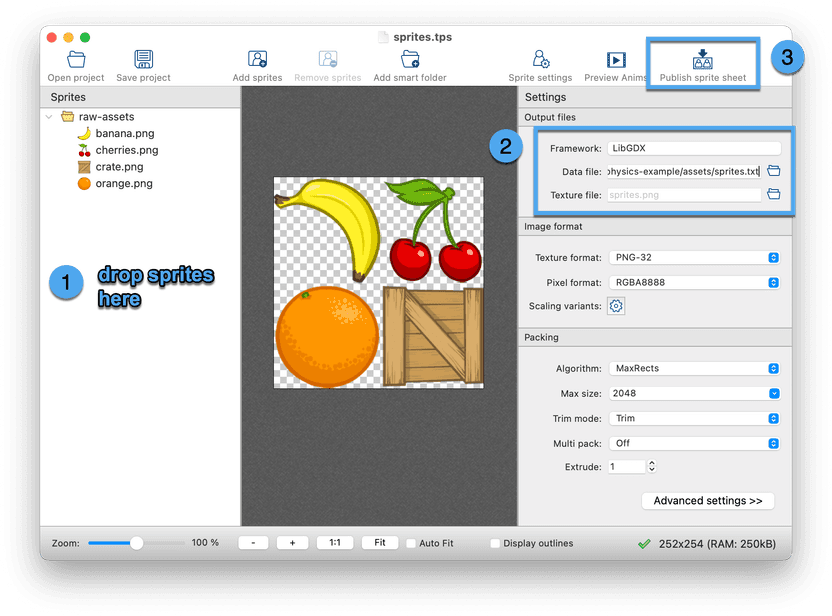
Dragging the folder has the following advantage: Making changes to the sprite folder — by adding, removing or changing images — automatically updates the sprite sheet in TexturePacker.
Save the project as sprites.tps next to the raw-assets folder.
Make sure that LibGDX is selected as Framework, and point the Data file to your project's assets/sprites.txt folder. The Texture file name can be left empty, TexturePacker will save the PNG containing the sprite sheet next to the data file. You can leave everything else at their default settings.
Click the Publish sprite sheet button in TexturePacker's toolbar. After that you can close out of TexturePacker, and go back to Android Studio. If you expand the android module, it should now look like this:
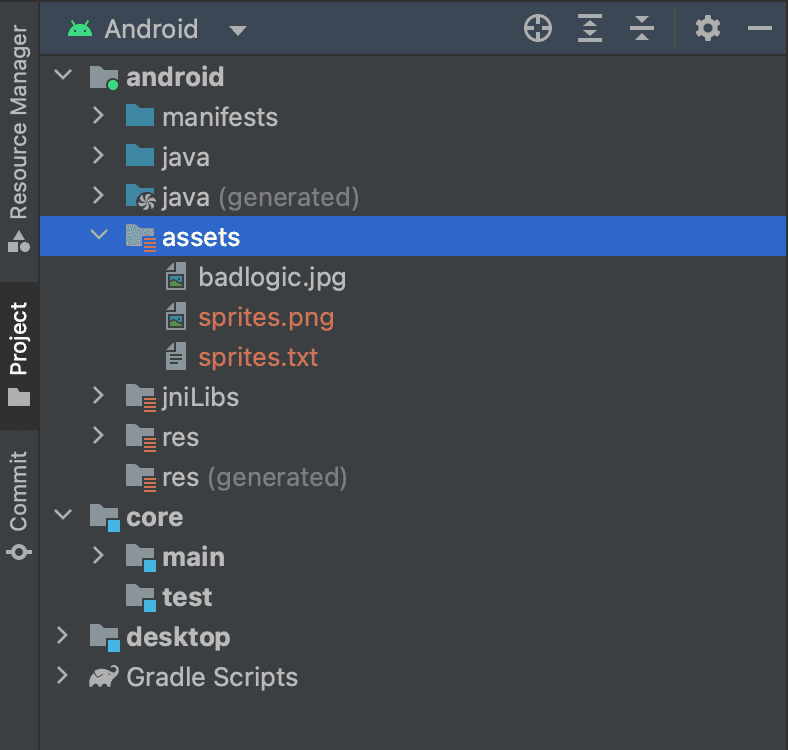
You'll notice that we have two new files. Don't worry about their colors in the above screenshot. The files are red because the project I'm working on is a git repository, and that is just to let me know that I have not yet committed them to git.
Loading sprite sheets in LibGDX
Loading sprite sheets in LibGDX is surprisingly easy. All we have to do is
create a new TextureAtlas instance, and give it the name of our atlas file,
which in this case is sprites.txt. Add this code to our PhysicsExample class:
...
import com.badlogic.gdx.graphics.g2d.TextureAtlas;
...

public class PhysicsExample extends ApplicationAdapter
{
    TextureAtlas textureAtlas;

    @Override
    public void create() {
        textureAtlas = new TextureAtlas("sprites.txt");
    }

    @Override
    public void dispose() {
        textureAtlas.dispose();
    }

    ...
}
I only included the relevant code in this example. I don't want you to delete everything else in the class, just add what you need to and leave the rest alone.
Now to create a sprite, all we have to do is this:
Sprite sprite = textureAtlas.createSprite("banana");Let's go ahead and try that now. Let's remove the sample image and replace it
with one of our sprites. To do that, delete the Texture img; line, and any
reference to the img variable. Then create a new variable for our sprite, and
initialize it in the create method.
...
import com.badlogic.gdx.graphics.g2d.Sprite;
...

public class PhysicsExample extends ApplicationAdapter {
    TextureAtlas textureAtlas;
    Sprite banana;

    @Override
    public void create() {
        textureAtlas = new TextureAtlas("sprites.txt");
        banana = textureAtlas.createSprite("banana");
    }

    @Override
    public void dispose() {
        textureAtlas.dispose();
        // sprites are not disposable objects
    }

    ...
}
Then in our render code, let's draw the sprite to the screen by updating our render method to look like this:
@Override
public void render() {
    ScreenUtils.clear(1, 0, 0, 1);
    batch.begin();
    banana.draw(batch);
    batch.end();
}
Note that drawing sprites is done differently than drawing textures. With a
texture you have to use batch.draw, but with sprites you use sprite.draw,
and give it the batch to draw to. I will go into detail about how this works
later on in the tutorial.
The full code for our PhysicsExample class should now look like this:
package com.codeandweb.tutorials;

import com.badlogic.gdx.ApplicationAdapter;
import com.badlogic.gdx.graphics.g2d.Sprite;
import com.badlogic.gdx.graphics.g2d.SpriteBatch;
import com.badlogic.gdx.graphics.g2d.TextureAtlas;
import com.badlogic.gdx.utils.ScreenUtils;

public class PhysicsExample extends ApplicationAdapter {
    TextureAtlas textureAtlas;
    Sprite banana;
    SpriteBatch batch;

    @Override
    public void create () {
        textureAtlas = new TextureAtlas("sprites.txt");
        banana = textureAtlas.createSprite("banana");
        batch = new SpriteBatch();
    }

    @Override
    public void render () {
        ScreenUtils.clear(1, 0, 0, 1);
        batch.begin();
        banana.draw(batch);
        batch.end();
    }

    @Override
    public void dispose () {
        textureAtlas.dispose();
        batch.dispose();
    }
}
And if we run the application, we'll get a window that looks like this:
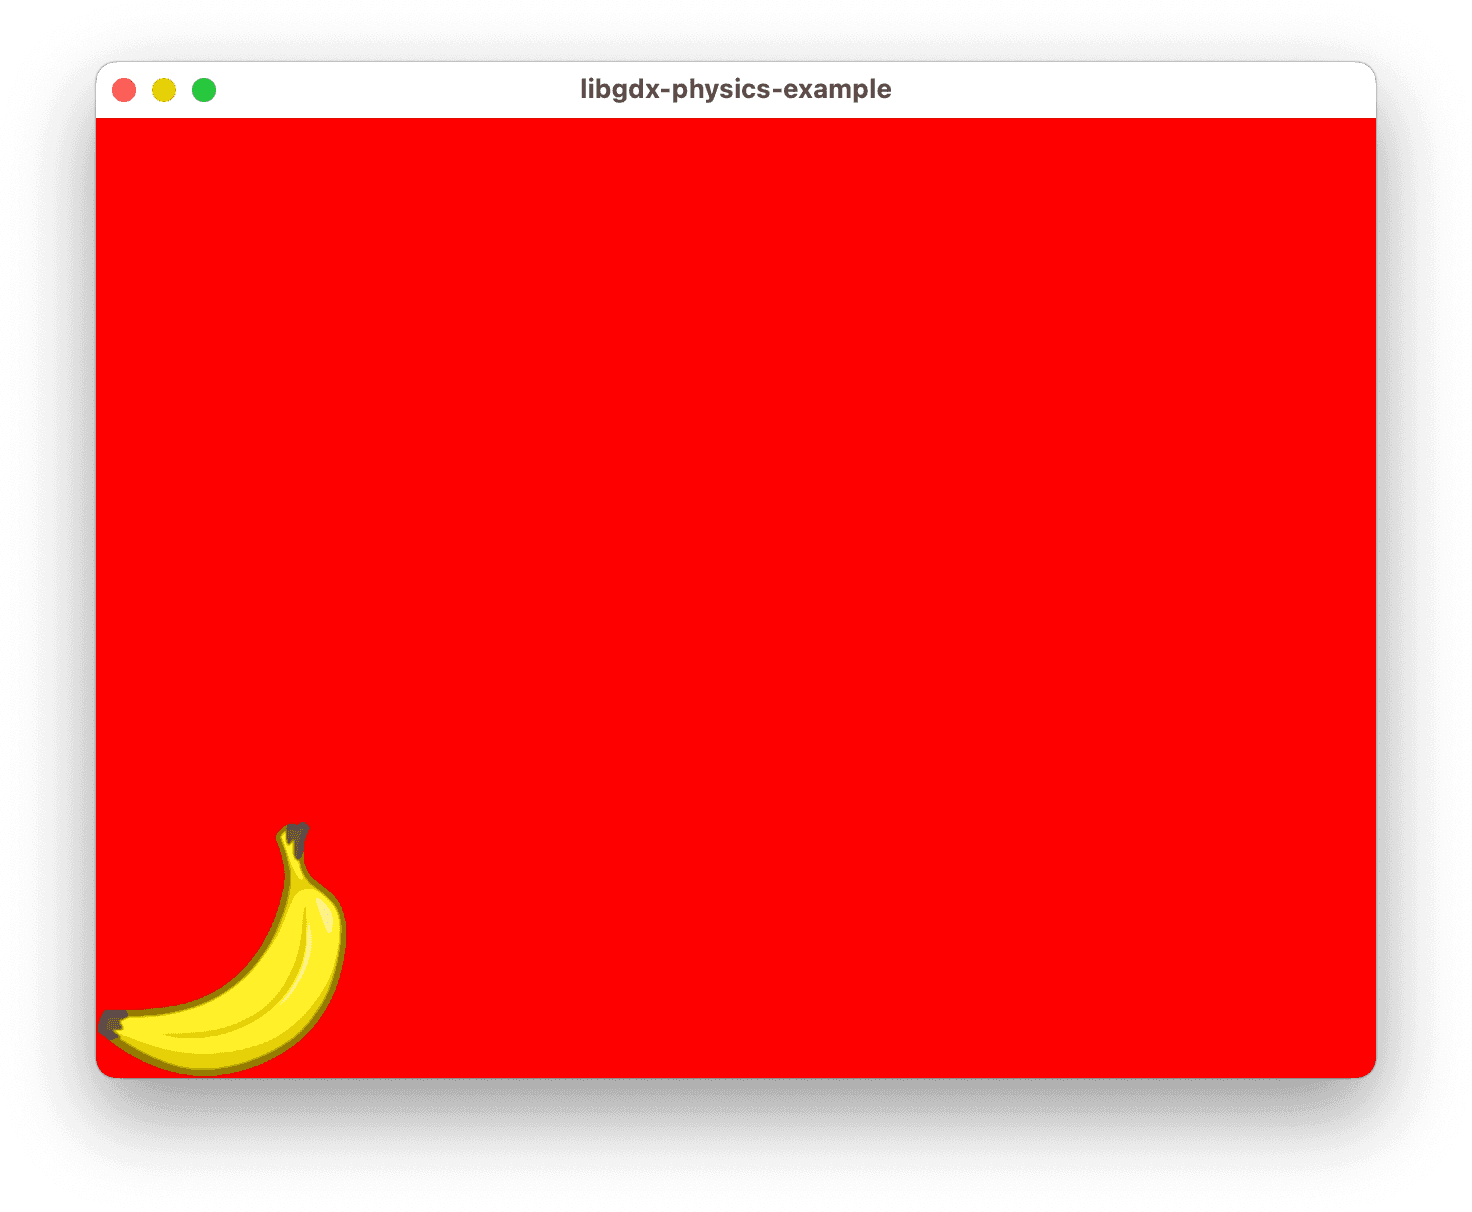
The red is a little hard on the eyes, though. Let's change that to a nice sky blue color. To do that, let's change the first line in our render function to look like this:
ScreenUtils.clear(0.57f, 0.77f, 0.85f, 1);Note that the RGB values are from 0 to 1, and not the traditional 0 to 255. This
is because we're making a direct call to the OpenGL function glClearColor. You
can read more about how that function works in the official OpenGL SDK
documentation.
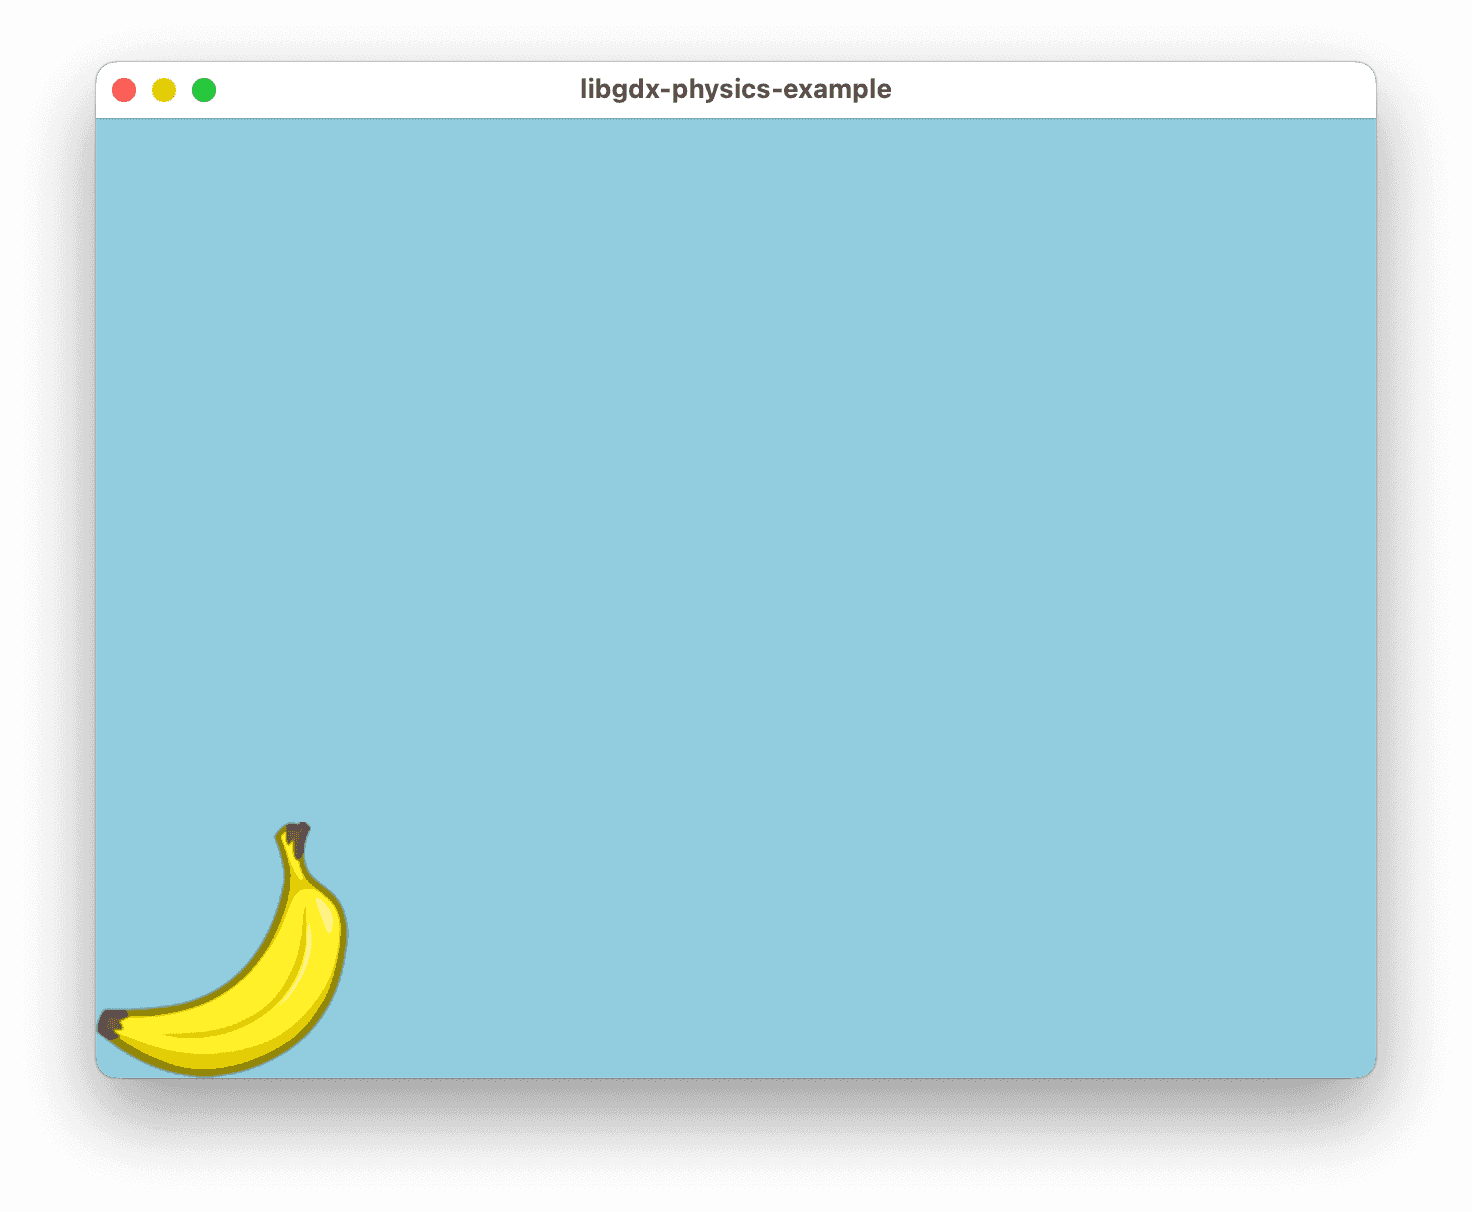
Now if we run our application, it should look like this:
Scaling our game
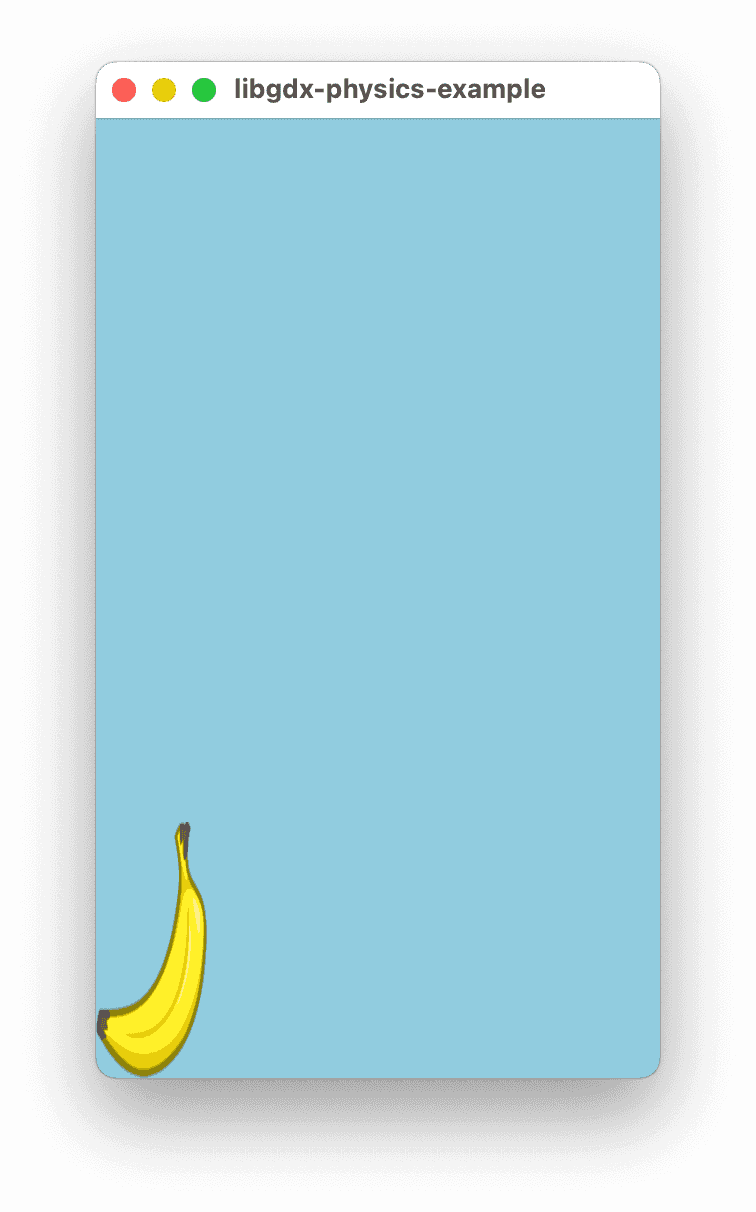
If you run the game again, and resize the window, you will notice that our sprite does not exactly scale well. Instead, it just shrinks or grows in the direction we resize the window, like this:
To get things to scale properly, we will be using a Viewport. If you read up on viewports on the wiki, you'll notice there are several variations. We will be using an ExtendViewport for our game.
We'll also need to include an OrthographicCamera, which is required for attaching a 2D environment to a viewport.
Here's the code for that:
import com.badlogic.gdx.graphics.OrthographicCamera;
import com.badlogic.gdx.utils.viewport.ExtendViewport;

...

public class PhysicsExample extends ApplicationAdapter {
    OrthographicCamera camera;
    ExtendViewport viewport;

    @Override
    public void create() {
        camera = new OrthographicCamera();
        viewport = new ExtendViewport(800, 600, camera);
        ...
    }

    @Override
    public void dispose() {
        // neither the camera or the viewport are disposable objects
        ...
    }
}
The sizes, 800, 600, are the resolution at which our sprites are scaled to
100%. If the window gets bigger than that, the sprites will grow, if it gets
smaller, the sprites will shrink, both while maintaining their original aspect
ratios.
But we still haven't told the sprite batch to use our camera, or the viewport when the screen is resized. Here's how to do that:
@Override
public void resize(int width, int height) {
    viewport.update(width, height, true);

    batch.setProjectionMatrix(camera.combined);
}
Now if we run our game and resize the window, the banana will properly scale to fit our viewport:
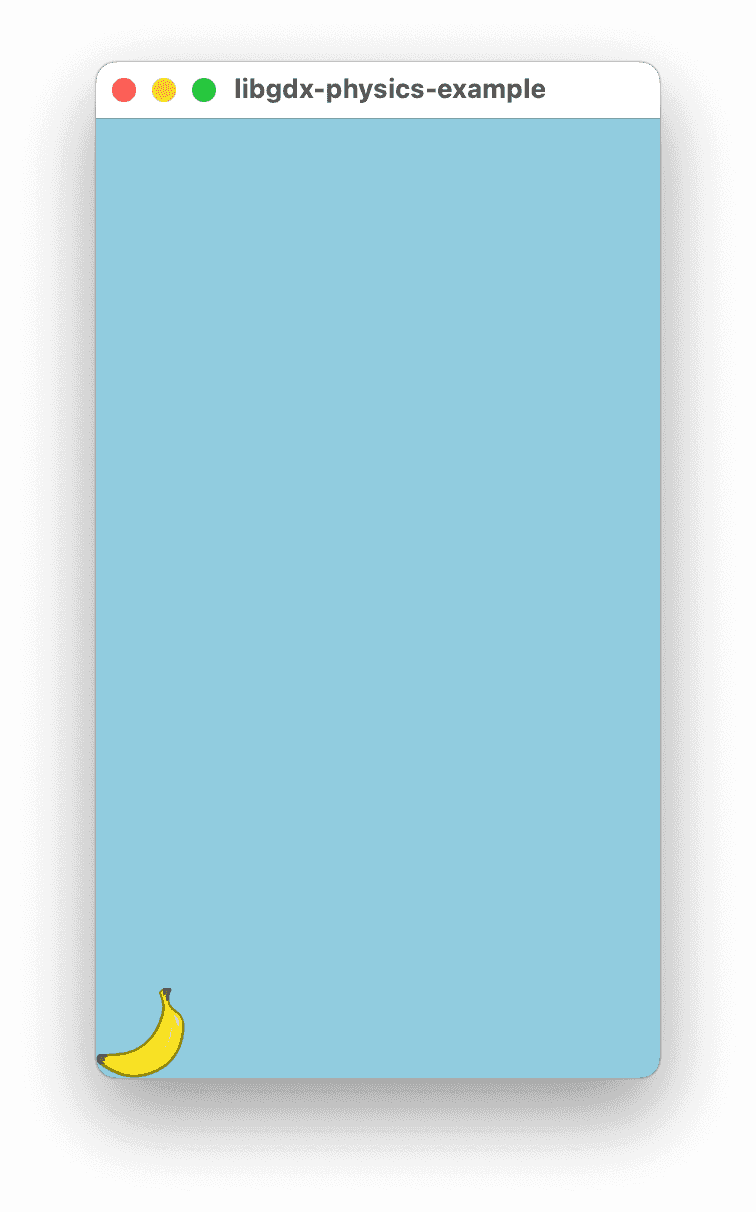
Note that we are updating the batch's projection matrix every time the screen is resized. This is what actually makes the scaling possible. We will need to update its projection matrix any time we make a change to the camera. If we were to change its position, for example.
We're also telling the viewport to center the camera every time the screen is
resized. That's what the true parameter in viewport.update is for. If you
are writing something like a platform game, you more than likely will want to
update the camera's position manually based on where the player is in the game
world. In that case we'd want to move the call to batch.setProjectionMatrix
out of the resize method and into something more appropriate.
Drawing multiple sprites
You may think that to draw more than one sprite we'd need to create two Sprite
instances. However, once you draw a sprite to the screen, you can reuse the same
instance to draw it again. Let's update our render code to look like this:
@Override
public void render() {
    ScreenUtils.clear(0.57f, 0.77f, 0.85f, 1);

    batch.begin();

    banana.setPosition(0, 0);
    banana.draw(batch);

    banana.setPosition(100, 100);
    banana.draw(batch);

    batch.end();
}
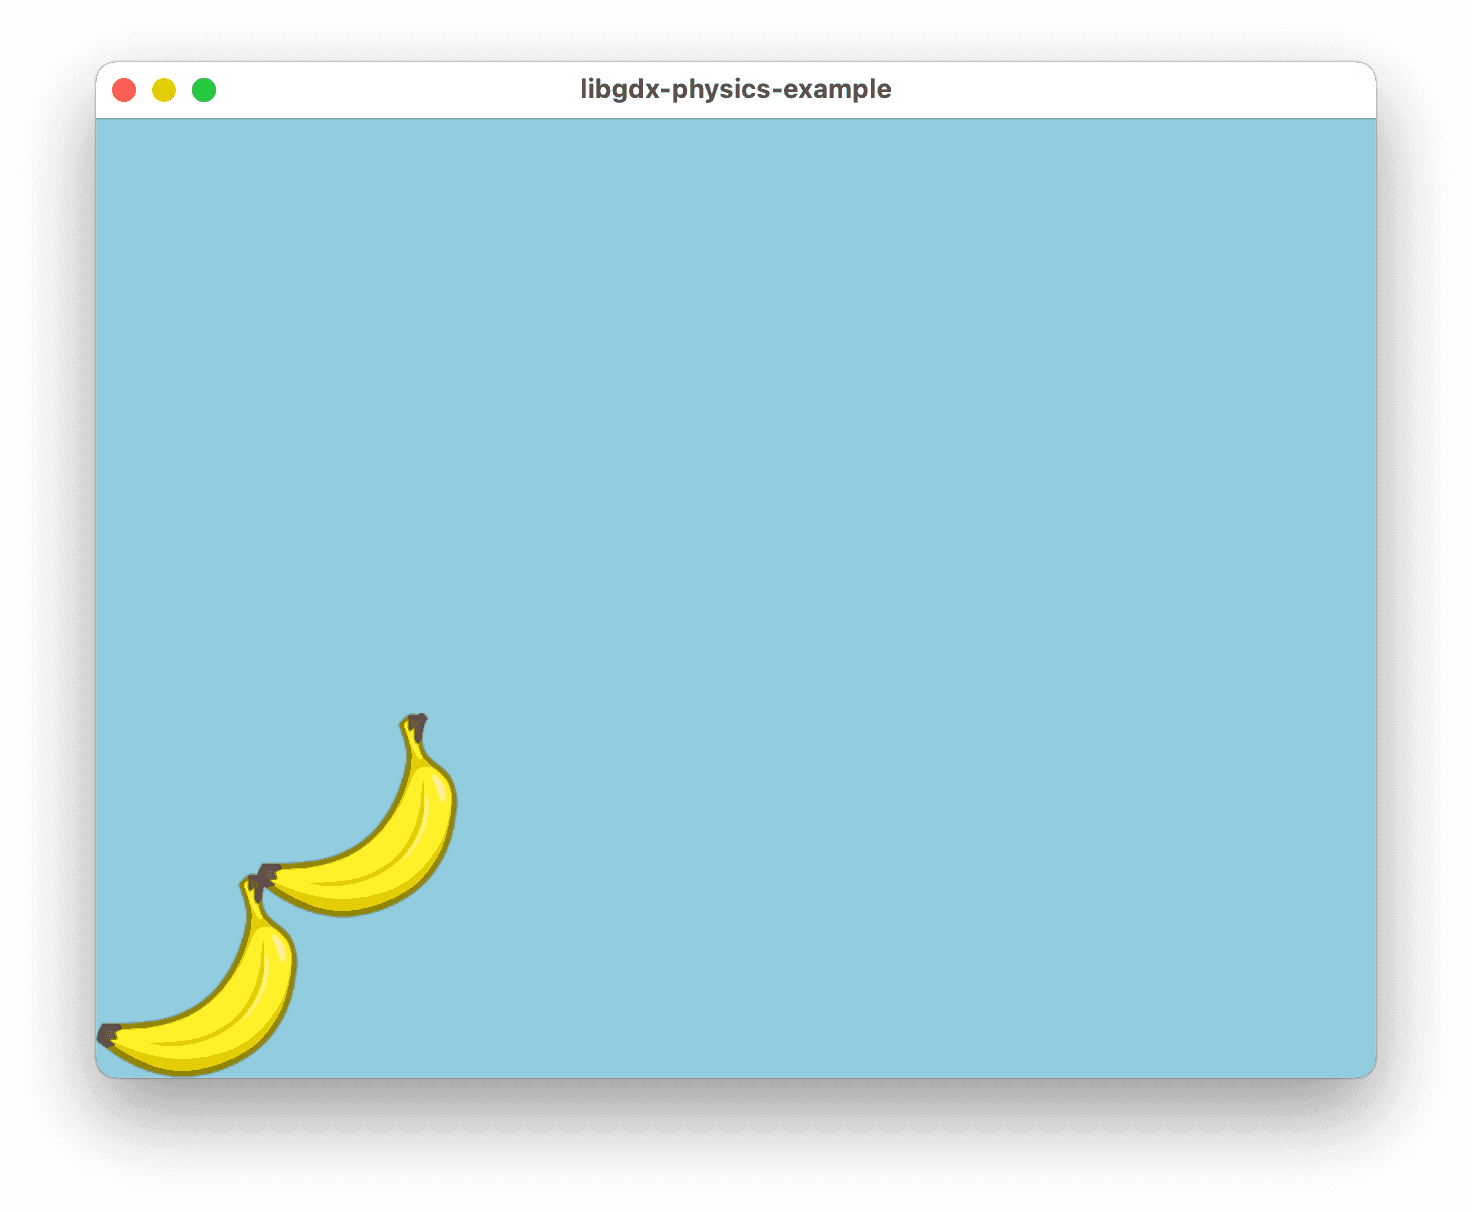
Now when you run the game you should see two bananas on the screen, like this:
With this knowledge, let's create a helper method to make drawing sprites a little easier:
private void drawSprite(String name, float x, float y) {
    Sprite sprite = textureAtlas.createSprite(name);

    sprite.setPosition(x, y);

    sprite.draw(batch);
}
Now we can simplify our render code a little. Let's go ahead and draw two different sprites while we're at it:
@Override
public void render() {
    ScreenUtils.clear(0.57f, 0.77f, 0.85f, 1);

    batch.begin();

    drawSprite("banana", 0, 0);
    drawSprite("cherries", 100, 100);

    batch.end();
}
Before we continue, let's take a closer look at the drawSprite helper method I
just wrote. Do you notice anything about it that might impact the performance of
our game? I do. Each time we call it, we're creating a new Sprite instance,
which will very quickly start consuming a lot of memory. Let's fix that by
caching the sprites using a HashMap.
Start by creating a HashMap that we can store our sprites inside. Since
this is not a LibGDX object, we can go ahead and make this a final variable, and
initialize it outside our create method:
import java.util.HashMap;
...

public class PhysicsExample extends ApplicationAdapter {
    final HashMap<String, Sprite> sprites = new HashMap<String, Sprite>();
    ...
}
Here's a method we can use to add our sprites from the TextureAtlas to our HashMap.
We'll want to call this in our create method, and clear the HashMap
in the dispose method.
import com.badlogic.gdx.graphics.g2d.TextureAtlas.AtlasRegion;
import com.badlogic.gdx.utils.Array;
...

public class PhysicsExample extends ApplicationAdapter {

    ...

    public void create() {
       ...
       loadSprites();
    }

    private void loadSprites() {
        Array<AtlasRegion> regions = textureAtlas.getRegions();

        for (AtlasRegion region : regions) {
            Sprite sprite = textureAtlas.createSprite(region.name);

            sprites.put(region.name, sprite);
        }
    }
}
Now we can update our drawSprite method to expect a sprite as first parameter.
This sprite the caller can fetch from the HashMap:
private void drawSprite(Sprite sprite, float x, float y) {
    sprite.setPosition(x, y);
    sprite.draw(batch);
}
So instead of creating a new sprite every time the method is called, it gets an instance that already exists in our HashMap. Here's what our class looks like now:
package com.codeandweb.tutorials;

import com.badlogic.gdx.ApplicationAdapter;
import com.badlogic.gdx.graphics.OrthographicCamera;
import com.badlogic.gdx.graphics.g2d.Sprite;
import com.badlogic.gdx.graphics.g2d.SpriteBatch;
import com.badlogic.gdx.graphics.g2d.TextureAtlas;
import com.badlogic.gdx.graphics.g2d.TextureAtlas.AtlasRegion;
import com.badlogic.gdx.utils.Array;
import com.badlogic.gdx.utils.ScreenUtils;
import com.badlogic.gdx.utils.viewport.ExtendViewport;
import java.util.HashMap;

public class PhysicsExample extends ApplicationAdapter {
    OrthographicCamera camera;
    ExtendViewport viewport;
    TextureAtlas textureAtlas;
    final HashMap<String, Sprite> sprites = new HashMap<String, Sprite>();
    SpriteBatch batch;

    @Override
    public void create () {
        camera = new OrthographicCamera();
        viewport = new ExtendViewport(800, 600, camera);
        textureAtlas = new TextureAtlas("sprites.txt");
        batch = new SpriteBatch();
        loadSprites();
    }

    private void loadSprites() {
        Array<AtlasRegion> regions = textureAtlas.getRegions();
        for (AtlasRegion region : regions) {
            Sprite sprite = textureAtlas.createSprite(region.name);
            sprites.put(region.name, sprite);
        }
    }

    @Override
    public void resize(int width, int height) {
        viewport.update(width, height, true);
        batch.setProjectionMatrix(camera.combined);
    }

    @Override
    public void render () {
        ScreenUtils.clear(0.57f, 0.77f, 0.85f, 1);
        batch.begin();

        drawSprite(sprites.get("banana"), 0, 0);
        drawSprite(sprites.get("cherries"), 100, 100);

        batch.end();
    }

    private void drawSprite(Sprite sprite, float x, float y) {
        sprite.setPosition(x, y);
        sprite.draw(batch);
    }

    @Override
    public void dispose () {
        sprites.clear();
        batch.dispose();
        textureAtlas.dispose();
    }
}
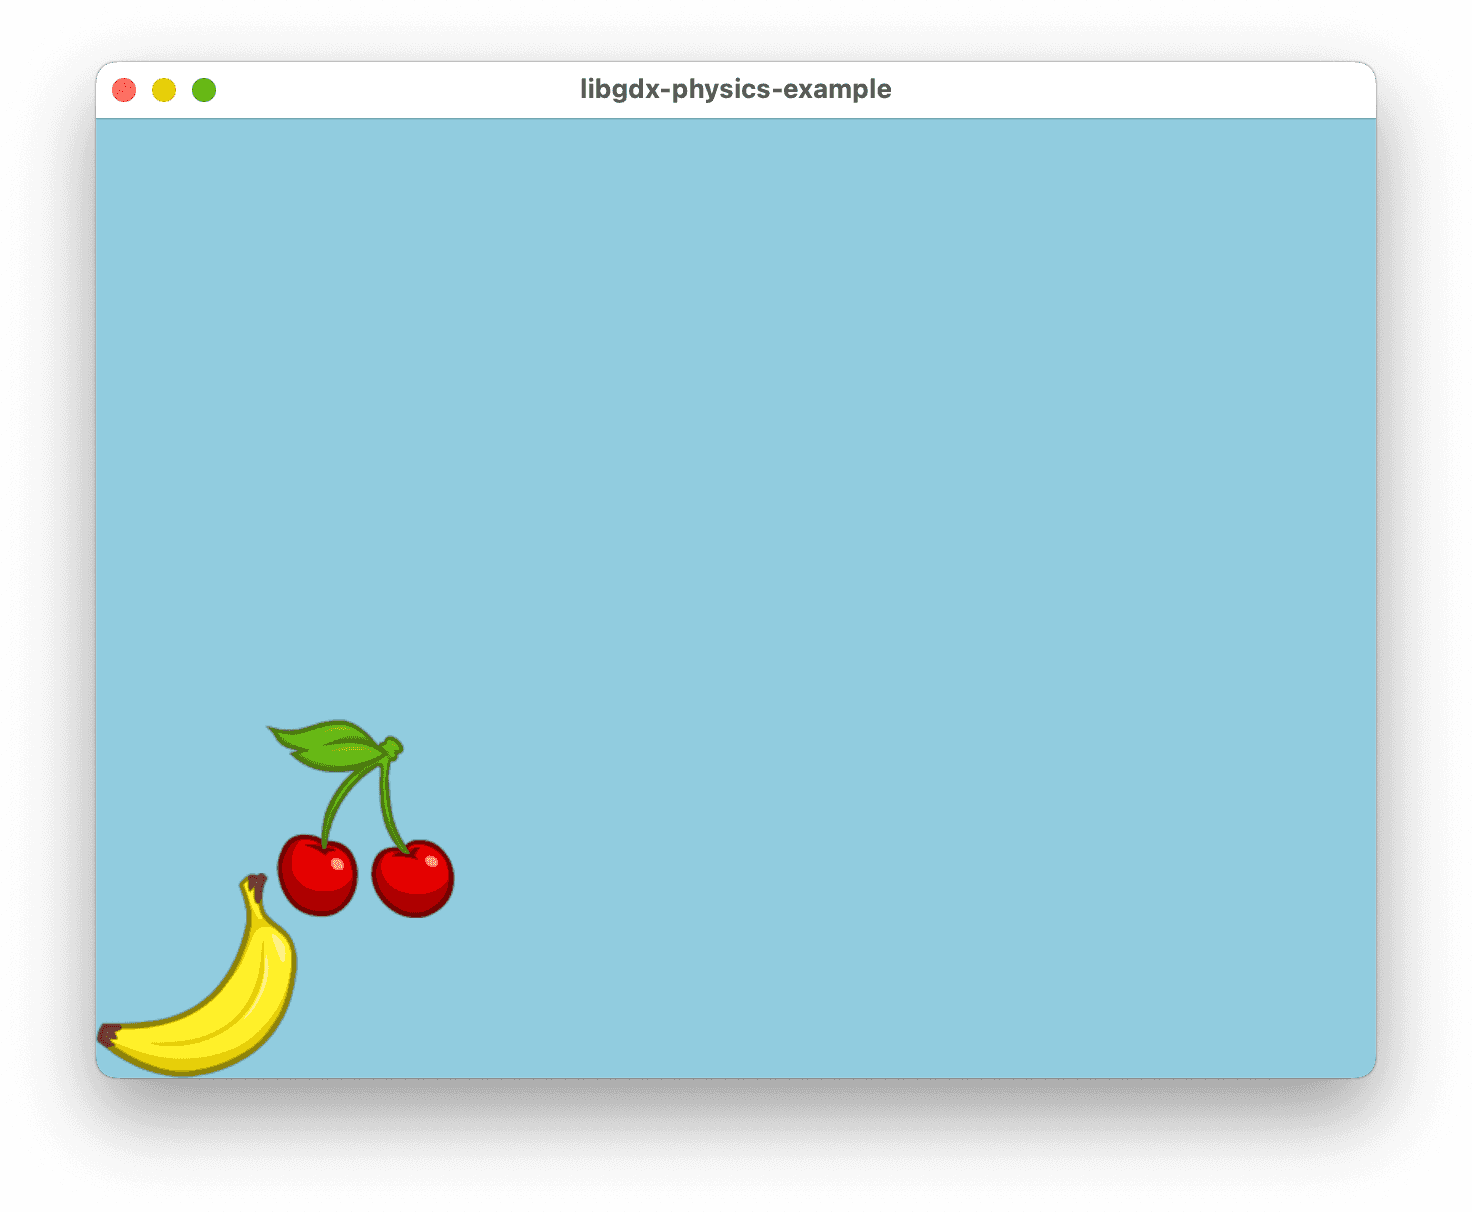
And when we run that, we get this as a result:
Adding Box2D physics
Now that we can draw our sprites to screen, let's do something a little more useful with them. Let's get some actual physics working in our game.
To start, we need to initialize Box2D. This call should only be made once at the top of our create method:
import com.badlogic.gdx.physics.box2d.Box2D;
...
@Override
public void create() {
    Box2D.init();
    ...
}
Now we need to create a world object:
import com.badlogic.gdx.math.Vector2;
import com.badlogic.gdx.physics.box2d.World;
...

World world;

@Override
public void create() {
    ...
    Box2D.init();
    world = new World(new Vector2(0, -10), true);
}

@Override
public void dispose() {
    world.dispose();
}
The new Vector2(0, -10) is the direction that gravity pulls in our world. In
this case, it doesn't have any effect on the X axis, and pulls on the Y axis
with a force of -10.
You may have already noticed when we draw our sprites to the screen that 0,0 is the bottom-left corner of the screen. This means that -10 will pull our physics objects down toward the bottom of the screen, and of course positive 10 would move them upward, which is not what we want.
Next we need to step our physics simulation. I could write a full article on stepping a Box2D world, but for now I'm just going to give you the code to add to the game to make that happen:
import com.badlogic.gdx.Gdx;

static final float STEP_TIME = 1f / 60f;
static final int VELOCITY_ITERATIONS = 6;
static final int POSITION_ITERATIONS = 2;

float accumulator = 0;

private void stepWorld() {
    float delta = Gdx.graphics.getDeltaTime();
    accumulator += Math.min(delta, 0.25f);

    if (accumulator >= STEP_TIME) {
        accumulator -= STEP_TIME;
        world.step(STEP_TIME, VELOCITY_ITERATIONS, POSITION_ITERATIONS);
    }
}

@Override
public void render() {
    stepWorld();
    ...
}
You can read more on how stepping the simulation works on the LibGDX wiki in this article.
Creating the physics objects
To add objects to our world, we need to provide them with what are known as bodies in Box2D terms. Each body has one or more fixtures, which are just basic shapes, like polygons or circles. The fixtures are what the physics objects works with, and are what actually collide with one another. The bodies are pretty much just bags of fixtures, although they do provide a little more information, e.g. whether they can move.
We're going to be using an application called PhysicsEditor to create polygons and shapes for our sprites, and then we'll be loading those in using the PhysicsShapeCache class provided by the gdx-pe-loader dependency we installed when we set up our LibGDX application.
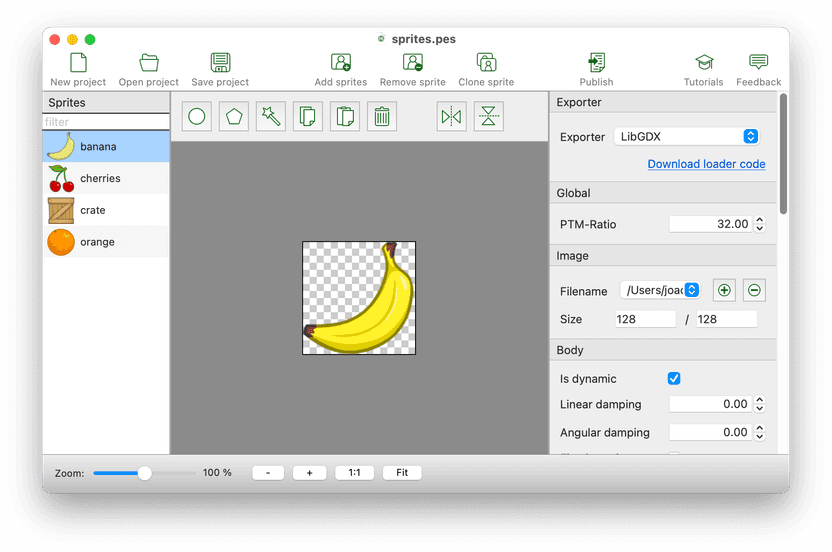
To get started, download and launch PhysicsEditor now. Once you have that open,
click the Add sprites button in the toolbar, or drag and drop the sprites from
our project's raw-assets folder into the sprites section of the window. This
is what PhysicsEditor will look like after you do that:
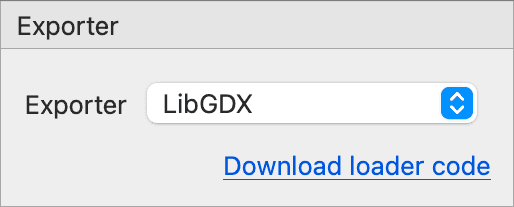
Then select the "LibGDX" option as your exporter:
Save the .pes file into the project's folder. Name it sprites.pes to continue with the same naming convention that we've been using so far. Then click the Publish button and save it into assets/physics.xml under the project's root path.
Now we can load the physics.xml file we just created in our application by adding this code:
import com.codeandweb.physicseditor.PhysicsShapeCache;
...

PhysicsShapeCache physicsBodies;

@Override
public void create() {
    physicsBodies = new PhysicsShapeCache("physics.xml");
}
Of course, we still need to actually draw our collision polygons in PhysicsEditor, or we don't exactly have anything to load. Let's start with the banana.
Back in PhysicsEditor, select the banana sprite, and click on the wand tool. You can find that in the toolbar just above the image of the banana. It looks like this:

After clicking on that icon, this window will open:
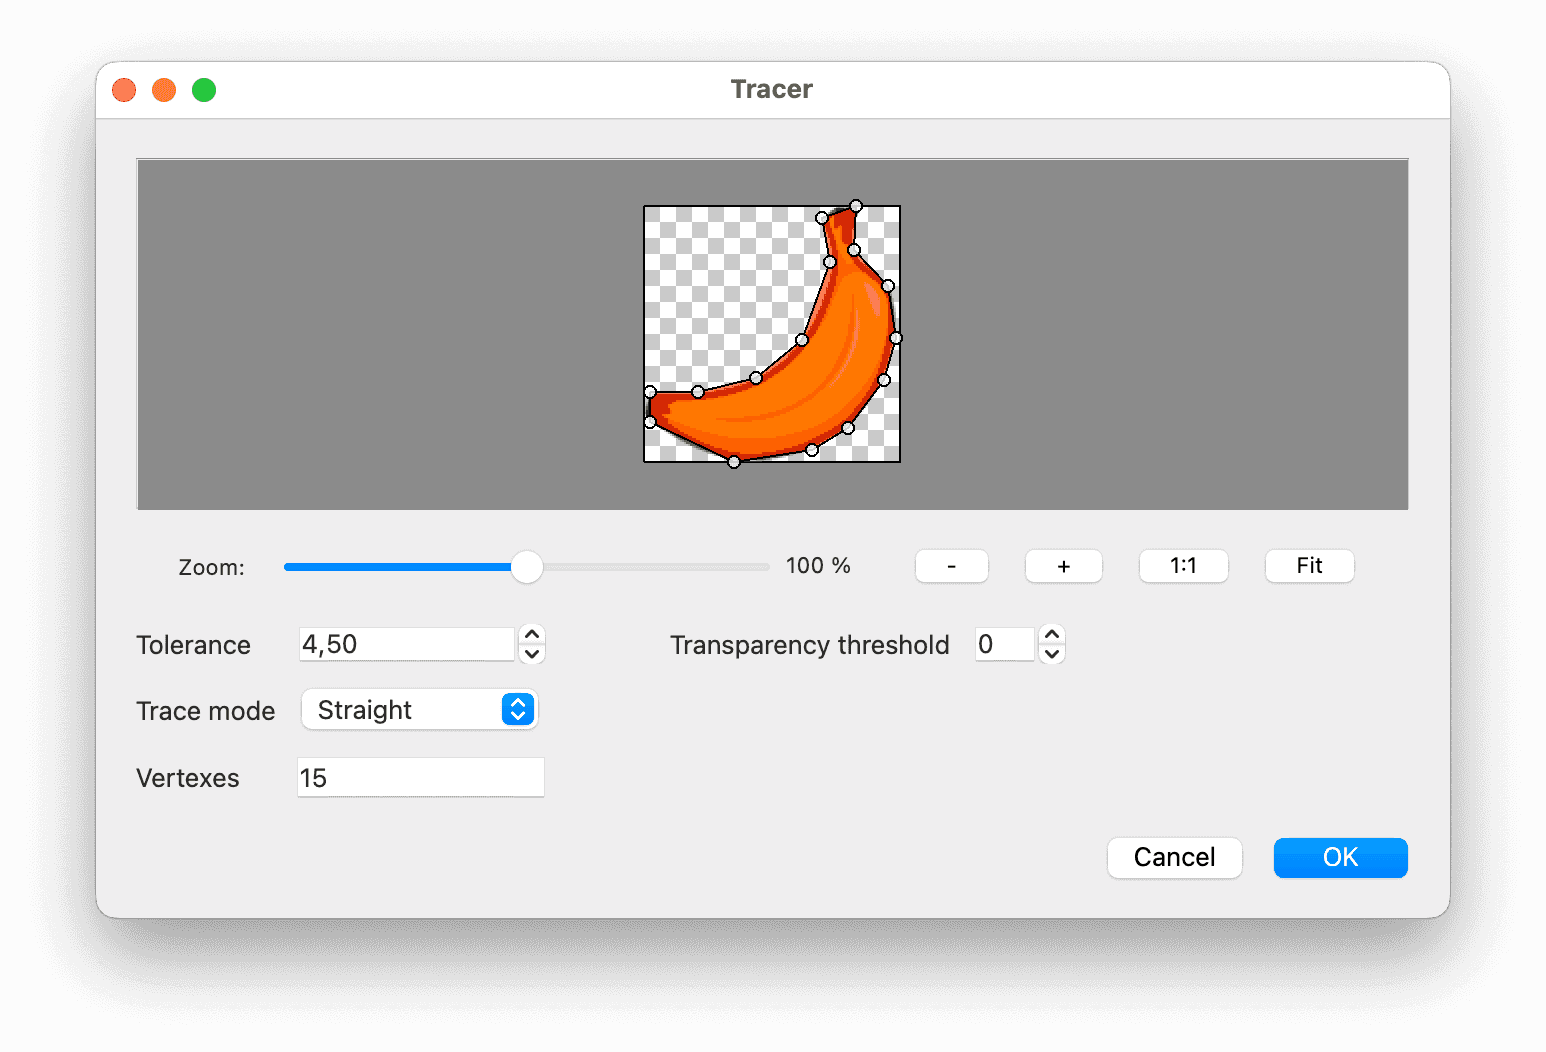
This tool detects the edges of the sprite and creates a polygon for it. You can play around with the settings to see the effects it has on the collision polygon.
Click the OK button. The polygon will be added to your sprite. You can then adjust its vertices by dragging them. Double-click on a vertex to delete it. Double-click outside the shape to add a vertex to the closest edge.
Use the zoom widget at the bottom of the main window to zoom in, so you could more clearly see the images you are working with.
For circular sprite parts like the orange or the cherries I opted to use circles instead polygons. The reason I did this is because of how much faster detecting collisions between circles is than between polygons.
All you have to do to detect collision between two circles is measure the distance between them, and check if it is less than the sum of their radii. You can see the difference in these two functions:
It is obvious just by comparing the two which one is going to impact the performance of the game more. Clearly the fewer vertices you add to your sprites the better the performance you will have, circles only contain one vertex each. So using circles where possible will theoretically increase the performance of your game.
Rendering Box2D objects.
One of the most frustrating things to work with regarding Box2D is its speed limit. Physics bodies cannot move faster than about 120 units per second - a unit in Box2D is typically referred to as meters. This means that at a screen resolution of 800 pixels wide, it would take approximately 6.7 seconds for an object to move from one side of the screen to the other at full speed.
To overcome this, some people will translate Box2D coordinates to screen coordinates when rendering their world. The PhysicsEditor application is set up to accommodate this by providing a PTM (Pixels To Meters) ratio.
However, instead of doing that, I prefer to scale our screen down to a size that fits within our physics world, which is a lot simpler. In fact all you really have to do is change the size of the viewport, and scaling down the sprites to an appropriate site as they are loaded into the game.
Let's start with the size of the viewport. Instead of initializing it with 800,600,
let's use 50,50:
viewport = new ExtendViewport(50, 50, camera);This does two things for us. One, it gives us a constant size to work with. We now know the exact size of our game world. It's 50 meters wide, by 50 meters tall. Two, it allows our sprites to move very fast. It will now only take 0.42 seconds for a sprite to move the full width of the screen. Much better than the 6.7 seconds we get with a world 800 meters (formerly known as pixels) wide.
If we run our game now, the sprites will be way too big to be drawn on the screen, as seen in the screenshot below.
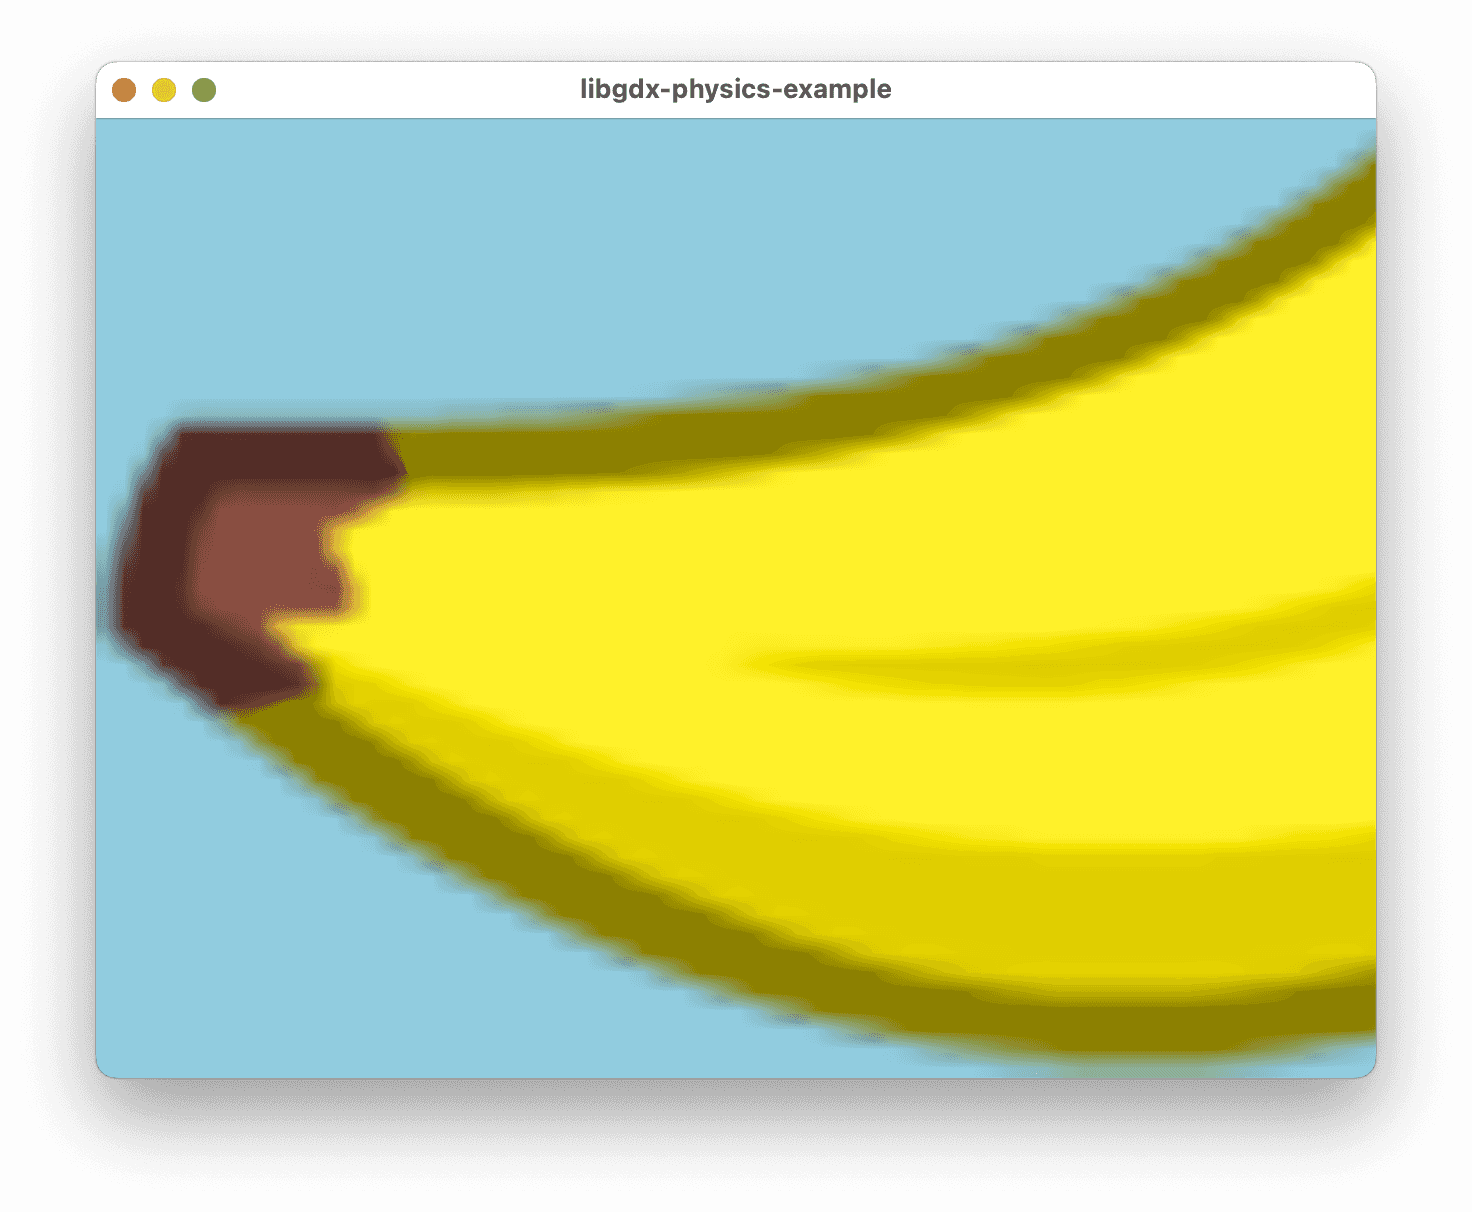
To fix this, we have to scale the image to something more appropriate to our
game world. To do this, I'm going to update the method we used to cache our
sprites in the HashMap:
static final float SCALE = 0.05f;

private void loadSprites() {
    Array<AtlasRegion> regions = textureAtlas.getRegions();

    for (AtlasRegion region : regions) {
        Sprite sprite = textureAtlas.createSprite(region.name);

        float width = sprite.getWidth() * SCALE;
        float height = sprite.getHeight() * SCALE;
        sprite.setSize(width, height);
        sprite.setOrigin(0, 0);

        sprites.put(region.name, sprite);
    }
}
Now if you run the game you'll see this:
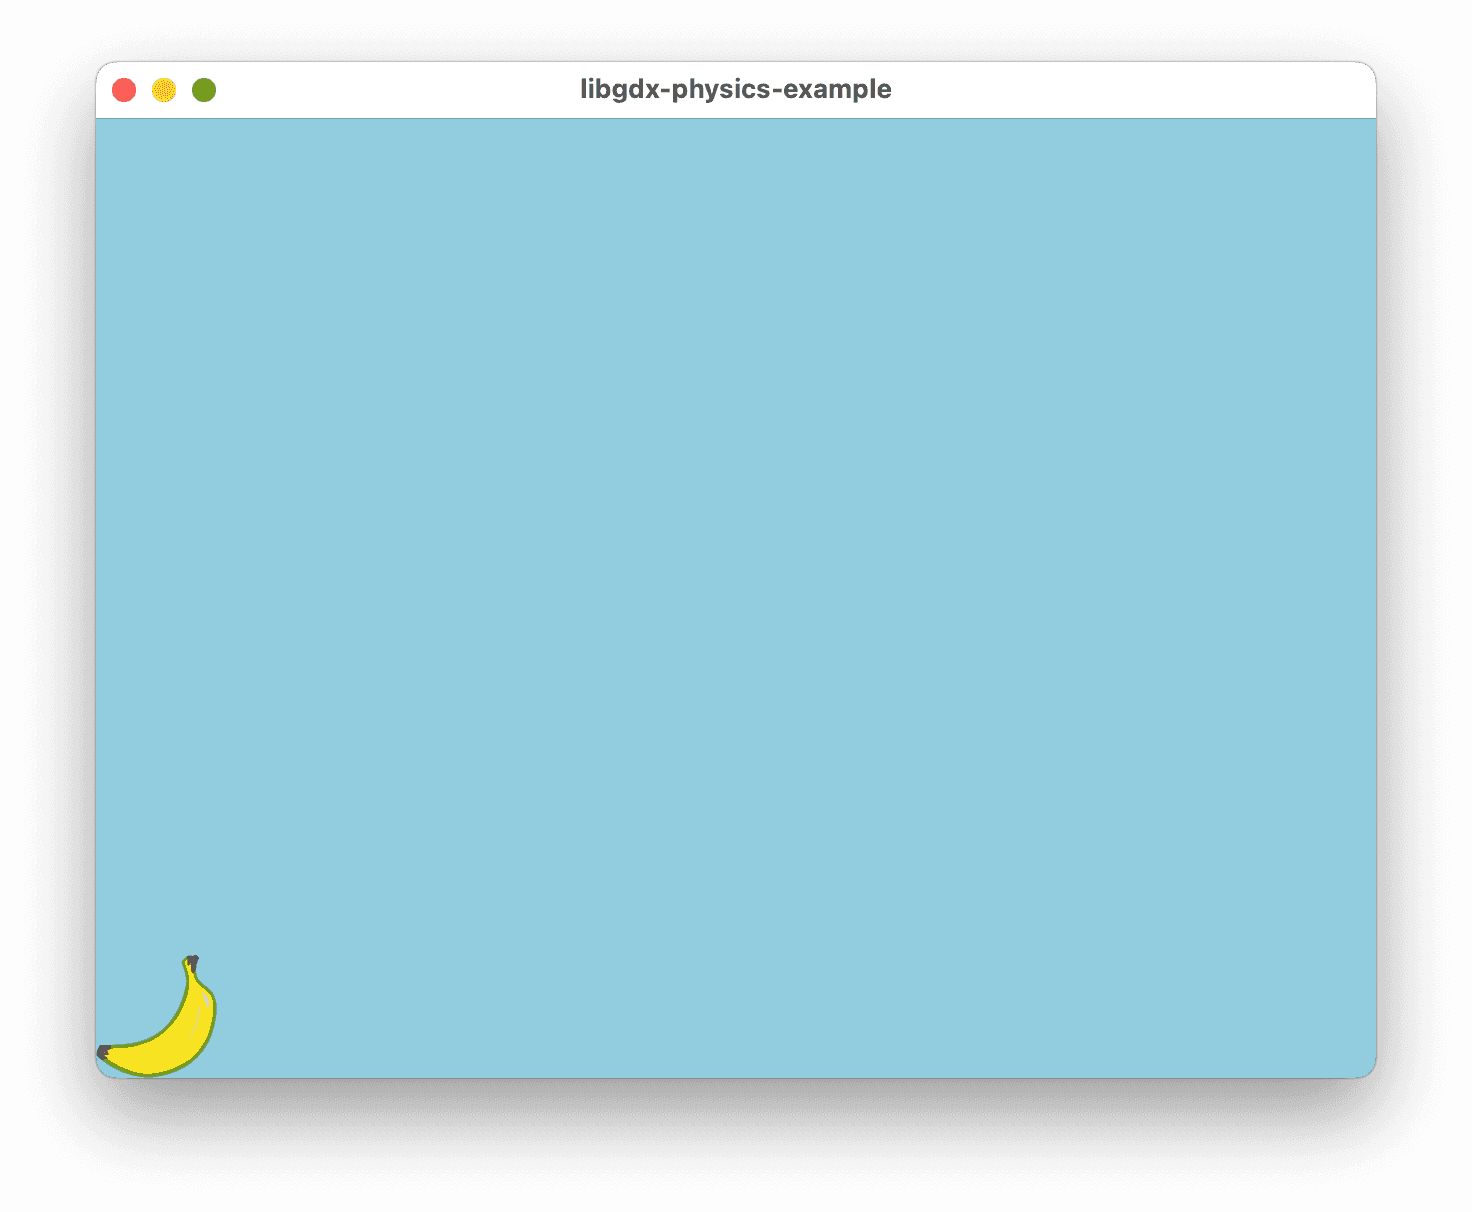
The banana is smaller than it was before, which is good. I would like to be able to draw more sprites on the screen, and 100% scale was just too big. It would take a little math to figure out exactly how much it was scaled in actual pixels, but that's not really important. We're working with meters now, not pixels. That's something you'll have to get used to.
Notice, too, that the cherries are gone. I didn't delete the code that drew the cherries. They're no longer being rendered, because they are at x=100, y=100, and since our game world is only 50x50 meters, they're way off the screen right now. We can bring them back into view easily enough. This will put them at roughly the same coordinates as before:
drawSprite(sprites.get("cherries"), 5, 5);Creating Box2D bodies
It is not the intention of this tutorial to detail exactly how to create a Box2D body. I suggest doing a little research of your own to get familiar with exactly how that works. The LibGDX wiki has an in depth article on that here.
Box2D itself is a C++ library. The implementation that LibGDX provides is a thin Java wrapper around it. Here is a very in depth Box2D guide you might want to bookmark as well. Although it's focused on C++ programmers, it has a lot more detail than what LibGDX provides on their wiki, and it answers a lot of questions I had when I first started using it. It's just a matter of converting the C++ syntax into Java to use it with LibGDX.
That said, let's get started by removing our render code and replacing it with a debug renderer that will draw our collision polygons onto the screen for us:
import com.badlogic.gdx.physics.box2d.Box2DDebugRenderer;
...

Box2DDebugRenderer debugRenderer;

@Override
public void create() {
    ...
    Box2D.init();
    debugRenderer = new Box2DDebugRenderer();
}

@Override
public void render() {
    ...
    debugRenderer.render(world, camera.combined);
}

@Override
public void dispose() {
    ...
    debugRenderer.dispose();
}
Make sure to initialize any Box2D objects after the call to Box2D.init() is
made to make sure the library is properly loaded first. You'll also want to put
your call to debugRenderer.render at the end of the render method so that the
debug shapes will always be rendered on top of everything else. I'll show the
full game code soon.
PhysicsShapeCache makes it really easy to create our physics bodies. Here's an example of how to create the banana:
import com.badlogic.gdx.physics.box2d.Body;
...
public void create() {
...
    Body body = physicsBodies.createBody("banana", world, SCALE, SCALE);
    body.setTransform(10, 10, 0);
}
If you add that code to the create method, you should see the body appear on screen, and slowly fall downward. Because it's drawing only the polygons, it will be very difficult to see, so I changed the background to black for this screenshot, so you can see it clearer:
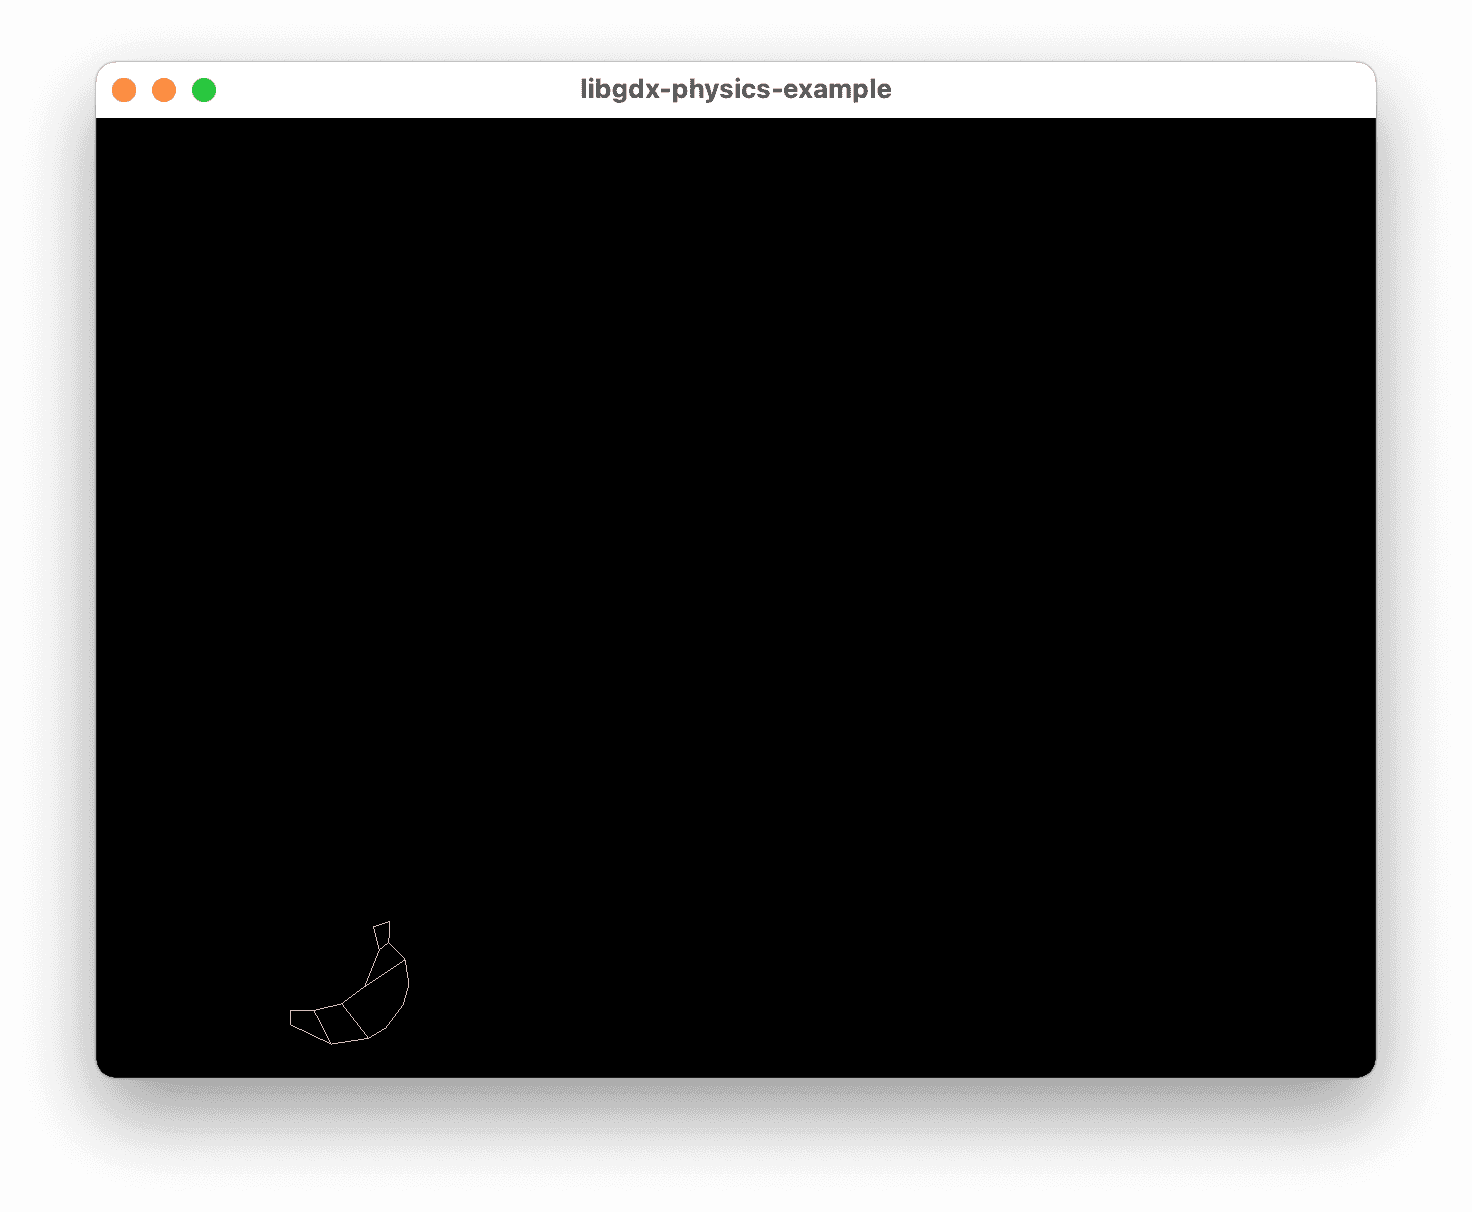
Let's create a helper method to make that process a little easier:
private Body createBody(String name, float x, float y, float rotation) {
    Body body = physicsBodies.createBody(name, world, SCALE, SCALE);
    body.setTransform(x, y, rotation);
    return body;
}
Now we can create bodies for our sprites in one line of code:
banana = createBody("banana", 10, 10, 0);So let's make a banana fall from the top of the screen down to the bottom. Here's the changes I made:
Body banana;
@Override
public void create() {
    ...
    banana = createBody("banana", 10, 50, 0);
}

@Override
public void render() {
    ScreenUtils.clear(0, 0, 0, 1); // setting the screen to black for now
    stepWorld();

    batch.begin();
    Vector2 position = banana.getPosition();
    drawSprite(sprites.get("banana"), position.x, position.y);
    batch.end();

    debugRenderer.render(world, camera.combined);
}
And here's the full code for the class:
package com.codeandweb.tutorials;

import com.badlogic.gdx.ApplicationAdapter;
import com.badlogic.gdx.Gdx;
import com.badlogic.gdx.graphics.OrthographicCamera;
import com.badlogic.gdx.graphics.g2d.Sprite;
import com.badlogic.gdx.graphics.g2d.SpriteBatch;
import com.badlogic.gdx.graphics.g2d.TextureAtlas;
import com.badlogic.gdx.graphics.g2d.TextureAtlas.AtlasRegion;
import com.badlogic.gdx.math.Vector2;
import com.badlogic.gdx.physics.box2d.Body;
import com.badlogic.gdx.physics.box2d.Box2D;
import com.badlogic.gdx.physics.box2d.Box2DDebugRenderer;
import com.badlogic.gdx.physics.box2d.World;
import com.badlogic.gdx.utils.Array;
import com.badlogic.gdx.utils.ScreenUtils;
import com.badlogic.gdx.utils.viewport.ExtendViewport;
import com.codeandweb.physicseditor.PhysicsShapeCache;
import java.util.HashMap;

public class PhysicsExample extends ApplicationAdapter {
    static final float STEP_TIME = 1f / 60f;
    static final int VELOCITY_ITERATIONS = 6;
    static final int POSITION_ITERATIONS = 2;
    static final float SCALE = 0.05f;

    OrthographicCamera camera;
    ExtendViewport viewport;
    TextureAtlas textureAtlas;
    final HashMap<String, Sprite> sprites = new HashMap<String, Sprite>();
    SpriteBatch batch;
    World world;
    Body banana;
    Box2DDebugRenderer debugRenderer;
    PhysicsShapeCache physicsBodies;
    float accumulator = 0;

    @Override
    public void create () {
        camera = new OrthographicCamera();
        viewport = new ExtendViewport(50, 50, camera);
        textureAtlas = new TextureAtlas("sprites.txt");
        batch = new SpriteBatch();
        loadSprites();

        Box2D.init();
        world = new World(new Vector2(0, -10), true);
        physicsBodies = new PhysicsShapeCache("physics.xml");
        debugRenderer = new Box2DDebugRenderer();
        banana = createBody("banana", 10, 50, 0);
    }

    private void loadSprites() {
        Array<AtlasRegion> regions = textureAtlas.getRegions();
        for (AtlasRegion region : regions) {
            Sprite sprite = textureAtlas.createSprite(region.name);

            float width = sprite.getWidth() * SCALE;
            float height = sprite.getHeight() * SCALE;
            sprite.setSize(width, height);
            sprite.setOrigin(0, 0);

            sprites.put(region.name, sprite);
        }
    }

    private Body createBody(String name, float x, float y, float rotation) {
        Body body = physicsBodies.createBody(name, world, SCALE, SCALE);
        body.setTransform(x, y, rotation);
        return body;
    }

    @Override
    public void resize(int width, int height) {
        viewport.update(width, height, true);
        batch.setProjectionMatrix(camera.combined);
    }

    private void drawSprite(Sprite sprite, float x, float y) {
        sprite.setPosition(x, y);
        sprite.draw(batch);
    }

    private void stepWorld() {
        float delta = Gdx.graphics.getDeltaTime();
        accumulator += Math.min(delta, 0.25f);

        if (accumulator >= STEP_TIME) {
            accumulator -= STEP_TIME;
            world.step(STEP_TIME, VELOCITY_ITERATIONS, POSITION_ITERATIONS);
        }
    }

    @Override
    public void render () {
        ScreenUtils.clear(0.57f, 0.77f, 0.85f, 1);
        stepWorld();

        batch.begin();
        Vector2 position = banana.getPosition();
        drawSprite(sprites.get("banana"), position.x, position.y);
        batch.end();

        debugRenderer.render(world, camera.combined);
    }

    @Override
    public void dispose () {
        debugRenderer.dispose();
        world.dispose();
        textureAtlas.dispose();
        batch.dispose();
        sprites.clear();
    }
}
If you run the game now, you'll see a banana fall from the top of the screen to the bottom, with its polygons drawn in wireframe over top of it.
Creating a ground
Right now the banana just falls off the screen and keeps going. Let's give it something to fall onto. For this I'm going to just create a single meter tall rectangle that spans the width of the screen, and place that at 0,0.
import com.badlogic.gdx.physics.box2d.FixtureDef;
import com.badlogic.gdx.physics.box2d.PolygonShape;
...
Body ground;

private void createGround() {
    if (ground != null) world.destroyBody(ground);

    BodyDef bodyDef = new BodyDef();
    bodyDef.type = BodyDef.BodyType.StaticBody;
    FixtureDef fixtureDef = new FixtureDef();
    PolygonShape shape = new PolygonShape();
    shape.setAsBox(camera.viewportWidth, 1);
    fixtureDef.shape = shape;

    ground = world.createBody(bodyDef);
    ground.createFixture(fixtureDef);
    ground.setTransform(0, 0, 0);

    shape.dispose();
}

@Override
public void resize(int width, int height) {
    viewport.update(width, height, true);
    batch.setProjectionMatrix(camera.combined);
    createGround();
}
You can see how much work the PhysicsShapeCache does for us. The createGround code
contains the minimal amount of work involved in creating just a single Box2D
fixture. I won't go into detail about how it works in this tutorial, but here's
the gist of it.
Every time the screen is resized, the ground will have to be resized as well. To make things easy, I just destroy the old ground and create a new one when that happens.
Next, I create a BodyDef, which tells Box2D that the ground is static, and can
only be moved manually. Then I create a FixtureDef, which contains a rectangle
that I adjust to the width of the viewport, and one meter tall. The rest of the
function creates the body, sets its position and rotation, and then disposes of
the shape that was used to create it.
If you run the game now, you'll notice something peculiar happens when the banana hits the ground. The Box2D debug renderer shows the banana rotate, but our sprite does not.
It's easy enough to rotate a sprite in LibGDX. Let's update the drawSprite
method to accommodate for that:
private void drawSprite(Sprite sprite, float x, float y, float degrees) {
    sprite.setPosition(x, y);
    sprite.setRotation(degrees);
    sprite.draw(batch);
}
Then of course, we'll have to update the call to drawSprite in our render
method. LibGDX wants degrees, but Box2D gives us radians. So we'll need to make
sure to translate our radians to degrees before passing it off to the drawSprite method:
Vector2 position = banana.getPosition();
float degrees = (float) Math.toDegrees(banana.getAngle());
drawSprite(sprites.get("banana"), position.x, position.y, degrees);
Now if we run the game, we'll see the sprite fall, hit the ground, and rock back and forth until it settles.
Now let's make some fruit fall from the sky:
import java.util.Random;

static final int COUNT = 10;
Body[] fruitBodies = new Body[COUNT];
Sprite[] fruitSprites = new Sprite[COUNT];

public void create() {
    ...
    generateFruit();
}

private void generateFruit() {
    String[] fruitNames = new String[]{"banana", "cherries", "orange"};
    Random random = new Random();

    for (int i = 0; i < fruitBodies.length; i++) {
        String name = fruitNames[random.nextInt(fruitNames.length)];
        float x = random.nextFloat() * 50;
        float y = random.nextFloat() * 200 + 50;
        fruitSprites[i] = sprites.get(name);
        fruitBodies[i] = createBody(name, x, y, 0);
    }
}

@Override
public void render() {
    ScreenUtils.clear(0.57f, 0.77f, 0.85f, 1);
    stepWorld();
    batch.begin();
    for (int i = 0; i < fruitBodies.length; i++) {
        Body body = fruitBodies[i];
        Vector2 position = body.getPosition();
        float degrees = (float) Math.toDegrees(body.getAngle());
        drawSprite(fruitSprites[i], position.x, position.y, degrees);
    }
    batch.end();
    debugRenderer.render(world, camera.combined);
}
With this updated code, a bunch of fruit will fall from above, hit the ground, then slide around. It will look something like this:
This is a good start, but let's make things more interesting. You'll notice how nothing really bounces. It just kind of falls, then slides around. The ground doesn't appear to have any friction to it, either.
Let's start by adding friction to the ground. Edit the createGround method,
and add friction to the ground's FixtureDef.
FixtureDef fixtureDef = new FixtureDef();
fixtureDef.friction = 1;
Of course, our physics bodies need friction as well for this to work. Using PhysicsEditor we can make some simple adjustments to give each of our fixtures a little more of a tactile feel.
Open PhysicsEditor, and edit the properties of each polygon and circle to look like this:
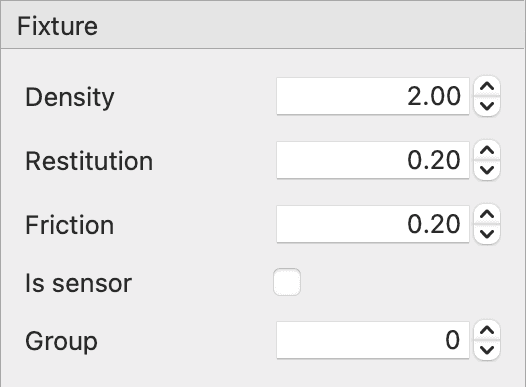
Then click "Save" and "Publish." Now run the game again. It will look something like this:
You can play around with the different settings. Here's what they mean:
- Restitution is how bouncy the objects are
- Density is how heavy they are
- Friction is how much they resist
All the values are from 0 to 1.
In case you are wondering why heavier objects don't drop faster than lighter objects: They just don't — as long as air resistance is not considered — which box2d does not simulate.
Galileo Galilei showed this in the Leaning Tower of Pisa experiment in 1589 where he dropped two spheres of different masses from the Leaning Tower of Pisa. Galileo discovered that objects fell with the same acceleration independent from their mass.
You might also want to adjust the level of gravity to make things more responsive. Right now it is set to -10, if you can recall. Try adjusting it to something much higher, like -40.
Here's what the full code of our falling fruit game looks like:
package com.codeandweb.tutorials;

import com.badlogic.gdx.ApplicationAdapter;
import com.badlogic.gdx.Gdx;
import com.badlogic.gdx.graphics.OrthographicCamera;
import com.badlogic.gdx.graphics.g2d.Sprite;
import com.badlogic.gdx.graphics.g2d.SpriteBatch;
import com.badlogic.gdx.graphics.g2d.TextureAtlas;
import com.badlogic.gdx.graphics.g2d.TextureAtlas.AtlasRegion;
import com.badlogic.gdx.math.Vector2;
import com.badlogic.gdx.physics.box2d.Body;
import com.badlogic.gdx.physics.box2d.BodyDef;
import com.badlogic.gdx.physics.box2d.Box2D;
import com.badlogic.gdx.physics.box2d.Box2DDebugRenderer;
import com.badlogic.gdx.physics.box2d.FixtureDef;
import com.badlogic.gdx.physics.box2d.PolygonShape;
import com.badlogic.gdx.physics.box2d.World;
import com.badlogic.gdx.utils.Array;
import com.badlogic.gdx.utils.ScreenUtils;
import com.badlogic.gdx.utils.viewport.ExtendViewport;
import com.codeandweb.physicseditor.PhysicsShapeCache;
import java.util.HashMap;
import java.util.Random;

public class PhysicsExample extends ApplicationAdapter {
    static final float STEP_TIME = 1f / 60f;
    static final int VELOCITY_ITERATIONS = 6;
    static final int POSITION_ITERATIONS = 2;
    static final float SCALE = 0.05f;
    static final int COUNT = 25;

    OrthographicCamera camera;
    ExtendViewport viewport;
    TextureAtlas textureAtlas;
    final HashMap<String, Sprite> sprites = new HashMap<String, Sprite>();
    SpriteBatch batch;
    World world;
    Body[] fruitBodies = new Body[COUNT];
    Sprite[] fruitSprites = new Sprite[COUNT];
    Body ground;
    Box2DDebugRenderer debugRenderer;
    PhysicsShapeCache physicsBodies;
    float accumulator = 0;

    @Override
    public void create () {
        camera = new OrthographicCamera();
        viewport = new ExtendViewport(50, 50, camera);
        textureAtlas = new TextureAtlas("sprites.txt");
        batch = new SpriteBatch();
        loadSprites();

        Box2D.init();
        world = new World(new Vector2(0, -40), true);
        physicsBodies = new PhysicsShapeCache("physics.xml");
        debugRenderer = new Box2DDebugRenderer();
        generateFruit();
    }

    private void loadSprites() {
        Array<AtlasRegion> regions = textureAtlas.getRegions();
        for (AtlasRegion region : regions) {
            Sprite sprite = textureAtlas.createSprite(region.name);
            float width = sprite.getWidth() * SCALE;
            float height = sprite.getHeight() * SCALE;
            sprite.setSize(width, height);
            sprite.setOrigin(0, 0);
            sprites.put(region.name, sprite);
        }
    }

    private void generateFruit() {
        String[] fruitNames = new String[]{"banana", "cherries", "orange"};
        Random random = new Random();
        for (int i = 0; i < fruitBodies.length; i++) {
            String name = fruitNames[random.nextInt(fruitNames.length)];
            float x = random.nextFloat() * 50;
            float y = random.nextFloat() * 200 + 50;
            fruitSprites[i] = sprites.get(name);
            fruitBodies[i] = createBody(name, x, y, 0);
        }
    }

    private Body createBody(String name, float x, float y, float rotation) {
        Body body = physicsBodies.createBody(name, world, SCALE, SCALE);
        body.setTransform(x, y, rotation);
        return body;
    }

    @Override
    public void resize(int width, int height) {
        viewport.update(width, height, true);
        batch.setProjectionMatrix(camera.combined);
        createGround();
    }

    private void createGround() {
        if (ground != null) world.destroyBody(ground);
        BodyDef bodyDef = new BodyDef();
        bodyDef.type = BodyDef.BodyType.StaticBody;
        FixtureDef fixtureDef = new FixtureDef();
        fixtureDef.friction = 1;
        PolygonShape shape = new PolygonShape();
        shape.setAsBox(camera.viewportWidth, 1);
        fixtureDef.shape = shape;

        ground = world.createBody(bodyDef);
        ground.createFixture(fixtureDef);
        ground.setTransform(0, 0, 0);
        shape.dispose();
    }

    @Override
    public void render () {
        ScreenUtils.clear(0.57f, 0.77f, 0.85f, 1);
        stepWorld();

        batch.begin();
        for (int i = 0; i < fruitBodies.length; i++) {
            Body body = fruitBodies[i];
            Vector2 position = body.getPosition();
            float degrees = (float) Math.toDegrees(body.getAngle());
            drawSprite(fruitSprites[i], position.x, position.y, degrees);
        }
        batch.end();

        debugRenderer.render(world, camera.combined);
    }

    private void stepWorld() {
        float delta = Gdx.graphics.getDeltaTime();
        accumulator += Math.min(delta, 0.25f);

        if (accumulator >= STEP_TIME) {
            accumulator -= STEP_TIME;
            world.step(STEP_TIME, VELOCITY_ITERATIONS, POSITION_ITERATIONS);
        }
    }

    private void drawSprite(Sprite sprite, float x, float y, float degrees) {
        sprite.setPosition(x, y);
        sprite.setRotation(degrees);
        sprite.draw(batch);
    }

    @Override
    public void dispose () {
        debugRenderer.dispose();
        world.dispose();
        sprites.clear();
        batch.dispose();
        textureAtlas.dispose();
    }
}