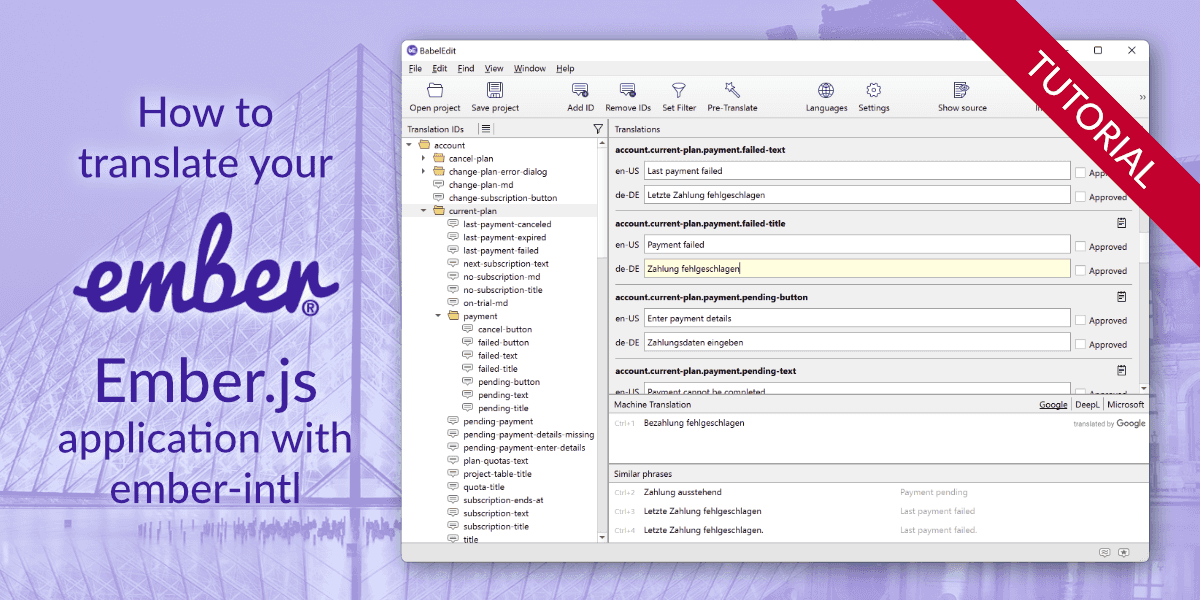
How to translate your Ember.js application with ember-intl

Overview
In this tutorial you are going to learn:
- How to translate your Ember.js application
- How to set up ember-intl
- How to edit and maintain your translations in YAML or JSON files
The source code for the example project is available on github.
Create a simple demo project
Let's start this tutorial with a simple demo application. You can of course skip this section if you already have an application that you want to translate.
Get ember-cli if you don't have it installed yet
npm install -g ember-cliYou should now have ember-cli in your command line. Create an empty new project:
ember new ember-intl-example
cd ember-intl-example
ember serve
You should see ember's default starting screen when you visit http://localhost:4200
Install ember-intl
The easiest way to install ember-intl is using ember-cli:
ember install ember-intlThis adds the following files:
-
create app/formats.js
-
create config/ember-intl.js
-
create translations/en-us.yaml
Warning during ember-serve
Ember is a highly opinionated framework that checks code style using a lint tool.
As soon as you start ember serve you'll see the following message:
The no-bare-strings rule must be configured when using
a localization framework (ember-intl). To prevent this warning, add the following to your .template-lintrc.js:
rules: {
    'no-bare-strings': true
}
That this means is:
- You should not use plain text in your templates (because these won't be translated)
- You have to use the
{{t 'translation.id'}}helper instead - Lint wants you to configure lint accordingly.
You have the following options as values for the parameter:
true/false- enabled/disabledarray- an array of whitelisted stringsobject- an object with the following keys:whitelist- An array of whitelisted stringsglobalAttributes- An array of attributes to check on every element.elementAttributes- An object whose keys are tag names and value is an array of attributes to check for that tag name.
When the config value of true is used the following configuration is used:
whitelist-(),.&+-=*/#%!?:[]{}globalAttributes-title,aria-label,aria-placeholder,aria-roledescription,aria-valuetextelementAttributes-{ img: ['alt'], input: ['placeholder'] }
This seems to be a good starting point. Let's use it for the demo... Please update .template-lintrc.js:
'use strict';

module.exports = {
  extends: 'recommended',

    rules: {
    'no-bare-strings': true
  }
};
Adding your first translation
Change the application.hbs to the following:
<h1>{{t "hello.world"}}</h1>

{{outlet}}
Run ember serve again, and the application now displays an error:
Missing translation "hello.world" for locale "en-us"
That's right... we've not yet added any translations. Open translations/en-us.yaml and change it to:
hello:
  world: Hello world!
What you see here is that ember uses a . to separate sub-entries in the YAML file. The key word is indented.
Refresh and you'll see the Hello world! text.
YAML or JSON?
ember-intl can also work with JSON files — that's simply a matter of personal taste which format you prefer. Let's stick with YAML for this demo because it's the default.
YAML is a bit more compact if you want to write it manually and might be a bit less strict — especially when it comes to additional commas at the end of lists which causes JSON to report errors.
There are loads of tools on the internet that can convert between JSON and YAML — so there's nothing to regret if you chose the "wrong" format.
Adding a new language
Let's now add a translation... we'll use German in this demo — but feel free to use your own native language.
You can use ember create translation de-de for this... or simply create the file — the effect
is the same.
Create a new translation file: translations/de-de.yaml.
hello:
  world: Hallo Welt!
Switching languages
Setting the language on startup
You might not see any change in the browser... let's switch the language to de-de:
Create app/routes/application.js with the following content. The code switches to the German (de-de) language file created in the section above.
import { inject as service } from '@ember/service';
import Route from '@ember/routing/route';

export default Route.extend({
  intl: service(),
  beforeModel() {
    this.get('intl').setLocale(['de-de']);
  }
});
Refresh the app and see the text change to
Hallo Welt!
Switching languages at runtime
Create an application controller in app/controllers/application.js with the following content:
import config from '../config/environment';
import Controller from '@ember/controller';
import { computed, get } from '@ember/object';
import { inject as service } from '@ember/service';
import { lookupByFactoryType } from 'ember-intl/hydrate';

const { modulePrefix } = config;

export default Controller.extend({
  intl: service(),
  activeLocale: computed.readOnly('intl.locale'),

  locales: computed(function() {
    return lookupByFactoryType('translations', modulePrefix).map(moduleName => moduleName.split('/').pop());
  }).readOnly(),

  selections: computed('locales.[]', 'activeLocale', function() {
    let active = get(this, 'activeLocale');

    return get(this, 'locales').map(locale => {
      return {
        locale: locale,
        active: active.indexOf(locale) > -1
      };
    });
  }).readOnly(),

  actions: {
    changeLocale(locale) {
      return get(this, 'intl').set('locale', locale);
    }
  }
});
The changeLocale action is called from the following template to activate a locale on button click.
This code also provides some computed properties to retrieve the currently active locale, a list of available locales and a list that contains the locale name and an active flag. The following template uses the code to render a list of buttons with the available languages.
Add the following code to app/templates/application.hbs to render a button for each language:
<div>
  {{#each selections as |model|}}
    <button class={{if model.active "active"}} {{action "changeLocale" model.locale}}>
      {{model.locale}}
    </button>
  {{/each}}
</div>
Add some css in app/styles/app.css to highlight the currently selected language and give the buttons a nicer look:
button
{
	padding: 0.25rem 0.5rem;
	border: 1px solid blue;
	color: black;
	background: white;
	border-radius: 0.25rem;
}

button.active
{
	background-color: blue;
	color: white;
}
You should now see the text from before and 2 buttons that you can use to toggle betwen German and English.
Parameters, pluralization and selections
Simple parameters
app/templates/application.hbs
<h1>{{t "greeting" name="John"}}</h1>Also add the following lines to translations/de-de.yaml
greeting: 'Hallo {name}!'and translations/en-us.yaml
greeting: 'Hello {name}!'The translation now replaces the {name} with the value provided in the name
parameter in the template: {{t "greeting" name="Andreas"}}
Selections
You can also change the translation based on parameters using the ICU syntax used by ember-intl.
The syntax allows you to select different strings:
app/templates/application.hbs
<p>{{t "download" name="BabelEdit" type="full"}}</p>
<p>{{t "download" name="BabelEdit" type="trial"}}</p>
The syntax for the greeting translation now looks like this:
Download {type, select,
    pro { {name} (full version) }
    trial { the free trial of {name} }
    other { {name} }
} from our web page!
The select syntax takes 3 comma separated values:
- the name of the variable that is used for the selection
- the keyword
select - a list of possible values followed by the text in
{}
You can also provide additional variables in {} in the translation texts, like the {name} in this example.
Add the following to translations/en-us.yaml
download: |-
  Download {type, select,
      pro { {name} (full version) }
      trial { the free trial of {name} }
      other { {name} }
  } from our web page!
and translations/de-de.yaml
download: |-
  Laden sie  {type, select,
      pro { {name} Professional}
      trial {die Test-Version von {name}}
      other { {name} }
  } von unserer Webseite!
Pluralization
You can also change the translation text depending on numbers. E.g.
- no flowers
- one flower
- 2 flowers
- ...
app/templates/application.hbs
<p>{{t "flowers" itemCount=0}}</p>
<p>{{t "flowers" itemCount=1}}</p>
<p>{{t "flowers" itemCount=4}}</p>
The syntax for the translation is
You have {itemCount, plural,
    =0 {no flowers}
    one {one flower}
    other {{itemCount} flowers}
}.
The plural syntax takes 3 comma separated values:
- the count of items
- the keyword
plural - a list of possible values followed by the text in
{}
Options for possible values are:
zeroone,twofew,manyother=value
Add this to translations/en-us.yaml
flowers: |-
  You have {itemCount, plural,
    =0 {no flowers}
    one {one flower}
    other {{itemCount} flowers}
  }.
and translations/de-de.yaml
flowers: |-
  Du hast {itemCount, plural,
    =0 {keine Blumen}
    one {eine Blume}
    other {{itemCount} Blumen}
  }.
Simplifying your workflow with BabelEdit
Working with a few translations and 2 languages is easy — but things become more complicated when your project grows.
- Which texts are already translated?
- Did I add the new translation key to all languages?
- Did I rename the key in all languages?
- Which texts are draft, which are final?
- ...
It's also hard to be consistent in the translation if you have to switch between multiple YAML files all the time... This is where BabelEdit comes to your rescue!
Getting started with BabelEdit
First of all download BabelEdit free trial from here:
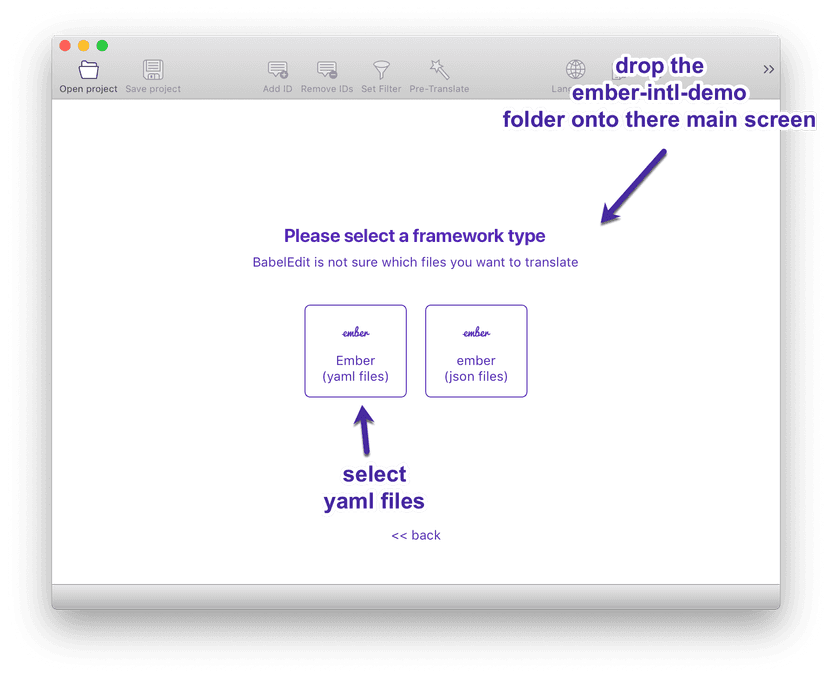
Simply drag & drop the whole ember-intl-example folder onto BabelEdit's main window.

BabelEdit detects the ember-intl project and asks you about the file format you use. Click on YAML.

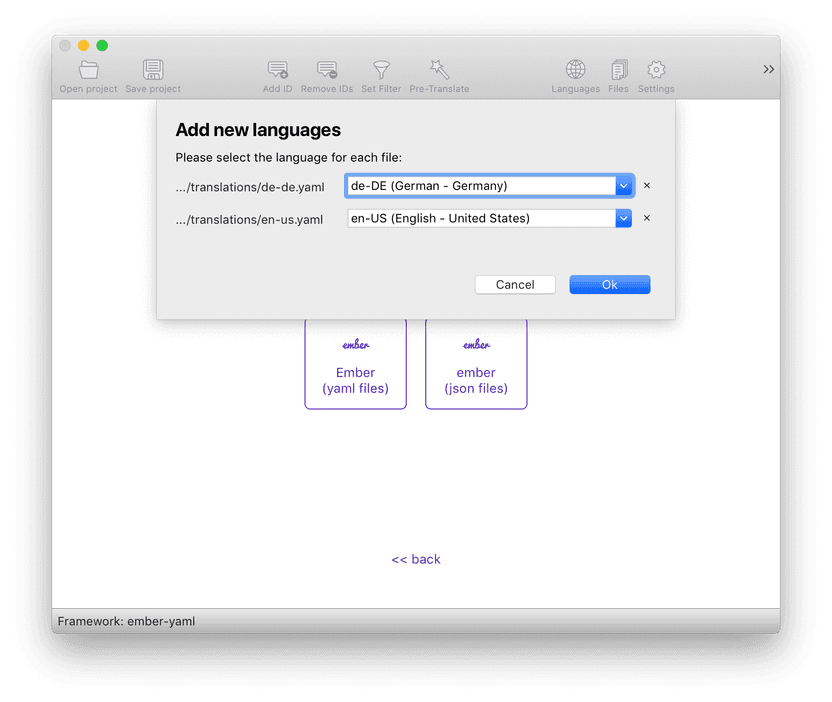
BabelEdit now asks you to set up the languages you want use — it should be ok to simply click Ok.
A short overview
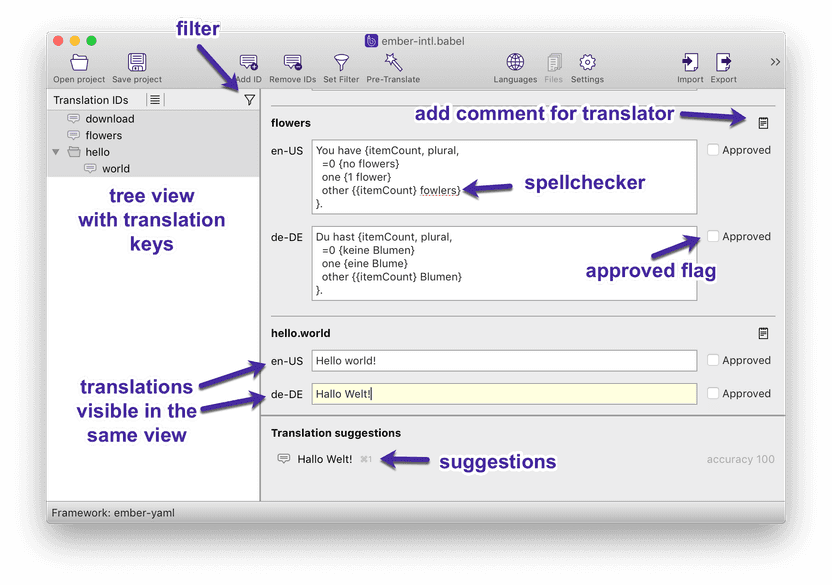
The left side of BabelEdit contains a tree view with the translation IDs you use in your YAML files. BabelEdit displays all YAML (or JSON) files in the same view.
Changes like adding, removing or renaming IDs are performed on all files at the same time.
The center view displays the translations selected on the left side.
A spell checker is activated for the translation edit fields. It of course checks each translation in its language. The license of the German spell checking dictionary does not allow us to bundle the files directly with BabelEdit. You have to download and install them following these instructions.
The machine translation features of BabelEdit display suggestions for the currently edited language. It is also possible to automatically translate all texts to preview your application in a new language. You might however have to work on messages containing ICU syntax...
Use the approved flag to mark translations that are final and don't require addtional work.
Add comments to give a translator detailed information about the text. E.g. where it's located, or what parameters to expect.
Use the filter to search for translation ids, words in the text. You can also filter translations by not approved or empty/untranslated.
Export and Import allow you to exchange translations with external translation agencies who neither want to use BabelEdit nor work with YAML or JSON files.
