How to use 2d dynamic light effects in Axmol Engine
This tutorial is for Axmol Engine.
We recently wanted to upgrade our to cocos2d-x tutorials but found out, that the framework is not supported anymore. The company behind cocos2d sets more and more focus on Cocos Creator and totally neglects the c++ community.
While researching options for our readers, we found a cocos2d-x fork called Axmol Engine that gets regular updates and fixed.
This tutorial is the right place for you to start with this cocos2d-x fork. The tutorial should also work with cocos2d-x V4 if you mange to get it running on your computer.
What you are going to learn from this tutorial
In this tutorial you are going to learn:
- How to add normal maps to your sprite sheets
- How to add a point light to a game scene
- How to create and add a shader to render the light effect
Get our demo project
I've already written an in-depth description about how to set up an Axmol project with sprite sheets in our Using sprite sheet animations in Axmol Engine tutorial. Use the first steps of the tutorial to install Axmol.
This tutorial is a bit more complex and requires more coding. This is why I've decided not to lead you step-by-step through the process but focus on explaining how things work in the example.
Start by downloading the source code from github or clone it with git:
git clone https://github.com/CodeAndWeb/axmol-dynamic-lighting-example.gitWith Axmol installed, you should now be able to change into that directory and create the build files for your platform using one of the following CMake commands:
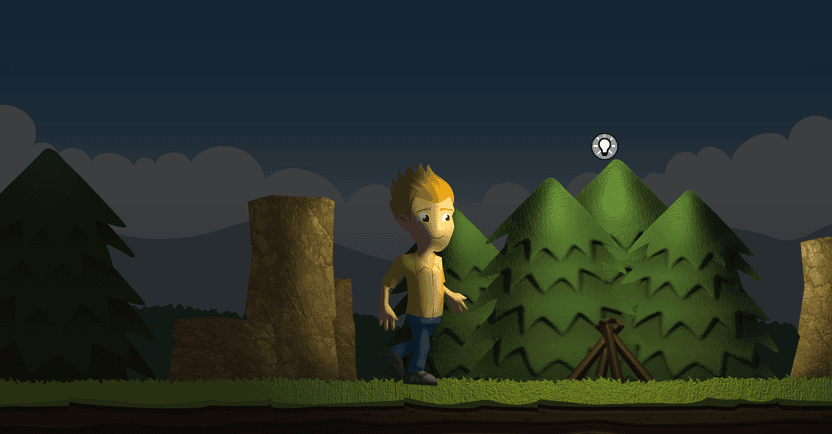
cmake . -B build-ios -GXcode -DCMAKE_TOOLCHAIN_FILE=$AX_ROOT/cmake/ios.toolchain.cmake -DPLATFORM=SIMULATOR64cmake -S . -B build -GXcode -DCMAKE_TOOLCHAIN_FILE=$AX_ROOT/cmake/ios.toolchain.cmake -DPLATFORM=OS64cmake -S . -B build -GXcode -DCMAKE_TOOLCHAIN_FILE=$AX_ROOT/cmake/ios.toolchain.cmake -DPLATFORM=TVOScmake -S . -B build -GXcode -DCMAKE_TOOLCHAIN_FILE=$AX_ROOT/cmake/ios.toolchain.cmake -DPLATFORM=SIMULATOR_TVOScmake -S . -B build -GXcode -DCMAKE_OSX_ARCHITECTURES=x86_64cmake -S . -B build -GXcode -DCMAKE_OSX_ARCHITECTURES=arm64cmake -S . -B build -G "Visual Studio 16 2019" -A Win32cmake -S . -B build -G "Visual Studio 16 2019" -A x64cmake -S . -B build -G "Visual Studio 17 2022" -A Win32cmake -S . -B build -G "Visual Studio 17 2022" -A x64Open your IDE and select the build target axmol-dynamic-lighting. After building the project, you should already see the game scene. Use touches or the mouse to drag the light source on the screen.
How does dynamic lighting with sprites work?
To create dynamic light effects for your sprites, you need a normal map. A normal map is an image that has the same shape as the sprite but the colors represent the direction, the pixel is facing.
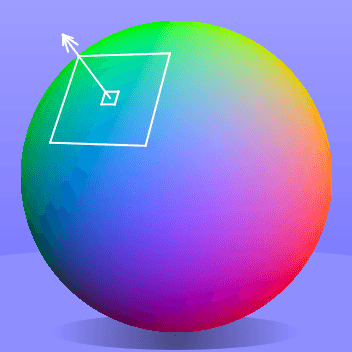
The sprite and its normal map look like this:

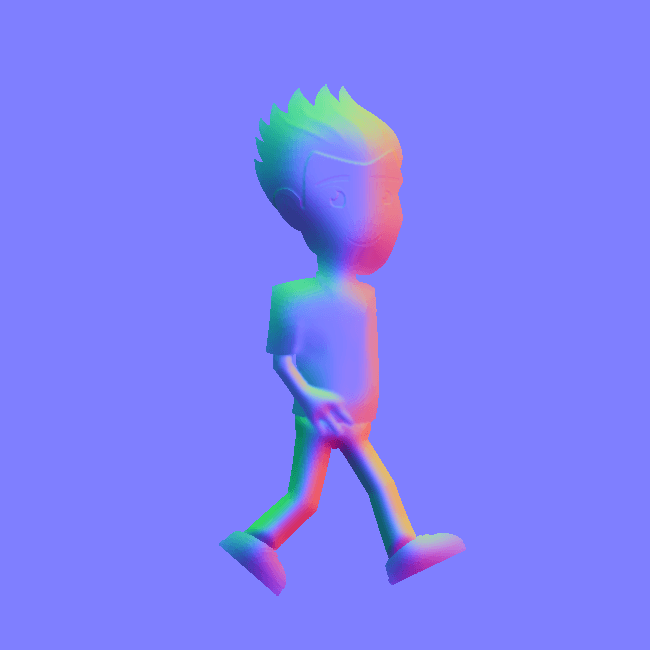
You also need a shader to render the light effect. The shader takes the light's position and color, the sprite's position and the direction from the normal map to calculate the brightness of the light in that pixel.
How do I create normal maps for my sprites?
If you want to create normal maps for your sprites, there are various tools available. While you could use a painting tool like Affinity Photo or Photoshop, this can be a challenging task. An easier option is to use a specialized software like SpriteIlluminator.
SpriteIlluminator is a dedicated painting program designed specifically for creating normal maps for sprites. With its user-friendly interface and various features, it can make the process of creating normal maps for your sprites much simpler and efficient.
Download SpriteIlluminator from here:
I've already created the normal maps for this game scene. You can open the SpriteIlluminator project in the main directory. It's the file called sprite-normals.sip.
I used the effects Bevel and Emboss. Bevel creates uses the sprite's transparency to simulate volume. Emboss uses brightness differences in the sprites to create higher and lower parts on the surface of the sprite. With these effects I was able to create the normal maps within seconds.
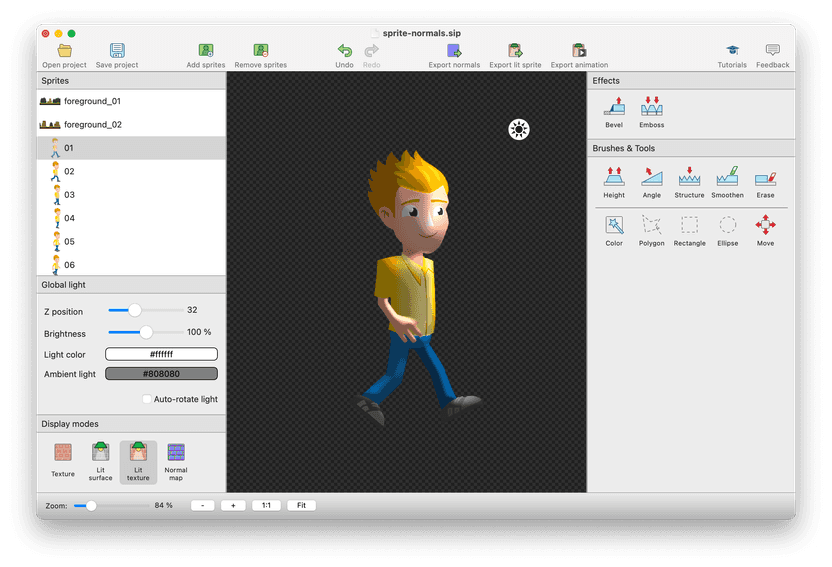
To achieve even better quality for your normal maps, you can utilize the selection tools in SpriteIlluminator to apply the effects selectively to specific parts of the sprite. For instance, if one arm appears in front of the body, you can use the color selection tool to isolate that area and restrict the Bevel effect to that specific region.
You can use the other tools in SpriteIlluminator to manually enhance the normal maps - e.g. the Angle Brush to tilt pixels in the selected direction.
Creating the sprite sheets
The next step is to pack the normal maps and the sprites into sprite sheets. It's important that both - the sprite sheet with the sprite and the one with the normal maps - have the same layout. Otherwise, the shader will not work.
For this, use TexturePacker. You can download it from here:
To learn how to use TexturePacker to pack sprite sheets take a look at this tutorial: Using sprite sheet animations in Axmol Engine
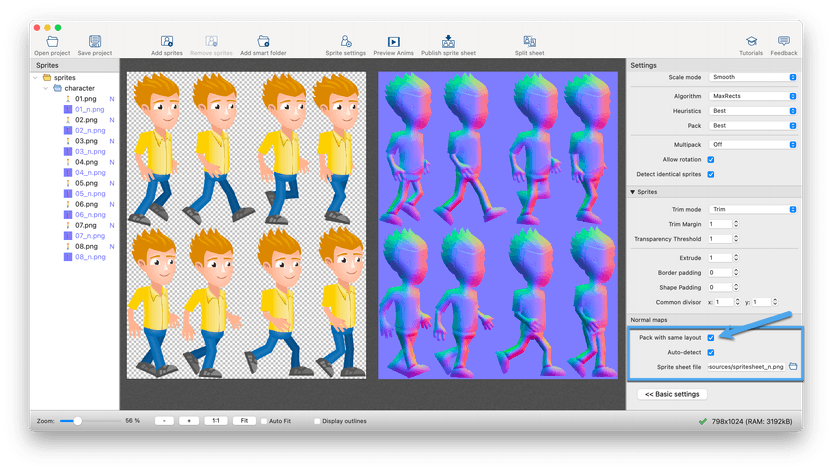
Add the sprites folder to TexturePacker. Apply the following settings:
- Data
- Data format: cocos2d-x
- Data file: Resources/spritesheet.plist
- Normal maps
- Pack with same layout: Yes
- Auto-detect: Yes
AppDelegate.cpp
We've removed the code that adapts to different screen resolutions to keep the tutorial as simple as possible. For this, we set a fixed design resolution size of 1920x1080.
    // set FPS. the default value is 1.0/60 if you don't call this
    director->setAnimationInterval(1.0f / 60);

    // Set the design resolution
    glView->setDesignResolutionSize(1920, 1080, ResolutionPolicy::SHOW_ALL);

    register_all_packages();
HelloWorldScene.cpp
HelloWorld::init()
    ax::Vec3 lightPos = Vec3(_screenW-200, _screenH-200, 150);

    _light = LightEffect::create();
    _light->setLightPos(_lightPos);
    _light->setLightCutoffRadius(1000);
    _light->setBrightness(2.0);
    _light->setLightColor(ax::Color3B(255,255,160));
    _light->retain();
This block initializes the LightEffect - a class that I'll explain in detail later.
The main configuration consists of the light position. The z value is the distance to the
sprite. Negative values simulate a light source that is behind the screen, positive values
between screen and player/viewer.
The light's intensity decreases with the distance. The cutoff radius is how far the light can be seen.
The other values are self-explanatory - brightness and color.
initBackground();Sets up the background which consists of 2 layers. The mountains and could which are not lit and the ground and trees. I'll explain that method later.
    auto spritecache = SpriteFrameCache::getInstance();
    spritecache->addSpriteFramesWithFile("spritesheet.plist");

    Vector<SpriteFrame*> animFrames;
    char str[100];
    for(int i = 1; i <= 8; i++)
    {
        snprintf(str, sizeof(str), "character/%02d.png", i);
        animFrames.pushBack(spritecache->getSpriteFrameByName(str));
    }
This code loads the sprite sheet and creates an animation from the character sprite frames.
The next line creates an EffectSprite - extends the standard Sprite with code
that applies the light effect shader.
auto sprite = EffectSprite::createWithSpriteFrame(animFrames.front()); Animation *animation = Animation::createWithSpriteFrames(animFrames, 1.0f/8);
sprite->runAction(RepeatForever::create(Animate::create(animation)));
sprite->setPosition(_screenW / 2.0, _screenH / 2.0 - 75.0);
sprite->setEffect(_light, "spritesheet_n.png");
addChild(sprite);The sprite would behave like a normal sprite without the highlighted line.
The setEffect() enabled the light effect and sets the normal map for rendering.
    _lightSprite = Sprite::create("lightbulb.png");
    _lightSprite->setPosition(_lightPos.x, _lightPos.y);
    addChild(_lightSprite);

    auto listerner = EventListenerTouchAllAtOnce::create();
    listerner->onTouchesMoved = AX_CALLBACK_2(HelloWorld::handleTouches, this);
    _eventDispatcher->addEventListenerWithSceneGraphPriority(listerner, this);
The last code block in this method creates a little sprite that represents the light source in the scene. It also adds a touch handler that allows the player to move the light source.
handleTouches() implements that functionality: A touch event updates the sprite
and light position:
void HelloWorld::handleTouches(const std::vector<Touch *> &touches, Event *)
{
    for (auto &touch: touches)
    {
        Point pos = touch->getLocation();
        _lightSprite->setPosition(pos);
        _lightPos.set(pos.x, pos.y, _lightPos.z);
        _light->setLightPos(_lightPos);
    }
}
initBackground() creates 2 big sprites for the background. These are not lit by
the sprite effect. It also adds 2 foreground sprites (floor, trees, rocks)
with normal maps.
The 3rd parameter is the movement speed for the sprite. The mountains and coulds move slower which gives the scene an additional depth effect.
void HelloWorld::initBackground()
{
    addBackgroundTile("res/background_01.png", 0, 100);
    addBackgroundTile("res/background_01.png", 1920, 100);
    addBackgroundTile("res/foreground_01.png", 0, 200, "res/foreground_01_n.png");
    addBackgroundTile("res/foreground_02.png", 1920, 200, "res/foreground_02_n.png");
}
The addBackgroundTile() create the sprite. The light effect is enabled
if a normal map file is set. The sprite is completely tinted with the ambient
light color if no normal map is set.
The RepeatForever action moves the sprite from right to left in an
infitite loop.
EffectSprite *HelloWorld::addBackgroundTile(const std::string &spriteFile,
                                            float offsetX,
                                            float speed,
                                            const std::string &normalsFile)
{
    auto background = EffectSprite::create(spriteFile);

    if (!normalsFile.empty())
    {
        background->setEffect(_light, normalsFile);
    }
    else
    {
        background->setColor(_light->getAmbientLightColor());
    }

    float offsetY = (_screenH - background->getContentSize().height) / 2.0f;

    background->setAnchorPoint(Vec2(0,0));
    addChild(background);

    auto a1 = MoveTo::create(0, Vec2(offsetX, offsetY));
    auto a2 = MoveTo::create((_screenW + offsetX) / speed, Vec2(-_screenW, offsetY));
    auto a3 = MoveTo::create(0, Vec2(_screenW, offsetY));
    auto a4 = MoveTo::create((_screenW - offsetX) / speed, Vec2(offsetX, offsetY));
    background->runAction(RepeatForever::create(Sequence::create(a1, a2, a3, a4, nullptr)));

    return background;
}
LightEffect.hpp / LightEffect.cpp
This class contains the spotlight effect. LightEffect::init() compiles the
fragment shader pointlight.frag and sets some default values for
the ambient light and spotlight.
LightEffect::prepareForRender() is called each time a sprite is rendered and sets
the parameters required by the shader.
EffectSprite.hpp / EffectSprite.cpp
EffectSprite is derived from Sprite - it stores the effect and updates
the shader before the sprite is drawn.
Conclusion
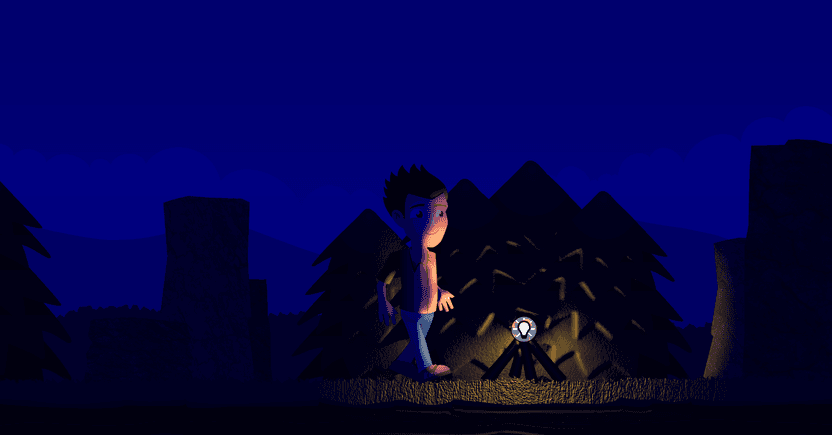
Creating light effects with Axmol Engine is quite simple. You can experiment with the code to create different lighting scenarios. Everything is possible - e.g. you can create an icy look with a cool, bluish light. You can give it the warm light of a sunset... or create a camp fire scene with dark blue ambient light and a warm orange light.
You can also adjust the light effect and shader to support multiple lights.
Adding a directional light is also a nice option to simulate sunlight instead of using the spotlight.
It would also be great to use the normal mapped sprites with a physics engine. With this, you can get correctly lit sprites even if they are rotated upside down...
