Creating sprite sheets for ShiVa using TexturePacker

Andreas Löw
Creating sprite sheets for ShiVa using TexturePacker
Last update: More than 3 months ago

Learn how to use Sprite Sheets with ShiVa:

  • What are sprite sheets? Why should you use them?
  • Creating sprite sheets with TexturePacker
  • Installing and using JPSprite
  • Playing animations

This blog post contains full source code available on GitHub.

It looks like the download page of JPSprite is down and that the project was abandoned. I'd currently NOT recommend to use this.

What you are going to learn

  • What is a sprite sheet

  • Why you should use sprite sheets

  • Creating sprite sheets with TexturePacker

  • Installing JPSprite

  • Loading sprite sheets with JPSprite

  • Using sprites (free)

What is a sprite sheet?

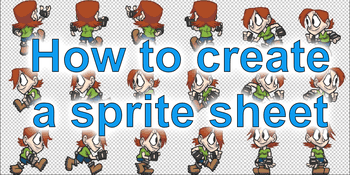
A sprite sheet is simply a big image containing many sprites which would otherwise be single images. There's also information in a separate file that describes where the sprites are located so that they can be cut from the sheet and be used individually.

Why should I use a sprite sheet? Using single sprites is easier!

You are right - adding single sprites to your game is in many cases the easier way to go... but: Using sprite sheets is quite easy if you have the right tools. And the benefit you get from it is immense!

There are 3 main reasons to use sprite sheets:

Reduced memory usage

Memory reduction happens in 3 ways:

  • Reducing the memory required on the file system by using a single file.
  • Reducing runtime memory by removing transparency from sprites.
  • ShiVa requires square textures which come with unused space - which can be filled with sprites.
Faster loading of your game / application

Using only a single file reduces the work required to load a file into memory to opening 1 file and loading it as a complete block into memory.

This speeds up things dramatically compared to loading many small files. Even if you are in flash memory or on an SSD the load time will be significantly reduced.

Increase of framerate / performance

A sprite sheet reduces the draw calls required to render your game scenes. Instead of setting source texture, coordinates and target space for each single sprite setting all coordinates as a list at once is possible.

This increases the framerate of your game - especially if you have many game objects in your scenes.

Creating sprite sheets with TexturePacker

As I already said: Using a sprite sheet requires some overhead. But with the right tools it's easy to handle.

TexturePacker is such a tool that makes it easy for you.

Open TexturePacker and select ShiVa3D + JPSprite extension as framework.

Drag and Drop your sprites inside TexturePacker, enter a location to store the texture and data file.

Press Publish sprite sheet to create the sprite sheet.

![img/shiva-select-framework.png](TexturePacker: Selecting shiva Framework)

![img/texturepacker2.png](TexturePacker packing sprites for ShiVa)

JPSprite

JPSprite is an importer for ShiVa that takes the texture and description file and assigns the sprites to an HUD component or object material.

Additionally a paid version of JPSprite also allows you easily play animations located on sprite sheets.

Importing the sprite sheets into ShiVa

First of all you have to add the generated XML and texture file to ShiVa.

In the Data Explorer

  • use Import > Texture and select the image file

  • use Import > XML and select the description file

You now have 2 new files that you can add to your project. Open the Game Editor's Resources tab. Drag & drop the 2 files from the Data Explorer into the Game Editor. See image on the right side.

You are now ready to use the atlas in your code.

![img/reference-resources.png](Adding resources to ShiVa)

Using sprites

Loading a sprite sheet

First of all you have to load the atlas inside the code:

JPSprite.setupAtlas ( "jpspritesample_sprites" )
Using a sprite on an HUD component

All you have to do to add a sprite to an HUD component is give JPSprite the component's handle and the sprite's name:

local hPlaneComponent = hud.getComponent ( this.getUser ( ), "JPSpriteSample.Plane" )
JPSprite.setComponentSprite ( hPlaneComponent, "plane" )

This adds the sprite to the component and resizes it to match the sprite.

JPSprite also allows to flip sprites:

local hPlaneComponent = hud.getComponent ( this.getUser ( ), "JPSpriteSample.Plane" )
local bFlipX = true
JPSprite.setComponentSprite ( hPlaneComponent, "plane", bFlipX )