TexturePacker3D Documentation
Adding models
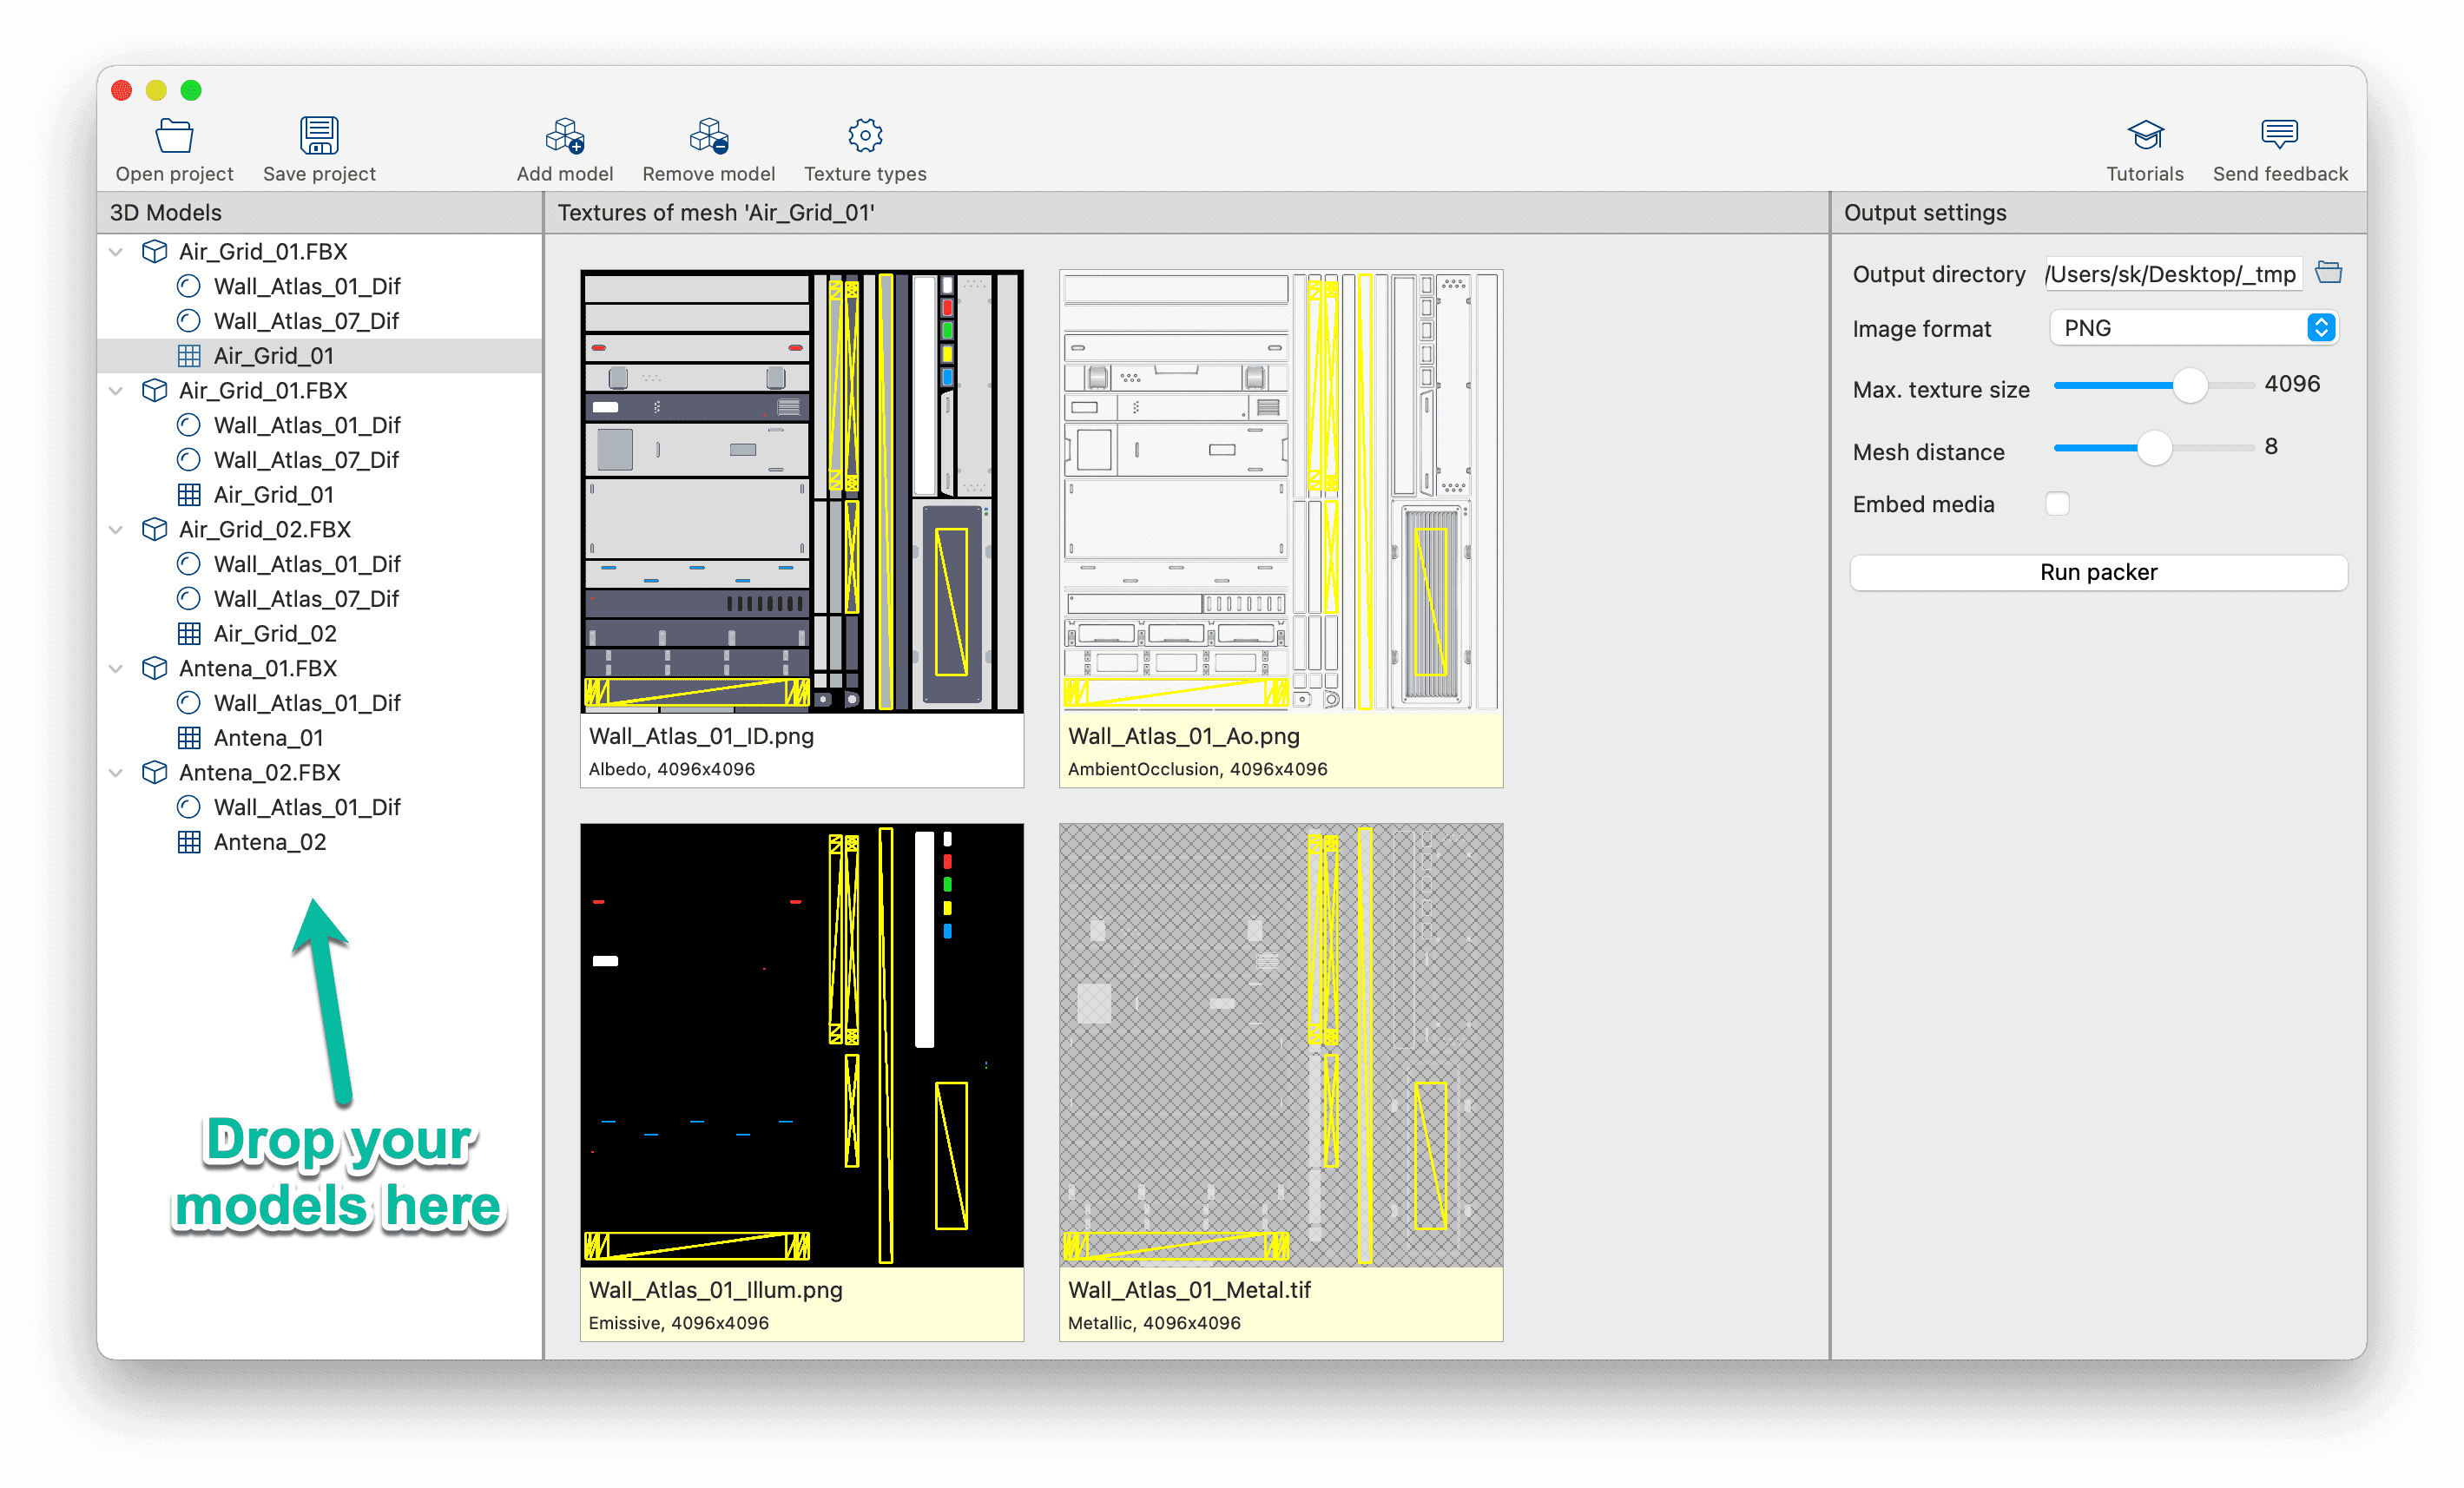
Adding models to TexturePacker3D ist simple: Just drop the .fbx files onto the left panel.
We currently only support .fbx files. Please let us know if you need support for other formats.

TexturePacker3D searches for textures in several locations. E.g. if the .fbx file links to c:\texurefiles\wall.png it'll try the following locations:
- in the path specified in the fbx file: c:\texurefiles\wall.png
- in the folder containing the fbx file: ./wall.png
- in all sub-folders relative to the fbx file: ./images/wall.png or ./textures/material/shared/wall.png
- the folders parallel to the fbx file's folder contain tex or material: ../textures/wall.png or ../materials/modelA/wall.png
It accepts texture files that have the same file name including the extension. E.g. if the .fbx file links to a wall.png it does not look for wall.jpg.
Restrictions
- Multiple UV channels per mesh not supported. We currently plan to add an option for selecting one of the UV sets for packing
- Tiled textures are partially supported. We plan to support meshes that exceed the texture bounds a bit. Full tiling support would require expanding the whole tiled texture to the mesh. This would most likely result in a much bigger texture. Tiled textures are currently copied to the destination folder.
- Texture transforms (scale, rotate) are not supported.
If you need these features or find something else that is not working: Please don't hesitate to contact us!
Configuring materials and textures
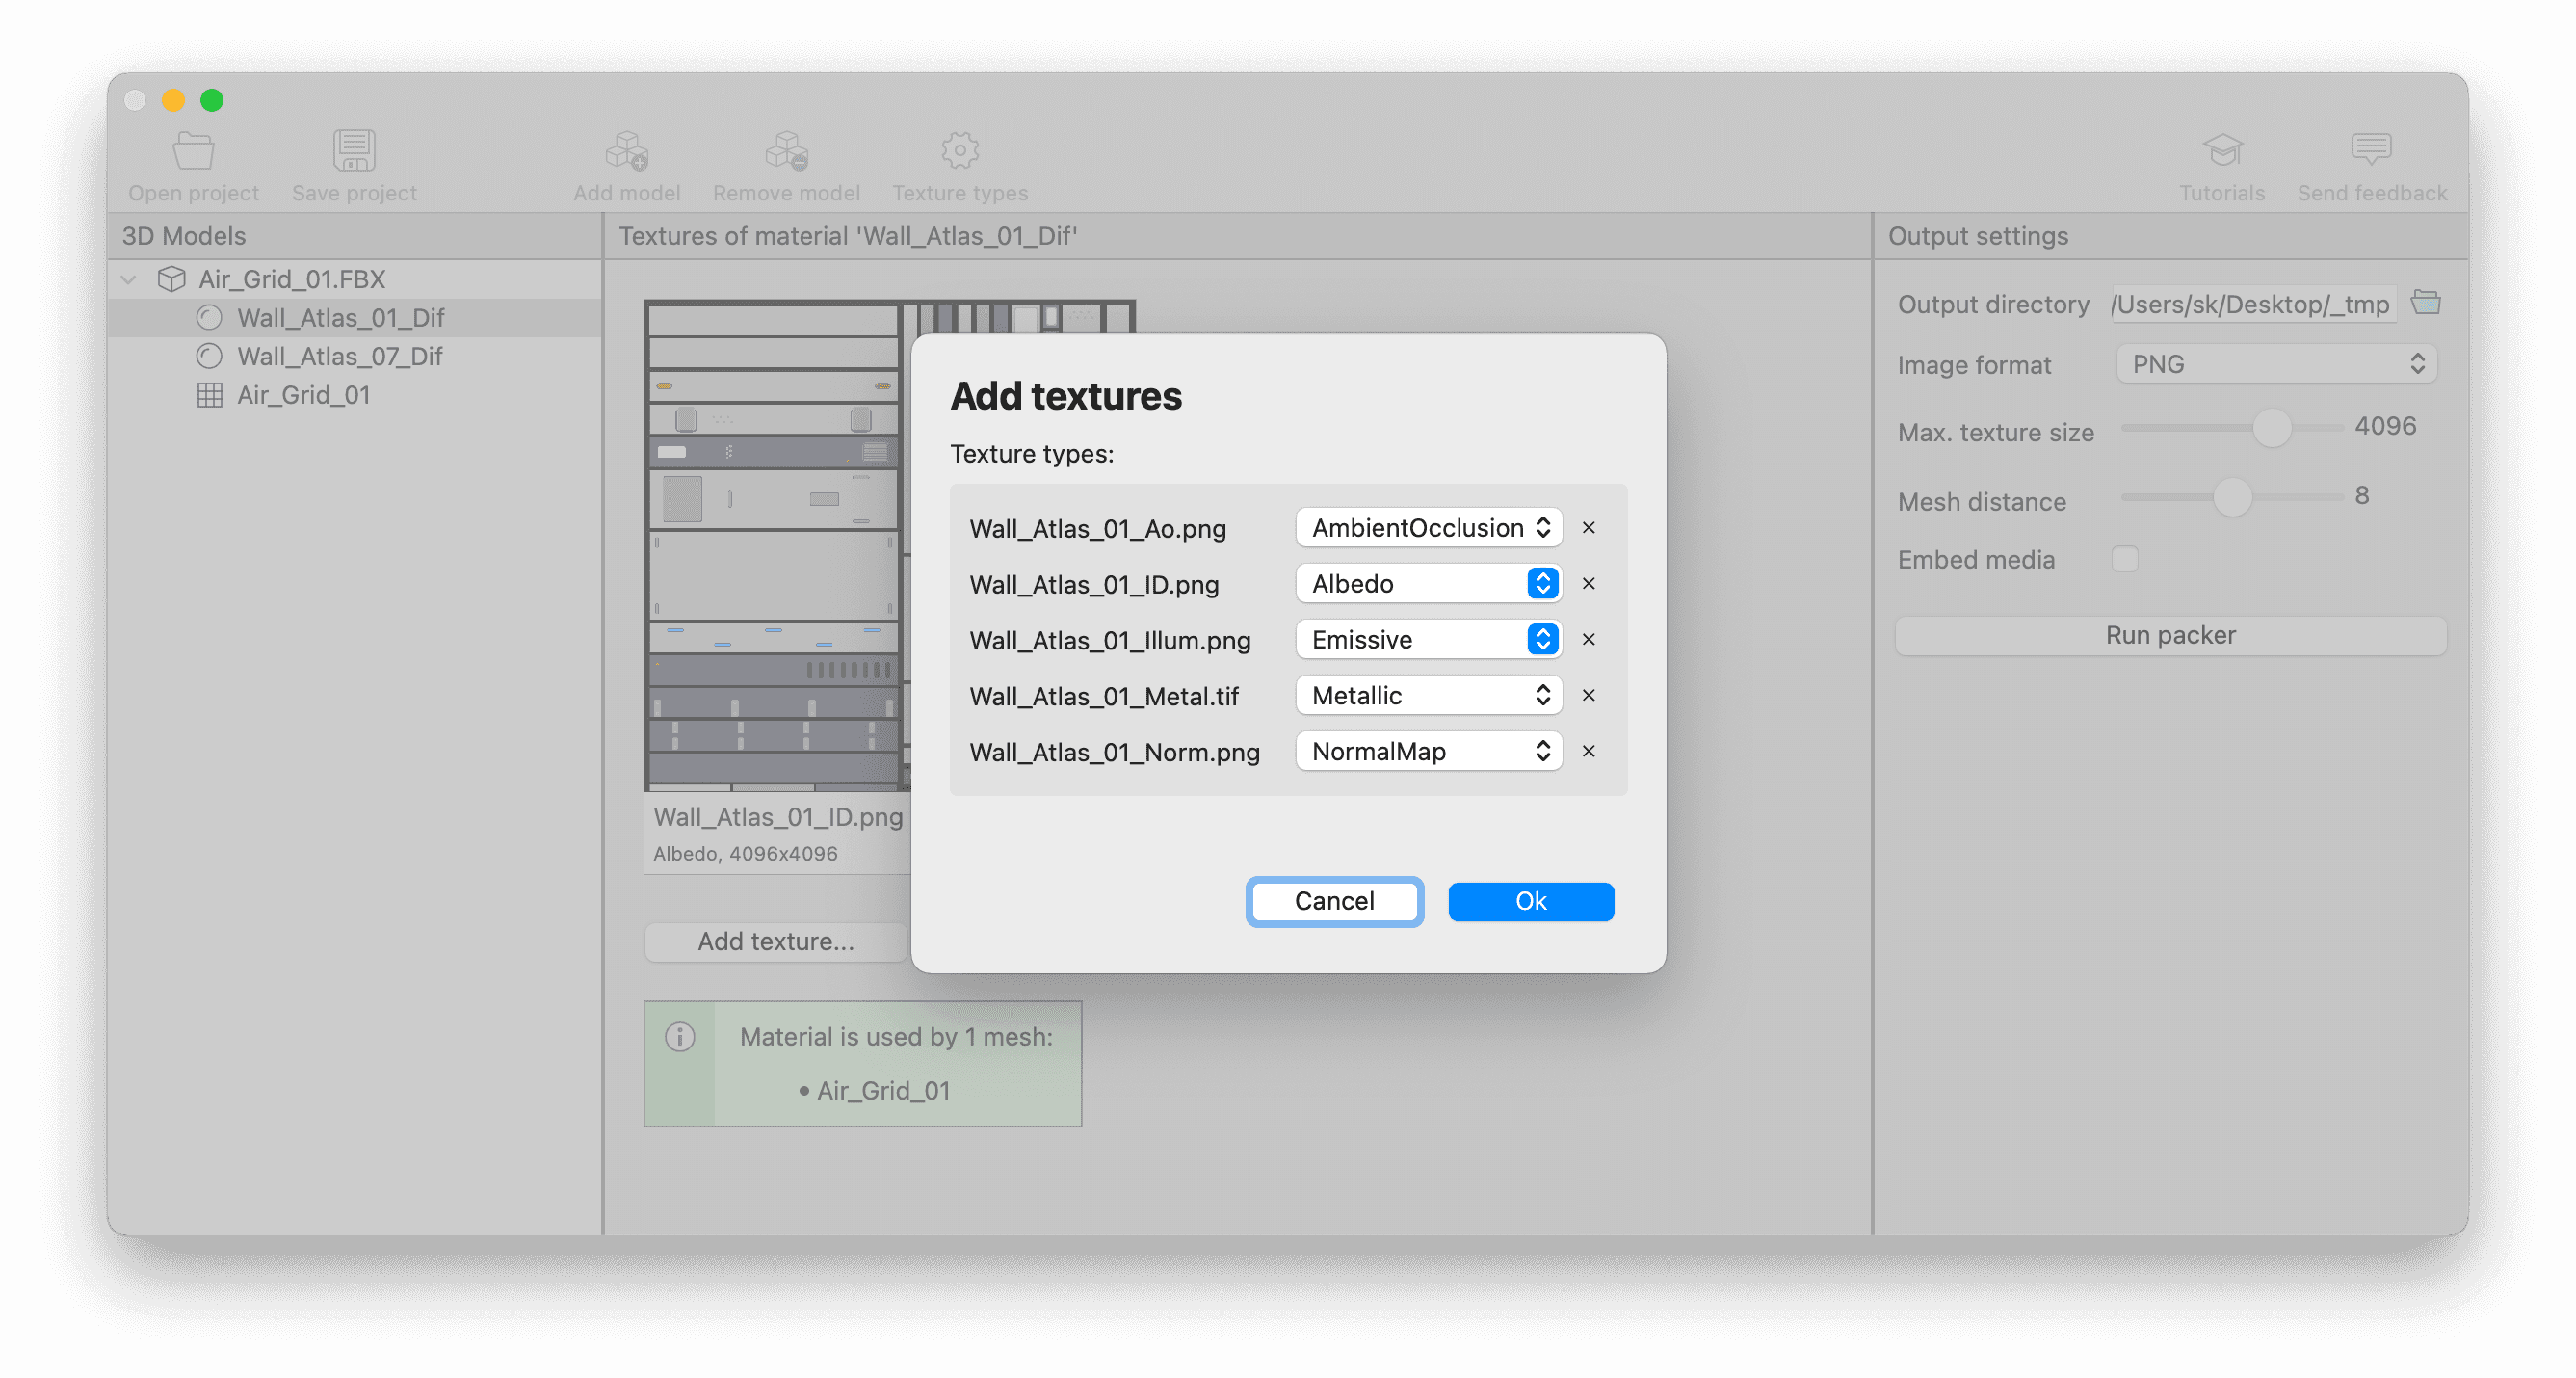
Not all models contain well-configured materials and textures. You can add textures manually if they don't all show up as expected.
- Select a material in the left panel
- Drag & drop the textures in the center view or click Add Texture...
- Configure the channels for the textures

Editing texture channel names and mappings
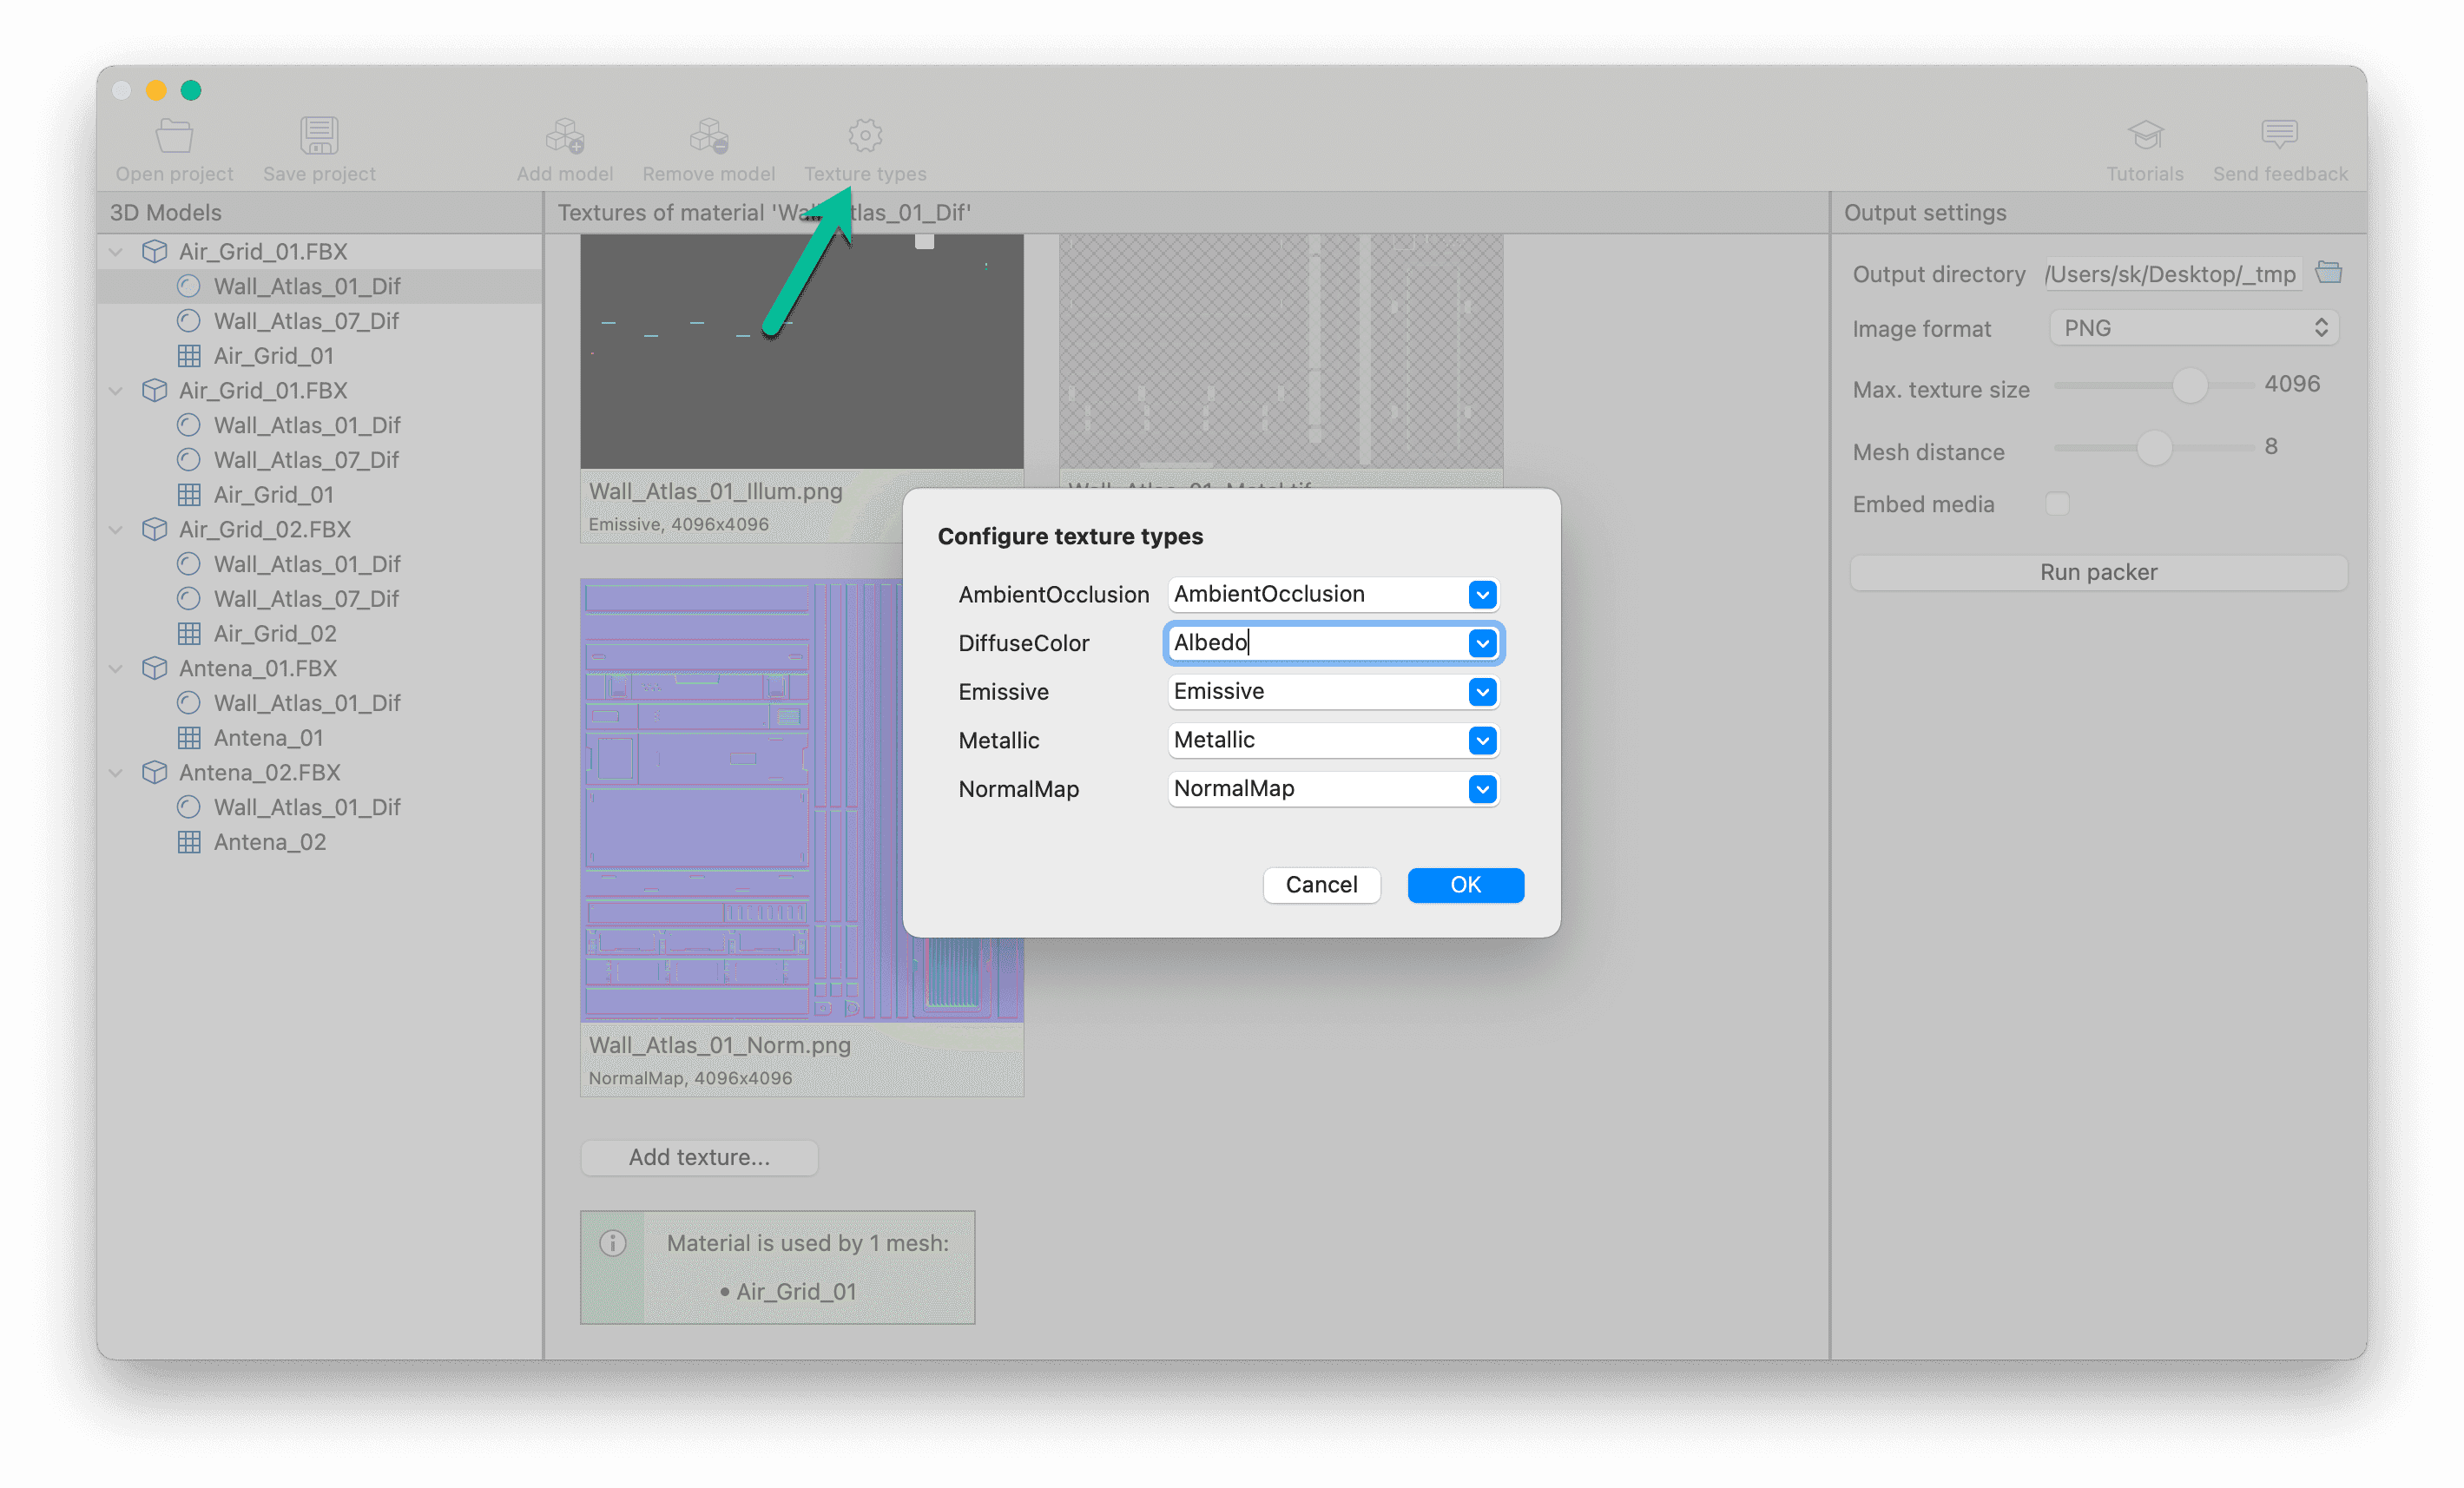
TexturePacker3D extracts channel names from the .fbx file and also has several pre-configured names. You can configure the assignment from model channel names to TexturePacker's channel names in Texture types. You can also rename the pre-defined texture channel names here.

The left side of each entry is the channel name as it is defined in the .fbx file, the right side is the texture channel that TexturePacker3D uses.
Use this mapping to combine channels. E.g. some models configure a "base color", some use "albedo" and some call it "diffuse color". Mapping all of them to "albedo" allows these textures to be packed together.
You can also mix different channels. E.g. if "normal map" is used by one model and "emissive" by another, these channels will not be packed on the same texture by default. TexturePacker3D would create two separate textures. But you can override this by mapping both types to "emissive+normal". This only works if there is no model that uses both channels.
Packing your models
Set the Output directory. TexturePacker3D stores the models and texture files in this directory. Make sure that it does not contain other files — especially not the textures directory. These files are removed when a new packing process is started.
Select the image format. We currently only support PNG and JPG — but have plans to support other formats such as TGA, TIFF and hardware compression formats like DDS and PVR. Please let us know if you need support for other formats.
Set the maximum size of an atlas texture.
The mesh distance is the minimum distance between meshes. It is automatically filled with pixels extended from the mesh border to prevent artifacts.
Embed media embeds the textures into the .fbx file. Set this only if you export a single model. Setting it for multiple files would duplicate the atlas textures into each file and increase the memory usage instead of reducing it.
Finally: Press Run packer to build the atlases from the models.
The output
In the output directory, you'll find the models with the updated meshes and texture paths and a folder called textures containing all the textures.
Texture names consist of the texture number followed by the channel type.
Some textures might start with the letter u. This means that TexturePacker3D did not process that file and simply copied it ('u' stands for unprocessed).
The most likely reason for this is that some UV coordinates are outside the 0..1 of the texture. In this case, TexturePacker3D assumes that this texture is used for tiling - which is not (yet) supported.
Enhancements planned for future versions
Here are some features we've on our list for future releases. Please let us know what else you need and which one are important for you:
- Per texture scaling — scale down complete textures for game development
- Per mesh scaling — scale down only the meshes that allow using a lower texture quality
- Mesh splitting — (automatically) split meshes to reduce texture size and increase packing ratio
- Combining texture channels into a texture — combine grayscale textures (masks, opacity, factors) into color channels
Workflows
Combine 3d models textures into texture atlases
Prerequisite
You have several 3d models that use separate textures.
Goal
Combine the single texture files into shared texture atlases.
Why should you do that?
Using atlas textures saves memory and increases the draw performance by reducing the number of texture switches when rendering the scene.
Steps for this workflow
- Add the model(s) to TexturePacker 3D by dropping it onto the left panel.
- Configure textures if they are not all properly assigned in the model.
- Configure the output path
- Set the maximum texture size
- Click Run packer
Consolidate and optimize your 3d models
Prerequisite
You have 1 3d model that use separate textures.
Goal
Combine the single texture files into shared texture atlases.
Why should you do that?
Using atlas textures saves memory and increases the draw performance by reducing the number of texture switches when rendering the scene.
Steps for this workflow
- Add the model(s) to TexturePacker 3D by dropping it onto the left panel.
- Configure textures if they are not all properly assigned in the model.
- Configure the output path
- Set the maximum texture size
- Click Run packer
Extract 3d models from existing atlases
Prerequisite
You have one or more 3d models that use atlas textures. The atlas contains additional textures that are not used by your models.
Goal
Reduce the textures to only contain the relevant parts used by your models.
Why should you do that?
Unused texture parts consume runtime memory and increase your application size.
Steps for this workflow
- Add the model(s) to TexturePacker 3D by dropping it onto the left panel.
- Configure textures if they are not all properly assigned in the model.
- Configure the output path
- Set the maximum texture size
- Click Run packer