How to translate your React app with react-i18next

What you are going to learn
Is this tutorial, you are going to learn how to …
The full source code for this tutorial is available on GitHub.
Set up your first React app (optional)
We're setting up a small React application to learn how localization works. Of course, you can skip this section if you want to use your own application for that.
If you haven't already installed the create-react-app scripts, install them using npm:
npm install -g create-react-appWith the following lines you create an empty react app and start it:
npx create-react-app react-i18next-translation-example
cd react-i18next-translation-example
npm start
The last line automatically opens the URL http://localhost:3000 and displays the welcome message rendered by the created app.
Add internationalization with react-i18next
As we want to use react-i18next to localize our application, add it to you project:
npm install i18next react-i18nextThe file src/index.js renders the App react element into your DOM:
ReactDOM.render(
    <React.StrictMode>
        <App/>
    </React.StrictMode>,
    document.getElementById('root')
);
To make the i18next configuration available in all our components we have to wrap the App component
with I18nextProvider. It expects an i18next instance which must be initialized before:
import React from 'react';
import ReactDOM from 'react-dom/client';
import './index.css';
import App from './App';
import {I18nextProvider} from "react-i18next";
import i18next from "i18next";

i18next.init({
    interpolation: { escapeValue: false },  // React already does escaping
});

const root = ReactDOM.createRoot(document.getElementById('root'));
root.render(
  <React.StrictMode>
      <I18nextProvider i18n={i18next}>
        <App />
      </I18nextProvider>
  </React.StrictMode>
);
Using translations in your app
You can use translations in your function components and High Order Components (HOC). Both works similar, but require a slightly different set-up.
Using translations in function components
To use translations, you have to call useTranslation() which returns the translation function t().
The first parameter to that t() function is the ID of the string to display.
The easiest way is to just wrap the original text e.g. t('Hello World!'). However, I don't recomment
doing this because it does not give the translator much context. It's also impossible to change the
representation of the string depending on its use. E.g. a translation might need to be shortened
when used as a table header compared to the use as a label.
So the better way to do this is to use IDs - e.g. t('app.title'). With this, the translator now has
more context - it's used as the title of the app.
You can also pass a context (a.k.a. namespace) name to useTranslation() to organize your messages.
Use useTranslation('main') to specify a single context, or useTranslation(['main','common']) if you want
to use translations from multiple contexts.
Apply these changes to your App.js file:
import './App.css';
import {useTranslation} from "react-i18next";

function App() {

    const {t} = useTranslation("common");

    return (
        <div className="App">
            <h1>{t('app.title')}</h1>
        </div>
    );
}

export default App;
Using translations in High-Order-Components
Some more work is required if you want to use High-Order-Components (HOC).
The t() function is available through the props. But you also have to
wrap your component with withTranslation() to get access to the translation methods:
import './App.css';
import {Component} from "react";
import {withTranslation} from "react-i18next";

class HighOrderComponentBody extends Component {
    render() {
        const { t } = this.props;
        return (
            <p>{t('hoc.text')}</p>
        )
    }
}
export const HighOrderComponent = withTranslation('common')(HighOrderComponentBody)
Creating the translation files
Create a new folder in the source directory called translations and make folders for each language your want to translate your app to. Use the language codes for these subdirectories. e.g. en and de.
Inside create 2 empty JSON files. Use the name common.json for these files.
This is the same name as the namespace you passed to the useTranslation() or withTranslation('common')
function.
{}{}Editing translation files
You could edit these files in a standard text editor — it's JSON and not really complicated, right?
When starting with a handful of translations, you are absolutely right. But over time, you add, remove and rename translations, and this is when the translation files get our of sync. There are some IDs in the German file that are not in the English and vice versa... Using a diff tool to get them back in sync is not an option because every line contains changes.
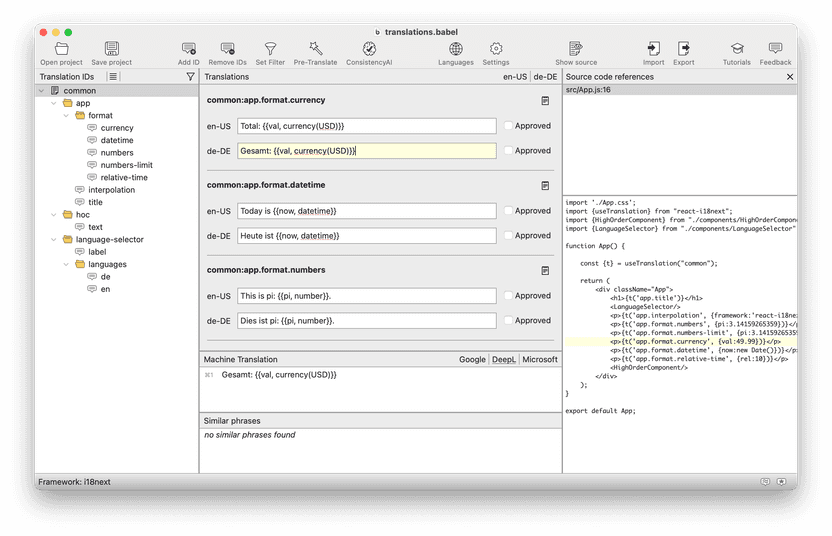
This is why we've created BabelEdit — changes are always synced across all languages. You can use machine translation to preview your app in different languages. You can add comments for translators and many more features. Here's a screenshot of what it looks like:

BabelEdit is available as a free trial. After that, it costs a bit of money — but you only have to pay once since it's a perpetual license and no subscription.
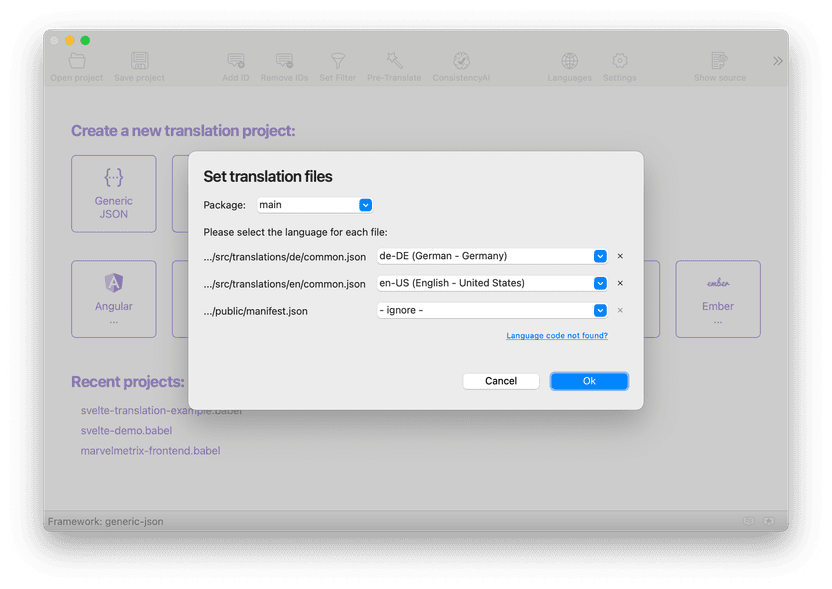
After installation, drag & drop your project folder onto BabelEdit. It automatically detects the project type (i18next) and also finds the existing translation files.

Now add your first translation ID: Use the Add ID button in the toolbar and
enter common:app.title.
common is the namespace, app.title the ID.
BabelEdit now asks you for your primary language. This is the language used as the source for machine translation and other features. Select en-US.
In the center view, enter "react-i18next translation example" in the en-US labeled text field.
| ID | Text |
|---|---|
common:app.title | react-i18next translation example. |
Click on Save in the toolbar. BabelEdit first asks you for the name of the project file — enter translations.babel and save it to the root folder of your project. It contains the project configuration and comments. Save also updates the JSON files which are now ready for use in your source code!
Loading translation files
Now that you have the translation files, it's time to load them into the application.
For the simplicity of this tutorial, we directly import the translations in the the src/index.js file. This is ok as long as you don't have too many translations and languages. If this is the case, you should switch to dynamic loading of the files.
...
import {I18nextProvider} from "react-i18next";
import i18next from "i18next";

import common_de from "./translations/de/common.json";
import common_en from "./translations/en/common.json";

i18next.init({
    interpolation: { escapeValue: false },  // React already does escaping
    lng: 'en',                              // language to use
    resources: {
        en: {
            common: common_en               // 'common' is our custom namespace
        },
        de: {
            common: common_de
        },
    },
});

const root = ReactDOM.createRoot(document.getElementById('root'));
...
Parameters, interpolation and formatting
The t() function also accepts a 2nd parameter: A javascript object with parameters that i18next uses
to replace parts of the translation strings.
    <div className="App">
        <h1>{t('app.title')}</h1>
            <p>{t('app.interpolation', {framework:'react-i18next'})}</p>
            <p>{t('app.format.numbers', {pi:3.14159265359})}</p>
            <p>{t('app.format.numbers-limit', {pi:3.14159265359})}</p>
            <p>{t('app.format.currency', {val:49.99})}</p>
            <p>{t('app.format.datetime', {now:new Date()})}</p>
            <p>{t('app.format.relative-time', {rel:10})}</p>
        <HighOrderComponent/>
    </div>
In BabelEdit, add a new ID:
| ID | Value |
|---|---|
common:app.interpolation | This translation example is using {{framework}}. |
Hint: If you've already selected translations in the left panel,
adding a new ID automatically suggests the prefix of that ID, so you don't have to
type it multiple times. E.g. if you selected common:app.title, adding a new ID suggests common:app.
and you only have to complete the text.
| ID | Text |
|---|---|
common:app.format.numbers | This is pi: {{pi, number}}. |
common:app.format.numbers-limit | This is pi: {{pi, number(minimumFractionDigits: 7) }}. |
common:app.format.curreny | Total: {{val, currency(USD)}} |
common:app.format.datetime | Today is {{now, datetime}} |
common:app.format.relative-time | Something wonderful happens {{rel, relativetime}}! |
Changing languages
So far, we've not yet switched the language. For this, let's add a language switcher component:
To automatically select a language, you might want to use one of the language detector plugins
listed on this page. For our demo app we just add two buttons and trigger the language change manually.
Add the following lines to the render() function in App.js:
import {useTranslation} from "react-i18next";
export const LanguageSelector = () =>
{
const [t, i18n] = useTranslation('common');
return <div>
<span>{t('language-selector.label')} </span>
<button onClick={() => i18n.changeLanguage('de')}>{t('language-selector.languages.de')}</button>
<button onClick={() => i18n.changeLanguage('en')}>{t('language-selector.languages.en')}</button>
</div>
}Use the component inside your App.js:
import './App.css';
import {useTranslation} from "react-i18next";
import {LanguageSelector} from "./components/LanguageSelector";

...

function App() {
    const {t} = useTranslation("common");
    return (
        <div className="App">
            <h1>{t('app.title')}</h1>
            <LanguageSelector/>
            ...
Add these entries to BabelEdit:
| ID | Text |
|---|---|
common:language-selector.label | Select your language: |
common:language-selector.languages.de | German |
common:language-selector.languages.de | English |
Switching should now work — however, the files in the de/common.json are still empty. The result is that you don't see anything on the screen.
This is, of course, not what you want. Start by opening the Settings in BabelEdit's toolbar. Remove the checkmark from Editor -> Save empty translations.
After saving in BabelEdit, you should now see the IDs instead of the translation text.
Fast previews with machine translation
To get a real preview, what your app looks like in German, use the Pre-Translate feature in BabelEdit:
Select the common in the left tree view to select all translations. Now click the magic wand icon in the toolbar (Pre-Translate).
BabelEdit currently offers 3 translation services. Google Translate is the default. For English to German translation, we recommend using DeepL since it usually delivers a better translation quality.
Save and test the app.

Conclusion
Enhancing your React app with translations is simple with react-i18next. By using BabelEdit to manage your translation files, the process becomes even smoother. It also enables you to preview your app in various languages throughout development.
The full source code for this tutorial is available on GitHub.