TexturePacker GUI Documentation
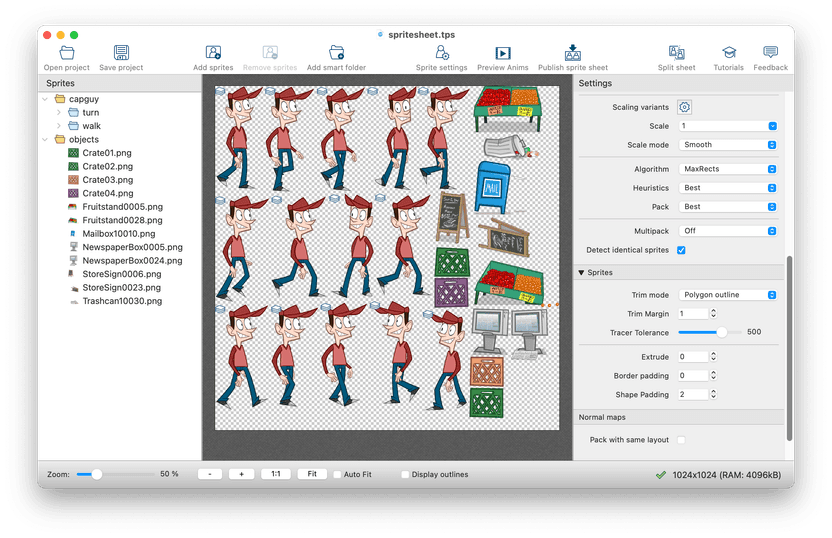
Tool Bar
- Open project
- Open an existing .tps file.
- Save project
- Save the current project to disk. Creates a .tps file.
- Add sprites
- Add new sprites to the sheet.
- Remove sprites
- Removes selected sprite or folder from your sprite sheet.
- Add smart folder
- Add a folder containing sprites.
- Sprite settings
- Edit sprite pivot points and borders for 9-patch scaling.
- Animation preview
- Show an animation preview for the currently selected sprites.
- Publish sprite sheet
- Publish current sprite sheet. Also available from the menu as 'Force Publish'
- Split sheet
- Splits a sprite sheet into sprites.
- Tutorial
- Opens TexturePacker's tutorial page in your web browser.
Sprites Panel
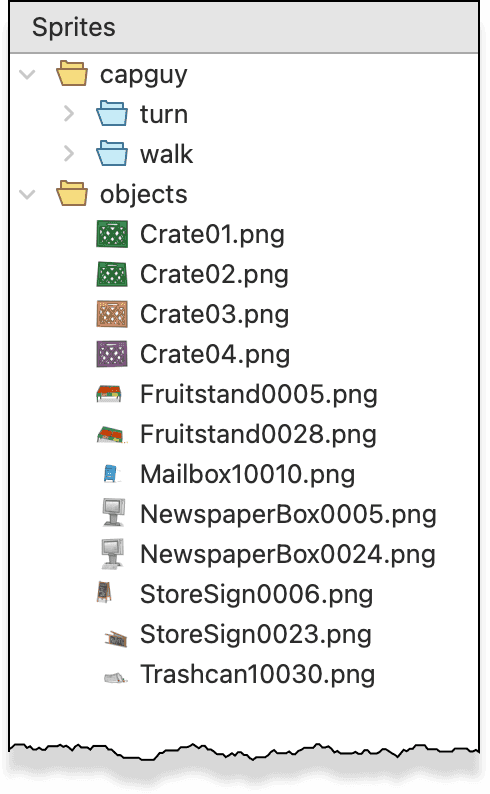
Just drag and drop your sprites into the Sprites Panel on the left side to load them into TexturePacker.
Supported image formats are: astc, basis, bmp, dds, gif, ico, jpeg, jpg, ktx, ktx2, pbm, pgm, pkm, png, ppm, psd, pvr, pvr.ccz, pvr.gz, pvrtc, svg, svgz, tga, tif, tiff, webp, xbm, xpm
You can also drag and drop complete folders of sprites onto the panel. TexturePacker imports all images inside that folder and uses sub-folder names as part of the final sprite name.
Any changes to the folder structure are synced in TexturePacker as soon as you re-enter the application.
Yellow folders are smart folders you've added to the project. They can be removed by pressing the Delete key.
Blue folders are folders inside a smart folder. They can only be removed via Finder/Explorer.
You can delete sprites from the panel only if you added them as individual sprites.
Preview Panel
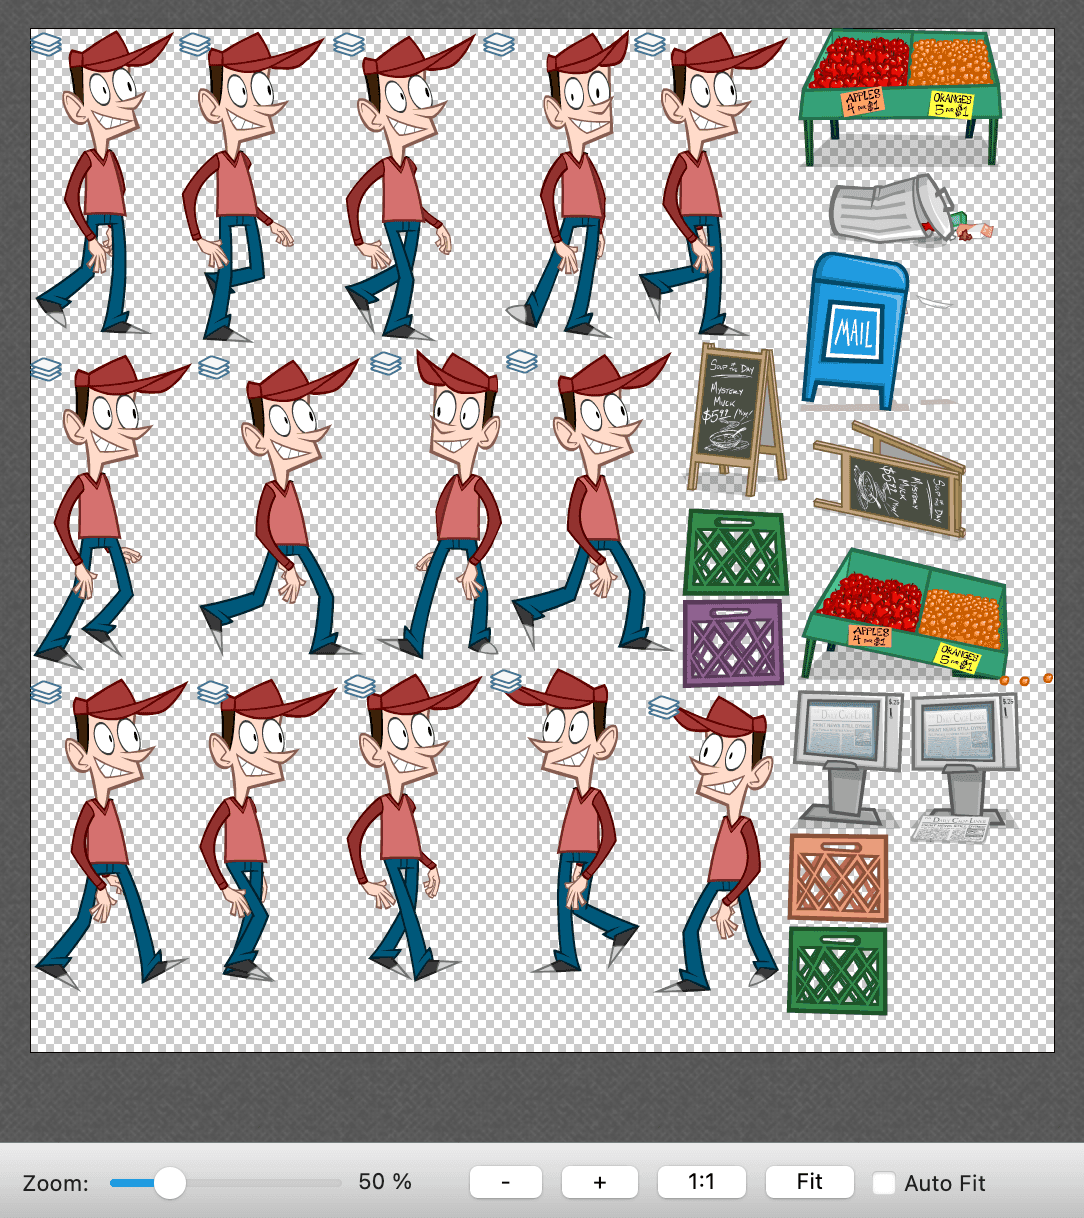
After adding sprites to TexturePacker, you can see your sprite sheet in the Preview Panel. The sprites will be aligned on the sprite sheet based on the chosen algorithm set in Layout -> Algorithm. Almost all the various TexturePacker options are updated in real-time, so you can immediately see the changes made to your sprite sheet.
Zoom Panel
With the Zoom Panel at the bottom of the window you can adjust the scaling factor of your Sprite Sheet Preview:
Use the slider to zoom in or out continuously.
Click - or + to zoom in predefined steps. 1:1 sets zoom factor to 100%.
To view your sprite sheet completely inside the TexturePacker window use Fit .
With the Display outlines checkbox you can visualize the sprite outlines and triangulation TexturePacker has calculated for your sprites. This makes sense if you've selected Trim mode Polygon outlines.
Settings Panel
On the right-hand side of TexturePacker you have numerous options to optimize your sprite sheet. If you open TexturePacker for the first time, you will only see the most important options. View all available options by clicking Advanced settings on the respective Settings Panel.
The settings to optimize your sprite sheet are described in detail in Texture Settings.
Pivot point editor
The pivot point (or anchor point) specifies the position inside the sprite that is used as a center for rotation and placement.
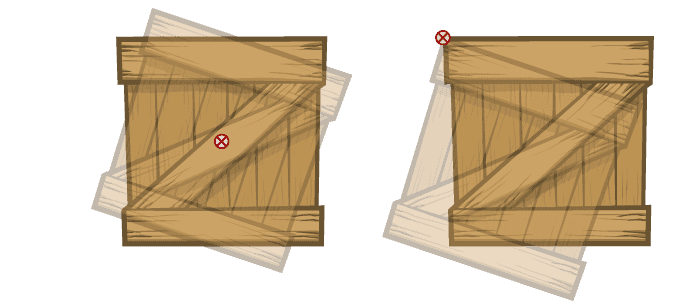
The pivot point and 9-patch editor are available from the toolbar: Sprite settings. The editor is only available for game development frameworks that are able to work with the settings. Such as Unity and cocos2d-x.
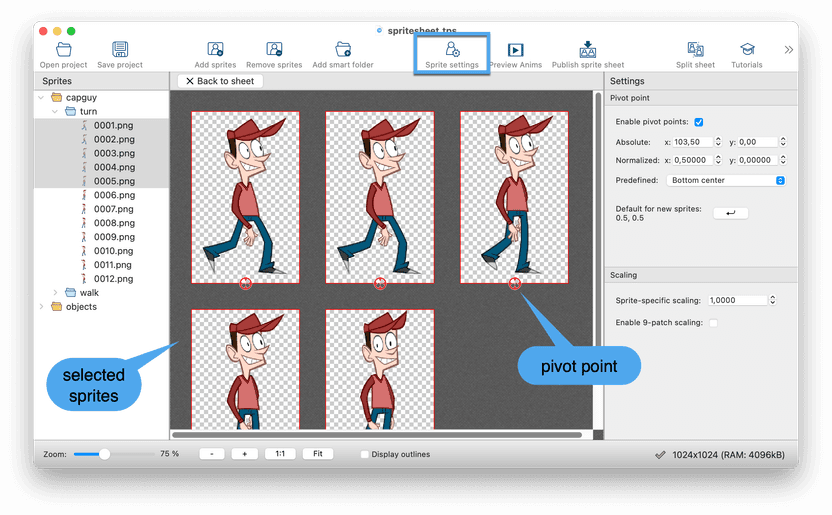
The editor displays sprites selected in the Sprites panel. You can select multiple sprites in the center view to adjust the pivot points of all of them.
The panel on the right gives you number controls to set the exact pixel coordinates of the pivot point — both in absolute and relative coordinates. You can also set it to predefined positions such as center, top left etc. You can also define the default pivot point for new sprites.
Multipack
Multipack allows you to pack multiple sprite sheets in a single TexturePacker project. You can either place the sprites on the sheets manually — or use the fully automated mode.
Auto Multipack Mode
The auto multipack mode was designed to pack sprites into the minimum number of atlases possible. For this, TexturePacker automatically decides where to place a sprite and how many sprite sheets to create.
While this approach works well for frameworks that have direct support for it, such as cocos2d-x or Phaser, it may not be suitable for frameworks like Unity. This is because Unity tracks sprites per texture, and using the auto multipack mode may cause the distribution of sprites to change when a new sprite is added. This breaks the sprite references in Unity.
There are also some disadvantages to using the auto multipack mode when it comes to optimizing PNG compression. For example, the quality of PNG-8 images can be improved by packing images with similar colors into the same atlas. Additionally, it can be difficult to optimize performance by reducing draw calls using this mode, as it requires knowledge of the context in which a sprite is used (e.g. background, foreground, UI, etc.). This is something that a tool cannot do automatically.
The Manual Multipack mode
The manual multipack mode gives you complete control over which sprites are packed onto which atlas. To enable this mode:
In the Advanced settings, go to Layout/Multipack and set it to Manual. Alternatively, you can find this option under Packing in the Basic settings.
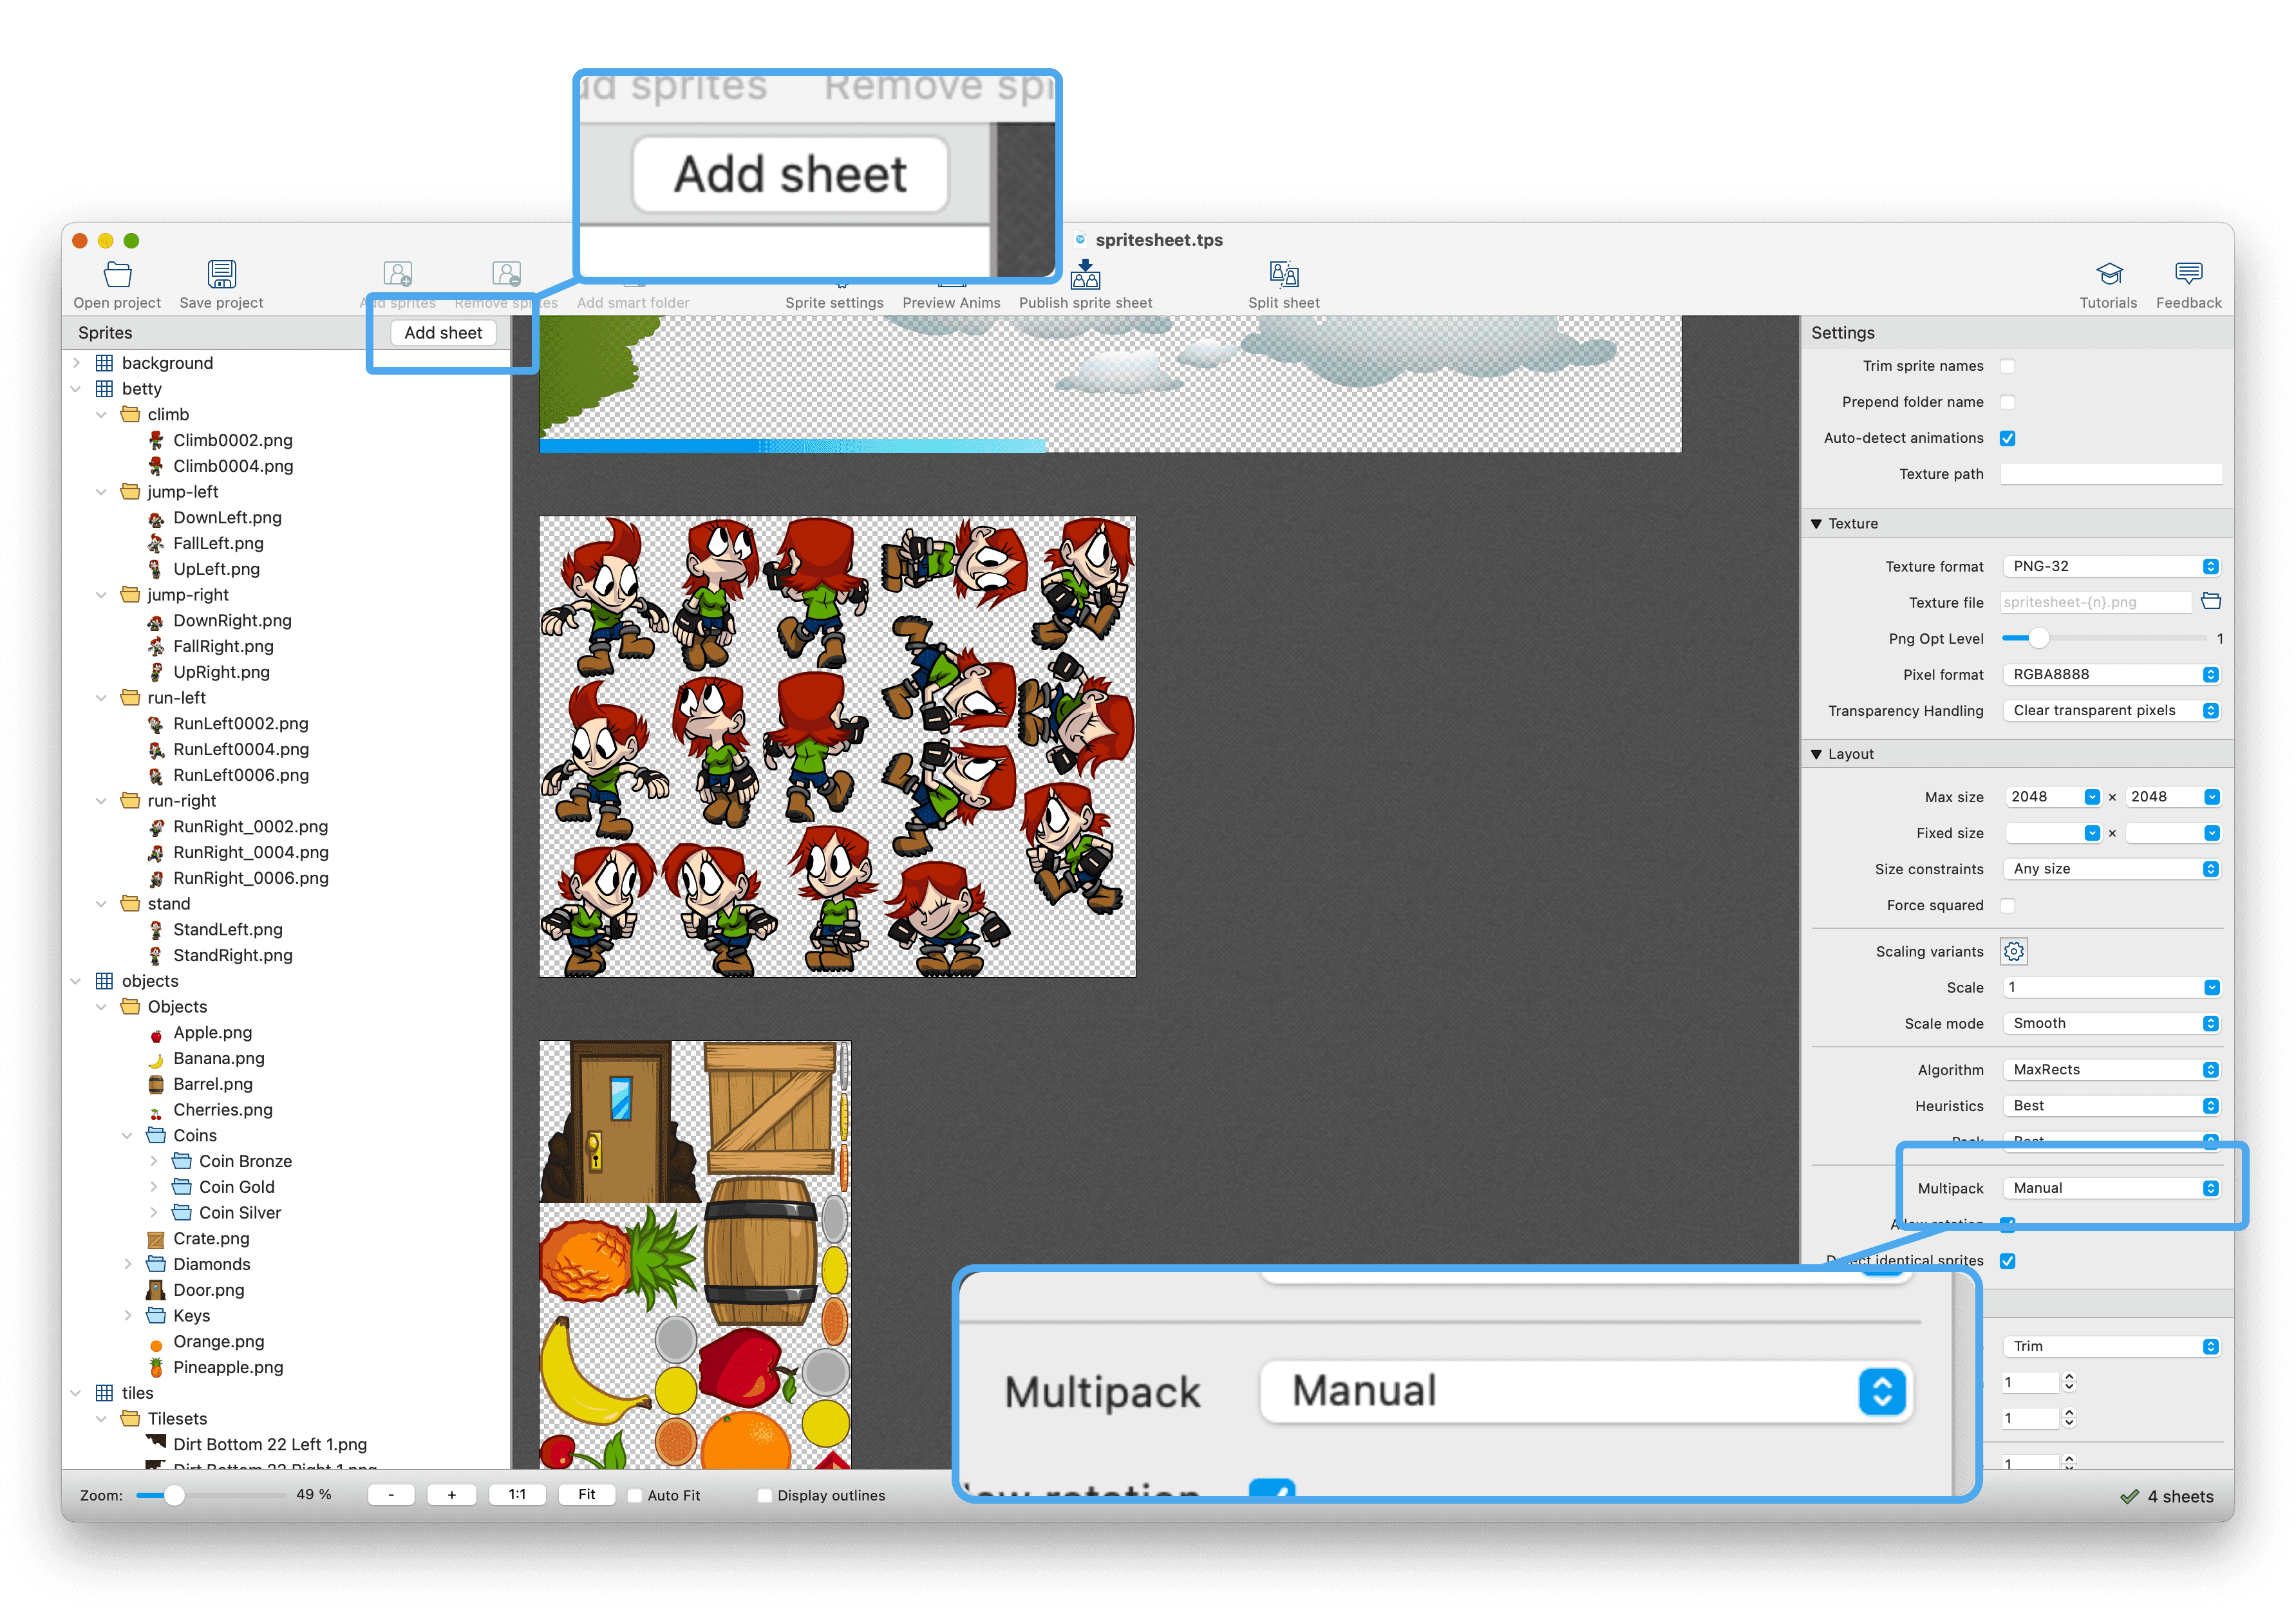
An "Add sheet" button will appear above the sprites panel on the left side of the TexturePacker window. You can use this button to add additional atlases to the project.
If you have already added sprites to the project, they will be moved to a sprite sheet called "default". You can rename this sheet to whatever you prefer.
Adding sprites
There are several ways to add more sprites to your project:
- Drag and drop new sprites onto a sprite sheet item in the tree view
- Drag and drop a folder (we call it a smart folder) containing sprites onto a sprite sheet item in the tree view
- Select a sprite sheet in the tree view and use the Add sprites button in the toolbar
- Select a sprite sheet in the tree view and use the Add smart folder button in the toolbar
Smart folders allow TexturePacker to automatically add all sprites in the folder to the sheet. When a change is made to the folder, TexturePacker will automatically update the sheet to reflect these changes. E.g. by adding, removing or renaming sprites.
TexturePacker by default does not include the top level folder name in the sprite name. Just sub-folders are used to
prefix the sprite name. E.g. in a folder character/walk/walk_01.png would be added as walk/walk_01.png by default.
If you want to include the folder name, enable Prepend folder name (right panel, in the Data section).
Moving sprites between sheets
You can move sprites or smart folders between sheets by dragging and dropping them to other sheets in the tree view. Currently, it is not possible to drag and drop onto the center view or between sprite sheets in the center. This feature may be added in a future update.
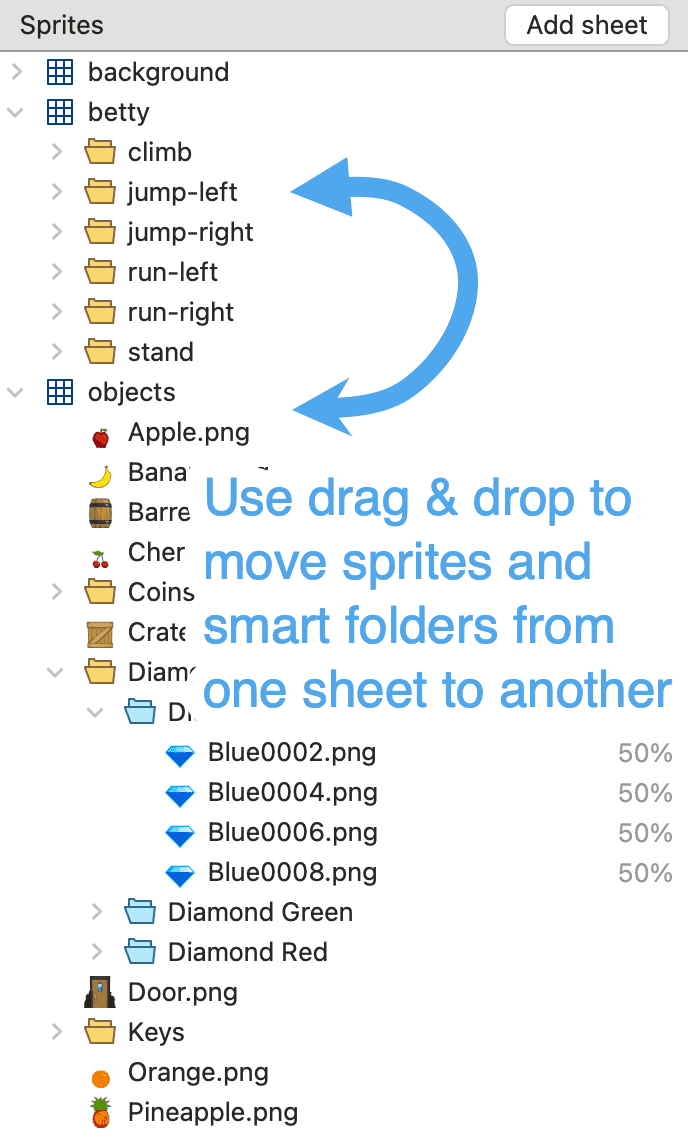
Note that only top-level items can be moved, such as sprites added directly to a sheet or the entire smart folder. It is not possible to move individual sprites inside a smart folder.
This may seem like a limitation, but it is easy to work around. For example, if you have a character folder with sub-folders for character/walk/..., character/stand/..., character/idle/..., etc., simply add the sub-folders to the sheet instead.
When identical sprites (same file) are added to multiple sheets, they are linked inside TexturePacker. This means that any changes made to pivot points or scaling will be applied to all sprites that originate from the same file.
Ideas for organizing sprites
Here are some ideas for organizing your sprites using the new feature:
- Keep all sprites in one project file instead of using multiple project files
- Group animations by character or level on a sheet
- Group sprites by color to improve PNG-8 compression and reduce the game's download size.
- Group sprites by layers (background, characters, foreground, UI) to improve performance by reducing draw calls.
Using device-specific scaling
When you enable scaling variants in Layout / Scaling Variants on the right panel, you can optimize sprites for different display sizes and resolutions, such as desktop computers, tablets, and mobile phones. This allows you to ensure that the sprites are displayed correctly and clearly on different devices, while at the same time reducing the game's download size on mobile devices.
In your game, you can use the screen size to determine which sprite sheet set to load.
Publishing the sprite sheets
After enabling multipack (manual or automatic), TexturePacker prompts you to add a {n} placeholder to your
sprite sheet file names. The {n} placeholder is replaced by the sprite sheet number for automatic multipack,
or by the sprite sheet name for manual multipack.
For example, if your sprite sheet file name is .../sheet-{n}.png and you have
sheets called level1 and background, the sprite
sheets are written as sheet-level1.png and sheet-background.png. If you only want the sprite sheet name, simply use
{n}.png.
You can also use the {n} placeholder as a folder name, along with the {v} placeholder for scaling variants.
For example, using .../{n}/{v}.png would create a folder for each sheet and put the scaling variants inside.
For example, you might have .../background/mobile.png or .../level1/2x.png, depending on your sheet names and
scaling variant names.
A click on Publish sprite sheet packs and saves all sprite sheets.
Sprite sheet setting
All sprite sheets have the same settings for size, packing mode, file type, and other options. Because of this, setting up a project is usually straightforward.
Currently, you will still need to create two projects in TexturePacker if you want to export the sheet in different image formats such as JPG for background art and PNG for sprites.
To publish the sprite sheet in different image formats (e.g. WebP, PNG, PVR), the easiest way is to set up a main project file and use the command line client of TexturePacker to override the output format parameters. You can put this in a simple script file and update all sprite sheets with a single start of that script.
E.g. to publish the main.tps sheet as WebP you can use:
TexturePacker main.tps --sheet ".../{n}.webp" --texture-format webp9-patch editor
The 9-patch editor is also part of the Sprite settings. It's only available for some game development frameworks.
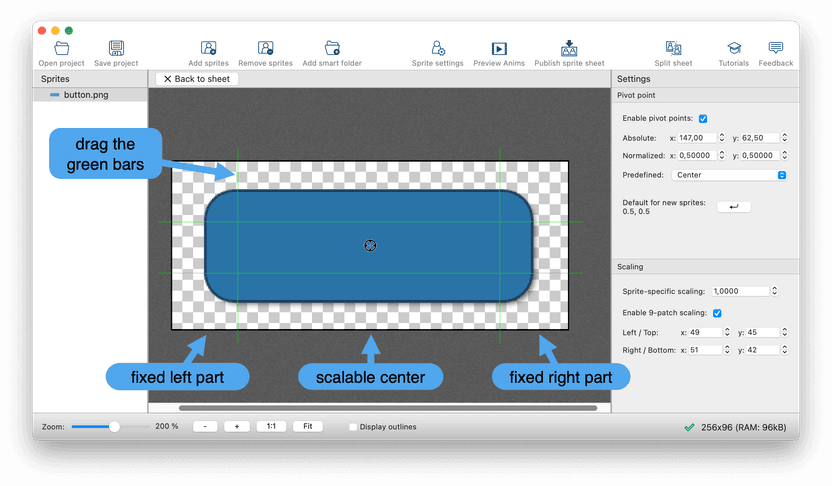
Select the sprites you want to edit and check the Enable 9-patch scaling.
Green bars appear on the sprite. Drag them with the mouse to split the sprite into 3 zones horizontally and vertically. The center zone is the part that scales, the border zones are fixed in their size. You can also use the number controls on the right side to enter exact values for the borders.
Drag both green lines to one border to disable scaling in that direction (3-patch).
Animation preview
The animation preview is a small floating window, activated by pressing the Anim Preview toolbar button.
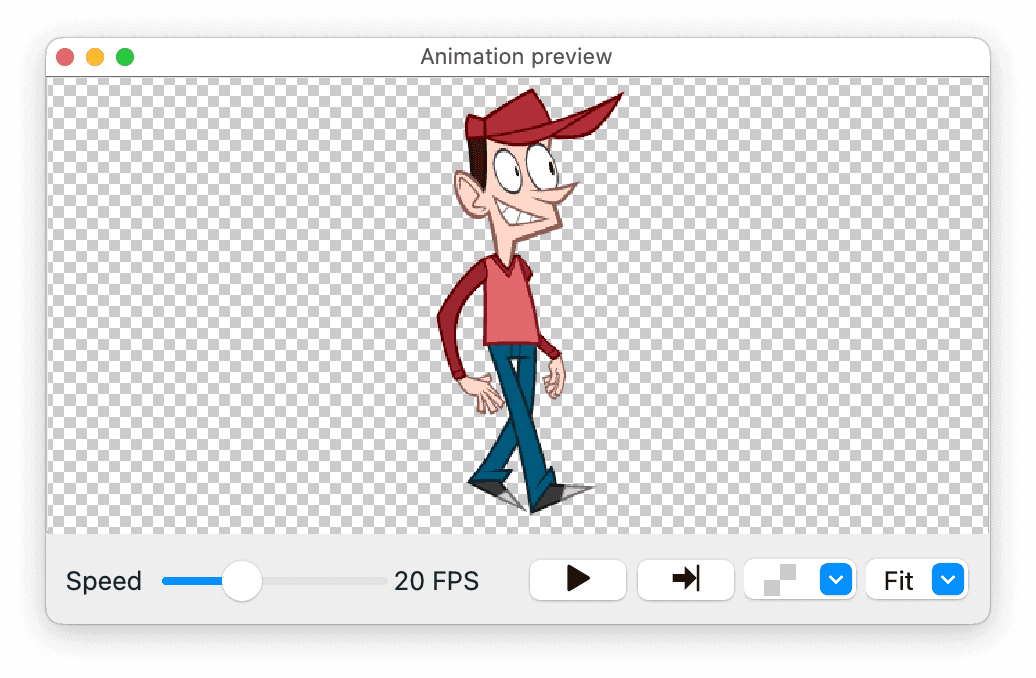
Select sprites in the Sprites panel to add them to the animation loop.
Use the controls at the bottom of the window to control the playback speed and looping.
You can also set the background color for the animation.
The animation previewer updates in real time. This is very useful if you are adapting pivot points in the Sprite settings.