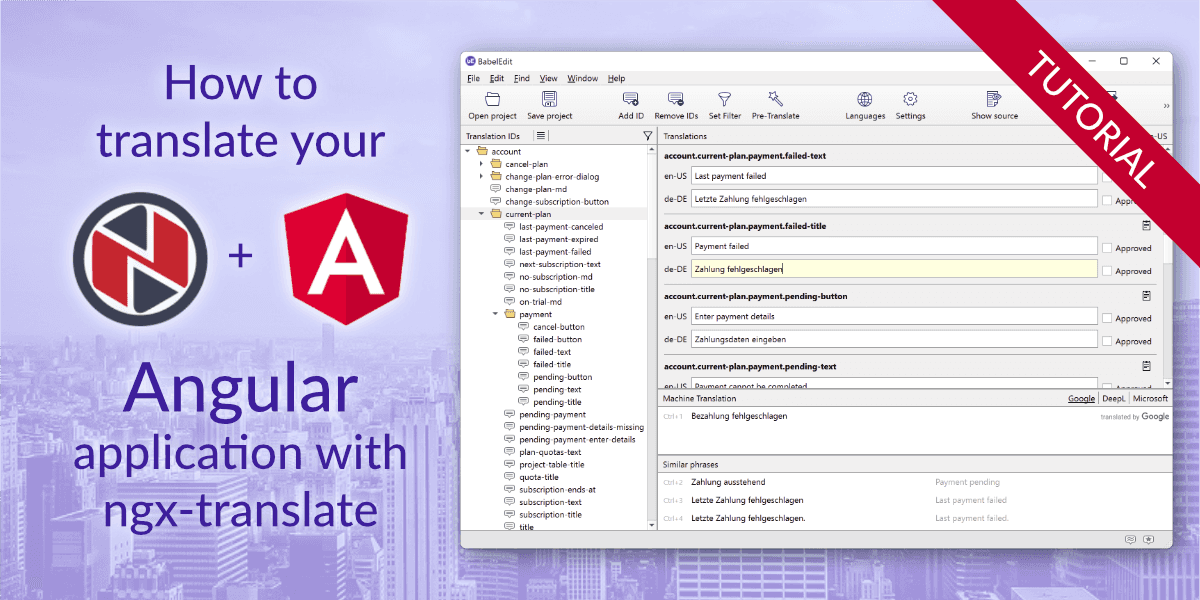
How to translate your Angular app with ngx-translate
Who is this tutorial for?
This tutorial is for Angular developers who want to translate their application into multiple languages. It covers Angular 8 - 16 together with the corresponding ngx-translate versions.
If you are, for some reason, still using an older Angular version, please take a look at the following tutorials:
- How to translate your Angular 7 app with ngx-translate
- How to translate your Angular 6 app with ngx-translate
If you are not sure which translation method to use with your Angular application, you might take a look at our other tutorials:
How to use ngx-translate with Angular
This tutorial guides you through the following steps
- Add ngx-translate to your Angular application
- Set up the TranslateService in your app.module.ts
- Create your main language translation files (in JSON format)
- Translate your JSON files to other languages
- Use translations in your templates and code
- Switch languages at runtime
- Extract translations form your source code
- Pluralization: Format complex translation messages with ICU syntax
- Prevent glitches in your app
Optional: Create an Angular project
For this tutorial you'll start with a simple demo application. I assume that you already have basic knowledge of Angular... You can, of course, skip this step and use your existing project.
Create an empty new project:
npx -p @angular/cli ng new translation-demo --style=scss --routing=falseThis creates a new Angular project called translation-demo, uses scss for style
sheets and does not include a router.
I do not install the ng command globally. Why? I have
several projects with different Angular versions and other frameworks on my computer.
Adding everything as global really is a pain with all the dependencies, different node version,
etc.
The only drawback is that you have to call npm run ng instead of just ng - but I think that
this is acceptable.
On a Mac or Linux system you can set an alias - with this, you can call ng directly
while you inside your project folder:
alias ng="npm run ng"Finally, start the new project:
cd translation-demo
ng serve
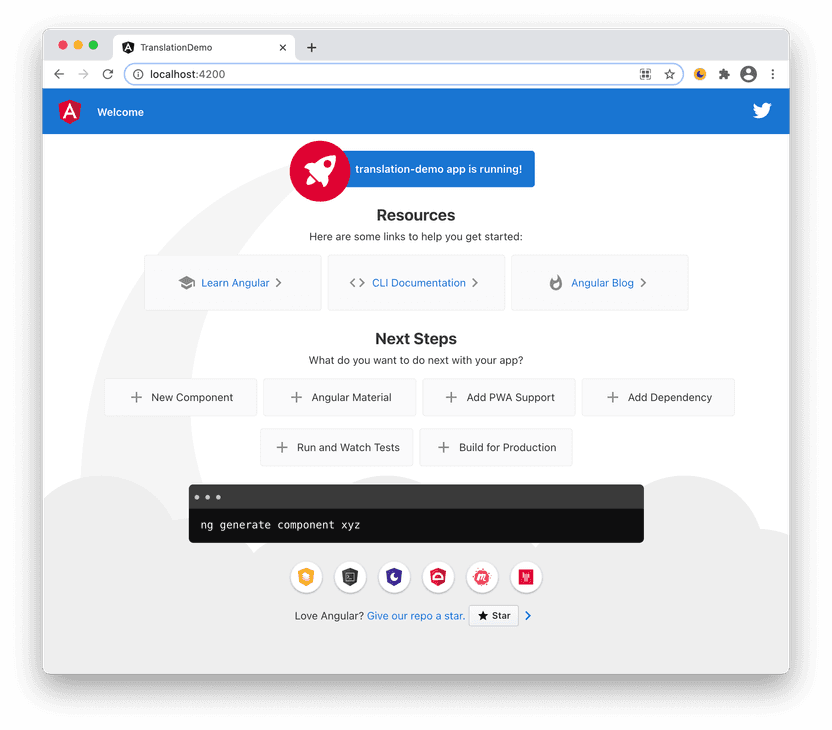
Open your browser and visit the following URL: http://localhost:4200. You should see something similar to this:
Here's the step-by-step guide on how to use NGX-Translate with Angular:
Step 1: Add ngx-translate your Angular application
Enter the following line in the terminal:
npm install @ngx-translate/core @ngx-translate/http-loaderThe @ngx-translate/core contains the core routines for the translation: The TranslateService, the translate
pipe and more.
The @ngx-translate/http-loader loads the translation files dynamically from your webserver.
Step 2: Set up the TranslateModule and TranslateService
Start by initializing the TranslateModule in your app.module.ts. The required changes to that file are highlighted in blue:
import { NgModule } from '@angular/core';
import { BrowserModule } from '@angular/platform-browser';

import { AppComponent } from './app.component';

// import ngx-translate and the http loader
import {TranslateLoader, TranslateModule} from '@ngx-translate/core';
import {TranslateHttpLoader} from '@ngx-translate/http-loader';
import {HttpClient, HttpClientModule} from '@angular/common/http';

@NgModule({
    declarations: [
        AppComponent
    ],
    imports: [
        BrowserModule,

        // ngx-translate and the loader module
        HttpClientModule,
        TranslateModule.forRoot({
            loader: {
                provide: TranslateLoader,
                useFactory: HttpLoaderFactory,
                deps: [HttpClient]
            }
        })
    ],
    providers: [],
    bootstrap: [AppComponent]
})
export class AppModule { }

// required for AOT compilation
export function HttpLoaderFactory(http: HttpClient): TranslateHttpLoader {
    return new TranslateHttpLoader(http);
}
The HttpLoaderFactory function is required for AOT (ahead of time) compilation in your project.
Now switch to app.component.ts :
import { Component } from '@angular/core';
import {TranslateService} from "@ngx-translate/core";

@Component({
  selector: 'app-root',
  templateUrl: './app.component.html',
  styleUrls: ['./app.component.scss']
})
export class AppComponent {
  constructor(private translate: TranslateService) {
    translate.setDefaultLang('en');
    translate.use('en');
  }
}
Add TranslateService to the constructor parameters to make it available in the component.
Set the default language of your
application using translate.setDefaultLang('en').
The default language is the fall-back language, that is used if a translation can not be found.
Set the current language to English by calling translate.use('en').
You'll learn more about switch languages at runtime later in this tutorial.
Let's also clean up app.component.html with this simple text:
<div>
    <h1>Translation demo</h1>
    <p>This is a simple demonstration app for ngx-translate</p>
</div>
Reloading the app seems to work, but a look at the browser console shows the following error:
Failed to load resource: the server responded with a status of 404 (Not Found) http://localhost:4200/assets/i18n/en.json
This is because the HttpLoader tries to load the default language from /assets/i18n/en.json from the server —
and we've not yet created that file.
Step 3: Create your JSON translation files
Start with empty files
Each language is stored in a separate files. Let's create the translation files for English, French and German:
- assets/i18n/de.json
- assets/i18n/en.json
- assets/i18n/fr.json
For now, create files with the following content, which makes the files valid but empty:
{}Get BabelEdit
To edit the translation files, download BabelEdit - you see how it'll make your life much easier.
BabelEdit is available for Windows, macOS and Linux. It's a translation editor running locally on your computer - no subscription required.
After the installation, drag & drop the i18n folder onto BabelEdit:
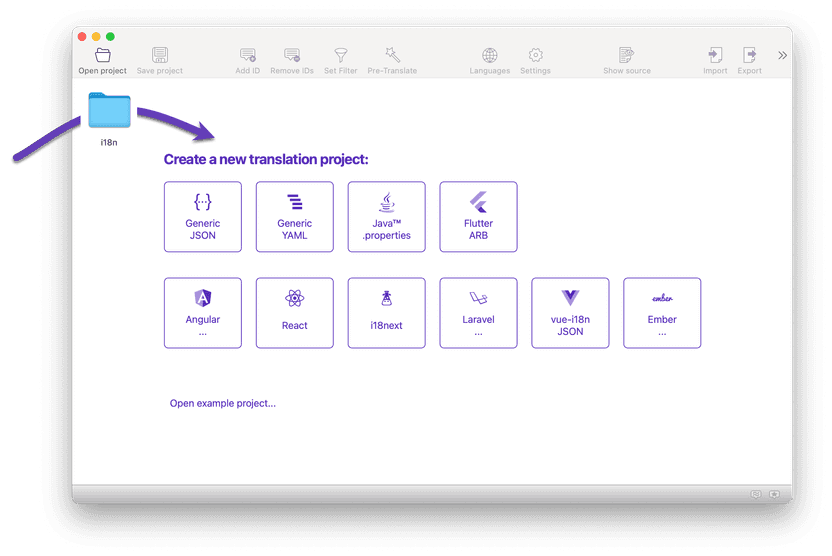
It automatically detects ngx-translate and configures the project for you. It also detects the 3 language files and configures them with the languages.
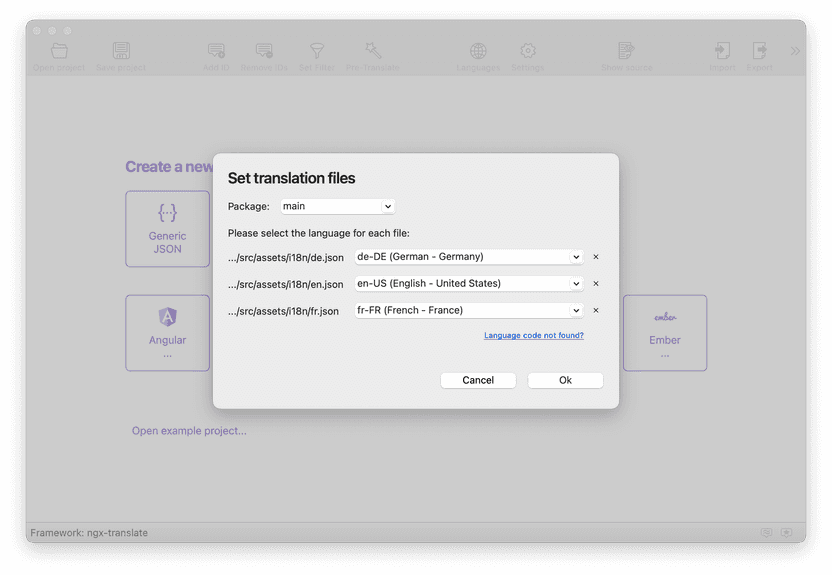
Feel free to use en-GB or instead of en-US in your project.
Click Ok to accept the setup.
Next, click Add ID in the toolbar or press ⌘+n (macOS) or CTRL+n (Windows).
Enter demo.heading in the dialog and click Ok.
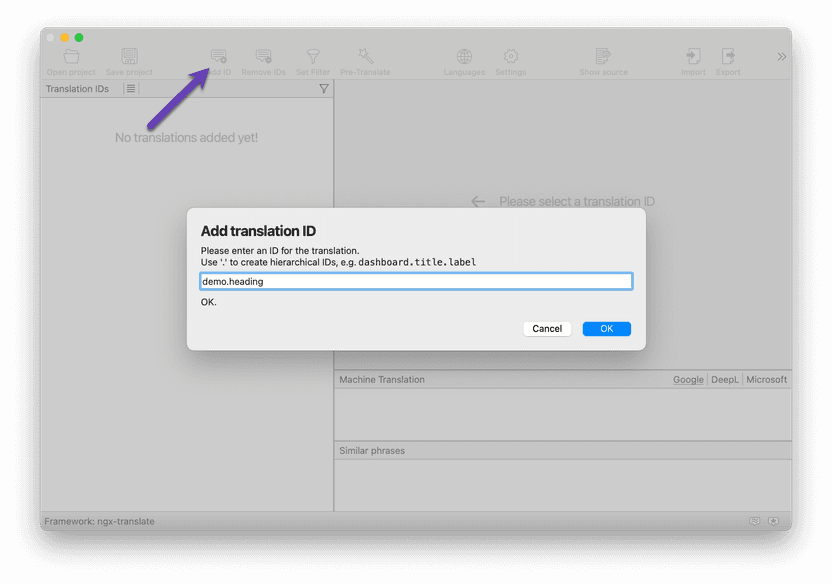
This creates entries in all 3 translation files at once - your translation files can never get out of sync.
You also see that it creates a tree structure. With this, you can easily group your translations in
different contexts. E.g. main.title, settings.account.user_name and so on.
Step 4: Translate your language file to other languages
BabelEdit requires what we call the primary language - that is the language used as a base the translations. Click on Configure... in the yellow dialog box at the bottom the center area.

After the configuration, another box opens: Display machine translations? - select Enable. This enables Google Translate, DeepL and Bing translation serivces inside BabelEdit that will speed up your development process!
In the field for en-US enter:
- en-US:
App Translation Demo
Switch to the de-DE field. Click on the German translation in the lower panel or
press ⌘+1 on a Mac or CTRL+1 on Windows to
use the translation Google provided.
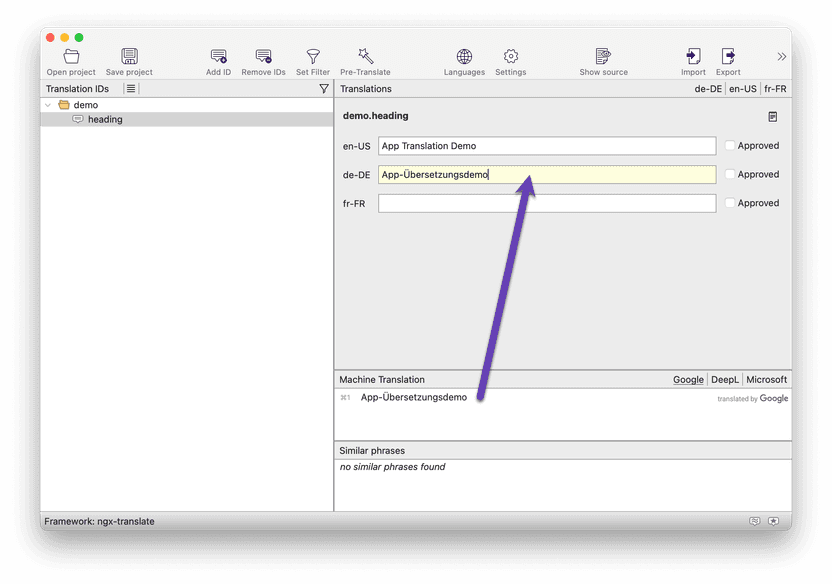
Switch to the French input field and repeat the same process.
Now click on Add ID again to create a translation for our 2nd string: demo.text.
Enter the following text for en-US: This tutorial explains, how you can easily translate your Angular app.
This time, use BabelEdit's Pre-Translate dialog to translate to all languages automatically. You can also use it if you've already entered many translations in your primary language and want.
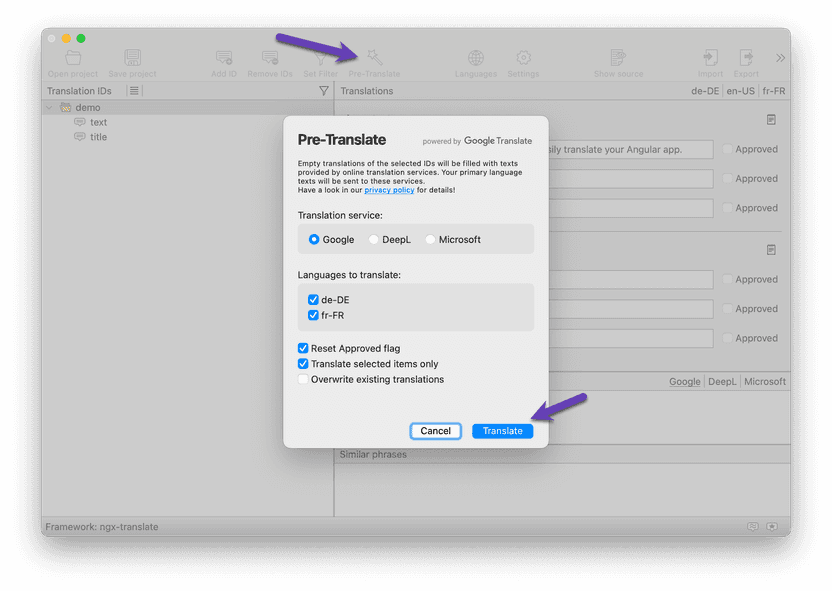
Finally, press Save. This saves the project configuration in a .babel project file and also updates the JSON files in your project.
Step 5: Use translations in your templates and code
Simple text without parameters
Now edit the app.component.html and replace the static texts with references to the messages in the en.json file.
You have 3 choices when it comes to adding translations. All options should lead to the same result — but that's not true in practice:
{{'id' | translate}}— translation pipe recommended- works in all use-cases
- acceptable readability
- also supports other pipes — e.g. making the translation string uppercase,...
<element [translate]="'id'"></element>— translation directive, id as attribute value deprecated- does (currently) not work with the more complex translation texts — see our section on Pluralization
<element translate>id</element>— translation directive, id as a child deprecated- shows errors/warnings in some IDEs (e.g. PhpStorm:
translate requires a value) - quite unreadable syntax when adding parameters
- shows errors/warnings in some IDEs (e.g. PhpStorm:
So: If possible go with variant 1.
app.component.html:
<div>
    <h1>{{ 'demo.heading' | translate }}</h1>

    <!-- translation: translation pipe -->
    <p>{{ 'demo.text' | translate }}</p>

    <!-- translation: directive (key as attribute)-->
    <p [translate]="'demo.text'"></p>

    <!-- translation: directive (key as content of element) -->
    <p translate>demo.text</p>
</div>
Using parameters in your translations
ngx-translate also supports simple parameters in translations out of the box. They are passed as an object, the keys can be used in the translation strings.
{{'id' | translate: {parameter:value} }}<element [translate]="'id'" [translateParams]="{parameter:value}"></element><element translate [translateParams]="{parameter:value}">id</element>
In your app.component.html, it looks like this.
<!-- translation with parameters: translation pipe -->
<p>{{ 'demo.greeting' | translate:{'name':'Andreas'} }}</p>

<!-- translation: directive (key as attribute) -->
<p [translate]="'demo.greeting'" [translateParams]="{name: 'Andreas'}"></p>

<!-- translation: directive (key as content of element)-->
<p translate [translateParams]="{name: 'Andreas'}">demo.greeting</p>
You can of course pass parameters from your component's .ts file, too.
You also have to extend the en.json with the new demo.greetings id.
Translation parameters are put between {{ and }}:
Switch to BabelEdit, create a new entry demo.greeting and enter
- en-US:
Hello {{name}}!
Use the Pre-translate functionality to create the translation for the other languages. Press Save to update the JSON files.
Using translations in your components (typescript code)
Sometimes you have to translate messages in your code and not only the template.
You can do that with the get() and instant()
methods of the TranslateService:
translate.get('demo.greeting', {name: 'John'}).subscribe((res: string) => {
    console.log(res);
});
You might wonder, why get() returns an observable that you have to
subscribe to. This is because ngx-translate handles language switches at runtime. The observable fires if
the language is switched!
If you are 100% sure that your translations are already loaded (e.g. by using static translations instead of
the translation loader) you can also use instant().
console.log(translate.instant('demo.greeting', {name: 'John'}));Using HTML formatted messages
It's also possible to use HTML formatted messages in your translations.
E.g.
- demo.paragraph:
Try <strong>BabelEdit</strong>! This translation editor is made for <strong>ngx-translate</strong>!
To render them, simply use the innerHTML attribute with the pipe on any element.
<div [innerHTML]="'demo.paragraph' | translate"></div>[innerHTML] should be safe to use because it uses Angular's DomSanitizer to filter potentially harmful tags like <script> or <style>.
More complex translation texts (Pluralization & Selections)
ngx-translate also supports more complex translation parameters including so-called pluralization and selections. E.g. instead of using
- You have 5 apple(s) in your basket.
It can automatically choose the right form the following:
- You have no apple in your basket.
- You have one apple in your basket.
- You have 5 apples in your basket.
This does not work out-of-the box but can be done with a plugin called ngx-translate-messageformat-compiler.
It uses ICU format (ICU stands for International Components for Unicode) and is a wildly used
format for specifying complex translation texts.
I'll show you how in the Pluralization section later in this tutorial.
Step 6: Switching languages at runtime
Adding a language selector
Let's now update the UI to switch between the language files you've just created:
Reloading the app will not show any differences — this is because
you've set the default language to en in app.component.ts .
Make the following changes to the app.component.html to add a simple language switcher:
<button (click)="useLanguage('de')">de</button>
<button (click)="useLanguage('en')">en</button>
<button (click)="useLanguage('fr')">de</button>
Add the following method to the app.component.ts
useLanguage(language: string): void {
    this.translate.use(language);
}
As you might remember, you've used setDefaultLang('en') in the constructor.
The default language is the fall-back that is used if a translation is not present in your selected language.
So if you suddenly see English text even if you've selected another language, the reason is usually that your translation files are out-of-sync, and you've not yet translated that string to the other language.
Getting the browser default language
The TranslateService contains 2 methods to receive the language set in the user's browser:
translate.getBrowserLang()gives you the language set in the user's browser (en)translate.getBrowserCultureLang()which gives you the complete language code such asen-USoren-GB.
Step 7: Extract translations from source code using ngx-translate-extract
Keeping the JSON files and your app in sync might become a challenge for more complex applications.
The good thing: Kim Biesbjerg created a tool called ngx-translate-extract. It scans your Angular app for the use of translations and adds new translations to your JSON files.
Add ngx-translate-extract to your project
Start by adding it to your project:
npm install @bartholomej/ngx-translate-extract @biesbjerg/ngx-translate-extract-marker@biesbjerg/ngx-translate-extract, switching to @bartholomej/ngx-translate-extract should fix the issue.const text = "node:internal/modules/cjs/loader:979
throw new ERR_REQUIRE_ESM(filename, true);
^
Error [ERR_REQUIRE_ESM]: require() of ES Module .../node_modules/@angular/compiler/fesm2015/compiler.mjs not supported.
Instead change the require of .../node_modules/@angular/compiler/fesm2015/compiler.mjs to a dynamic import() which is available in all CommonJS modules.
at Object.<anonymous> (.../@biesbjerg/ngx-translate-extract/dist/parsers/pipe.parser.js:3:20)
at Object.<anonymous> (.../@biesbjerg/ngx-translate-extract/dist/cli/cli.js:6:23)
at Object.<anonymous> (.../@biesbjerg/ngx-translate-extract/bin/cli.js:3:1) {"{"}
code: 'ERR_REQUIRE_ESM'
You can add the following lines to your package.json to make using the tool more convenient:
"scripts": {
    "extract-translations": "ngx-translate-extract --input ./src --output ./src/assets/i18n/*.json --clean --sort --format namespaced-json --marker _"
}
Let's take a look at the parameters:
--input ./src
Sets the source directory in which to look for translations. The default is to scan all html and ts files. You can use an additional--patternsparameter to specify other file extensions.--output ./src/assets/i18n/*.json
This specifies which files to update. The example here updates all existing language files in your ./src/assets/i18n folder that end with json . To add new languages simply add a new (empty) file to the translation folder. You can also list individual files if you prefer being more precise about what to update.--clean
This option removes all translations that are not found in the source files. Usually it's a good idea to enable this to keep files consistent.--sort
Sorts the JSON files.--format namespaced-json
Creates the JSON files with the nested object structure as you used in this tutorial.--marker _
ngx-translate-extract can search your TypeScript files for strings to translate. You have to surround the strings with a marker function e.g._('app.title'). See below.
Extracting translations
A simple command now updates your JSON files:
npm run extract-translationsUsing translatable strings in your TypeScript files
Sometimes you have to add translatable strings to your TypeScript code. ngx-translate-extract needs a way to distinguish between these strings and all the other strings in your application.
This is where the marker function comes into play. The function itself
does nothing — it only passes the string as a result.
import { marker } from '@biesbjerg/ngx-translate-extract-marker';

{
    let messageBoxContent = marker('messagebox.warning.text');
}
Using marker might not be the best choice for a name so feel free to rename it to
whatever suits you. I prefer _. The extract module detects the function name you are
using based on the import.
import { marker as _ } from '@biesbjerg/ngx-translate-extract-marker';

{
    let messageBoxContent = _('messagebox.warning.text');
}
You can now use the pipe or directive to display the translated string:
<div>{{ messageBoxContent | translate }}</div>Step 8: Pluralization in Angular in ngx-translate with ICU
Sometimes it's not enough to simply add a value to your translations. There are cases where parts or event the whole sentence has to change.
Think about the following situation: You want to display the number of images a user has uploaded.
- No image uploaded yet.
- One image uploaded.
- 123 images uploaded.
Or you want to display a dynamic value:
- My favorite color is green.
- My favorite color is red.
- My favorite color is blue.
The ngx-translate-messageformat-compiler is what you need now!
It parses messages using the ICU syntax.
Install the plugin using the following commands:
npm install ngx-translate-messageformat-compiler @messageformat/coreNext you have to tell ngx-translate to use the message format compiler for rendering the translated messages in app.module.ts :
import {BrowserModule} from '@angular/platform-browser';
import {NgModule} from '@angular/core';
import {AppRoutingModule} from './app-routing.module';
import {AppComponent} from './app.component';

// import ngx-translate and the http loader
import {TranslateCompiler, TranslateLoader, TranslateModule} from '@ngx-translate/core';
import {TranslateHttpLoader} from '@ngx-translate/http-loader';
import {HttpClient, HttpClientModule} from '@angular/common/http';

// import ngx-translate-messageformat-compiler
import {TranslateMessageFormatCompiler} from 'ngx-translate-messageformat-compiler';

@NgModule({
    declarations: [
        AppComponent
    ],
    imports: [
        BrowserModule,
        AppRoutingModule,

        // configure the imports
        HttpClientModule,
        TranslateModule.forRoot({
            loader: {
                provide: TranslateLoader,
                useFactory: HttpLoaderFactory,
                deps: [HttpClient]
            // highlight-start
            },

            // compiler configuration
            compiler: {
                provide: TranslateCompiler,
                useClass: TranslateMessageFormatCompiler
            }
            // highlight-end
        })
    ],
    providers: [],
    bootstrap: [AppComponent]
})

export class AppModule {
}

// required for AOT compilation
export function HttpLoaderFactory(http: HttpClient) {
    return new TranslateHttpLoader(http);
}
Update app.component.html to render the new demo messages:
<div>
  <h2>ngx-translate-messageformat-compiler demo</h2>

  <h3>Pluralization</h3>
  <ul>
    <li translate="" [translateParams]="{ count: 1 }">icu.pluralization</li>
    <li>{{'icu.pluralization' | translate:{ 'count': 2 } }}</li>
  </ul>

  <h3>Selection</h3>
  <ul>
    <li translate [translateParams]="{ 'gender': 'male', 'product': 'BabelEdit' }">icu.select</li>
    <li>{{'icu.select' | translate:{ 'gender': 'other', 'product': 'BabelEdit' } }}</li>
  </ul>

  <button (click)="useLanguage('en')">en</button>
  <button (click)="useLanguage('de')">de</button>
</div>
For some reason not obvious to me, this following syntax does not work with the message compiler. Or better said: It works but gives an error in the browser console.
<p [translate]="'demo.greeting'" [translateParams]="{name: 'Andreas'}"></p>

<li [translate]="'icu.select'" [translateParams]="{ 'gender': 'female', 'product': 'BabelEdit' }"></li>
Finally, update the en.json files with the new ICU syntax:
{
	"demo": {
		"greeting": "Hello {name}!",
		"text": "This is a simple demonstration app for ngx-translate",
		"title": "Translation demo"
	},
	"icu": {
		"pluralization": "There {count, plural, =0{is no apple} one{is one apple} other{there are several apples}}.",
		"select": "{gender, select, male{His uses} female{She uses} other{They use }} {product}"
	},
	"messagebox": {
		"warning": {
			"text": "Warning!"
		}
	}
}
and de.json
{
	"demo": {
        "greeting": "Hallo {name}!",
        "text": "Dies ist eine einfache Applikation um die Funktionen von ngx-transalte zu demonstrieren.",
		"title": "Übersetzungs-Demo"
	},
    "icu": {
		"pluralization": "Da {count, plural, =0{ist kein Apfel} one{ist ein Apfel} other{sind mehrere Äpfel}}.",
		"select": "{gender, select, male{Er verwendet} female{Sie verwendet} other{Sie verwenden }} {product}."
	},
    "messagebox": {
		"warning": {
			"text": "Warnung!"
		}
	}
}
Please note that the ICU templates used by the message parser use single braces {} to
enclose parameters — in contrast to the template format of ngx-translate.
This is why you also have to replace the {{name}} in demo.greeting with {name}.
You can read more about the ICU syntax here: ICU User Guide.
How to fix glitches when using TranslateLoader
The translation files are loaded after the application is initialized, this is why you can see the translation message IDs for a short time.
The easiest way to avoid this is to add your main language as static data to your application. You'll still see a small glitch when you start the application with another language — but this time it's your main language that is displayed and not the translation IDs.
If this is also not acceptable you can either bundle your application with all languages or build separate bundles for each language.
First enable loading of JSON files in your tsconfig.app.json
"compilerOptions": {
    ...
    "resolveJsonModule": true,
    "esModuleInterop": true
    ...
},
Open your app.component.ts and load your default language at the top:
import defaultLanguage from "./../assets/i18n/en.json";Change the constructor to set the translations from the file:
constructor(private translate: TranslateService) {
    translate.setTranslation('en', defaultLanguage);
    translate.setDefaultLang('en');
}
Conclusion
With ngx-translate it's easy to create a multilingual version of your Angular app.
Use ngx-translate-extract to keep your translation files up-to-date.
Finally, BabelEdit helps you to mange and edit your translations.