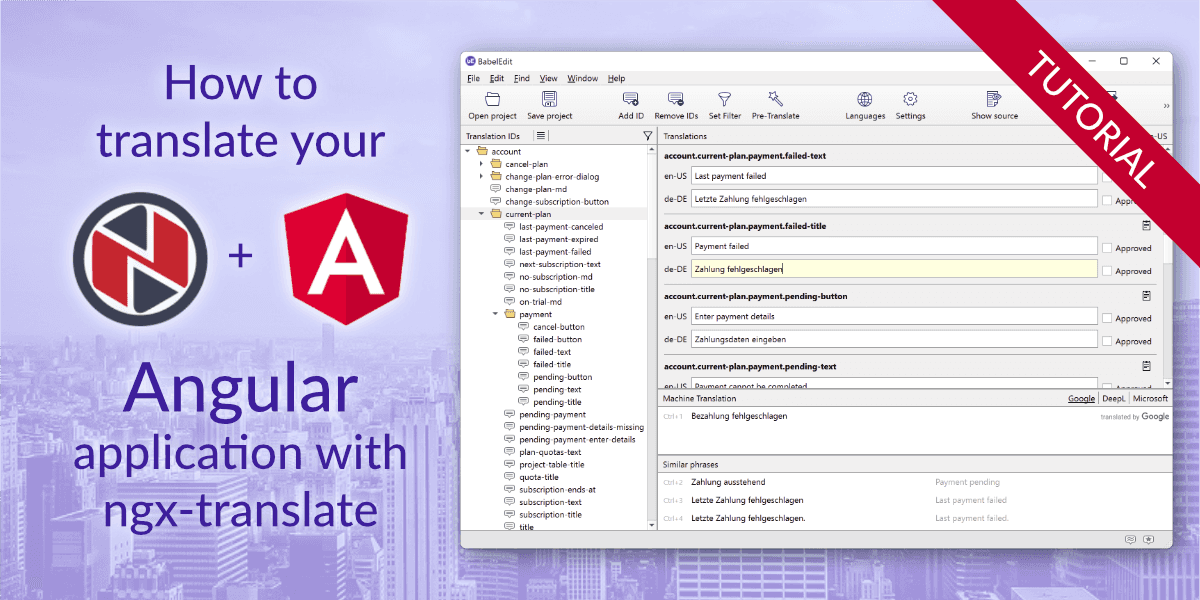
How to translate your Angular 6 app with ngx-translate

In this tutorial you are going to learn:
- How to set up ngx-translate
- How to update your translation files with ngx-translate-extract
- How to edit and maintain multiple JSON files
This tutorial uses the Angular 6 together with ngx-translate 10.
A version of the tutorial covering Angular 7 is available from here: How to translate your Angular 7 app with ngx-translate
An updated version of the tutorial that covers Angular 8-11 is available here: How to translate your Angular 11 app with ngx-translate.
What you are going to learn in this tutorial
Here's a small outline of the tutorial:
-
How to set up ngx-translate
-
How to update your translation files with ngx-translate-extract
-
How to edit and maintain multiple JSON files
How to set up ngx-translate
Create a simple demo project
For this tutorial you'll start with a simple demo application. I assume that you already have basic knowledge of Angular and AngularCLI is already installed on your system. You can of course skip this step and use your own project.
npm install -g @angular/cli@6
ng new translation-demo
cd translation-demo
ng serve
The demo project should now be available in your web browser under the following url: http://localhost:4200.
How to add ngx-translate your Angular application
npm install @ngx-translate/core@10 @ngx-translate/http-loader@3 rxjs --saveThis tutorial uses the newest version of Angular 6 together with ngx-translate 10.
If you have to use the older Angular 5 in your project you also have to use ngx-translate 9:
npm install @ngx-translate/core@9 @ngx-translate/http-loader@2 --save
The @ngx-translate/core contains the core routines for the translation: The TranslateService and some pipes.
The @ngx-translate/http-loader loads the translation files from your webserver.
Now you have to init the translation TranslateModule in your app.module.ts :
import {BrowserModule} from '@angular/platform-browser';
import {NgModule} from '@angular/core';
import {AppComponent} from './app.component';

// import ngx-translate and the http loader
import {TranslateModule, TranslateLoader} from '@ngx-translate/core';
import {TranslateHttpLoader} from '@ngx-translate/http-loader';
import {HttpClient, HttpClientModule} from '@angular/common/http';

@NgModule({
    declarations: [
        AppComponent
    ],
    imports: [
        BrowserModule,
        HttpClientModule,
        TranslateModule.forRoot({
            loader: {
                provide: TranslateLoader,
                useFactory: HttpLoaderFactory,
                deps: [HttpClient]
            }
        })
    ],
    providers: [],
    bootstrap: [AppComponent]
})
export class AppModule {
}

// required for AOT compilation
export function HttpLoaderFactory(http: HttpClient) {
    return new TranslateHttpLoader(http);
}
The HttpLoaderFactory is required for AOT (ahead of time) compilation in your project.
Now switch to app.component.ts :
import {Component} from '@angular/core';
import {TranslateService} from '@ngx-translate/core';

@Component({
    selector: 'app-root',
    templateUrl: './app.component.html',
    styleUrls: ['./app.component.css']
})
export class AppComponent {
    constructor(private translate: TranslateService) {
        translate.setDefaultLang('en');
    }
}
First, you have to inject TranslateService in the constructor.
The next step is to set the default language of your application using translate.setDefaultLang('en') . In a real app you can of course
load language from the user's settings.
Reloading the app now shows an error in the browser console:
Failed to load resource: the server responded with a status of 404 (Not Found) http://localhost:4200/assets/i18n/en.json
This is because of the http loader which now tries to load the default language (en) from the server.
How to translate your application
The JSON translation file
Each language is stored in a separate .json file. Let's create the JSON file for the English translation: assets/i18n/en.json .
ngx-translate can read 2 JSON formats:
{
  "demo.title": "Translation demo",
  "demo.text": "This is a simple demonstration app for ngx-translate"
}
or
{
    "demo": {
        "title": "Translation demo",
        "text": "This is a simple demonstration app for ngx-translate"
    }
}
This is just a matter of personal taste. The second one (so called namespaced-json format) is more structured and gives a better overview over the translations. It's the format I prefer. It's not important which one you choose — it's easy to convert one into the other later. Please use the second format for this tutorial.
Using translations title and text are identifiers ngx-translate uses to find the translation strings.
Now edit the app.component.html
You have two choices when it comes to adding translations:
-
translation pipe —
{{'id' | translate}} -
translation directive —
<element [translate]="'id'"></element>
Both options lead to the same result — it's just a matter of personal taste which one you want to use.
<div>
    <!-- translation: translation pipe -->
    <h1>{{ 'demo.title' | translate }}</h1>

    <!-- translation: directive (key as attribute)-->
    <p [translate]="'demo.text'"></p>

    <!-- translation: directive (key as content of element) -->
    <p translate>demo.text</p>
</div>
Translations with parameters
ngx-translate also supports parameters in translations. They are passed as an object, the keys can be used in the translation strings.
<!-- translation: translation pipe -->
<p>{{ 'demo.greeting' | translate:{'name':'Andreas'} }}</p>

<!-- translation: directive (key as attribute) -->
<p [translate]="'demo.greeting'" [translateParams]="{name: 'Andreas'}"></p>

<!-- translation: directive (key as content of element)-->
<p translate [translateParams]="{name: 'Andreas'}">demo.greeting</p>
And the extended translations file:
{
"demo": {
<span class="text-muted">…</span>
"greeting": "Hello {{name}}!"
}
}Switching languages at runtime
To switch language you'll first have to add a new JSON file for that language. Let's create a German translation for the demo: assets/i18n/de.json
{
    "demo": {
        "title": "Übersetzungs-Demo",
        "text": "Dies ist eine einfache Applikation um die Funktionen von ngx-transalte zu demonstrieren.",
        "greeting": "Hallo {{name}}!"
    }
}
Reloading the app will not show any differences — this is because
you've set the default language to en in app.component.ts .
Make the following changes to the app.component.html to add a simple language switcher:
<button (click)="useLanguage('en')">en</button>
<button (click)="useLanguage('de')">de</button>
Add the following method to the app.component.ts
useLanguage(language: string) {
    this.translate.use(language);
}
Editing JSON files with BabelEdit
Things are easy as long as you are only working with a single translation file. But as soon as you add a second language it becomes quite hard work to maintain both files. Not to speak of 5 or more languages.
To get started with BabelEdit download it from here:
The editor is currently in beta phase and you can use it for free.
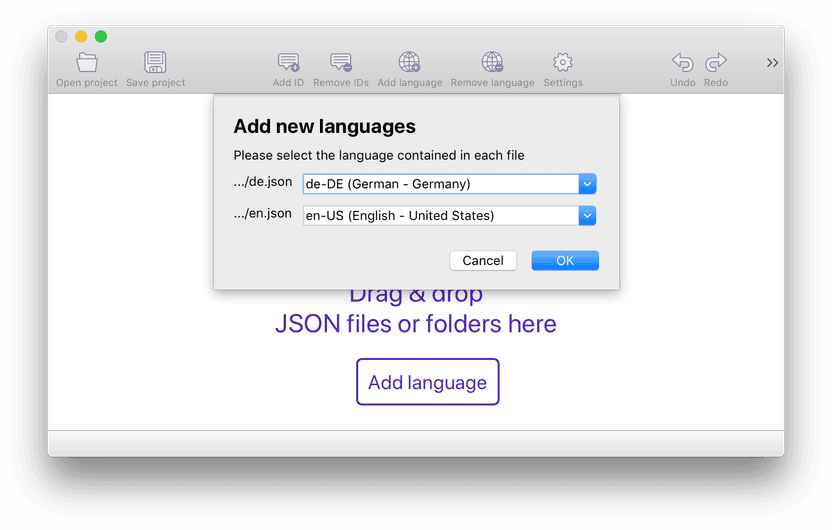
Start BabelEdit after the installation. To get started, drag & drop your assets/i18n -folder onto the main window.
BabelEdit now asks you for the languages contained in the files — making guesses from the file name:

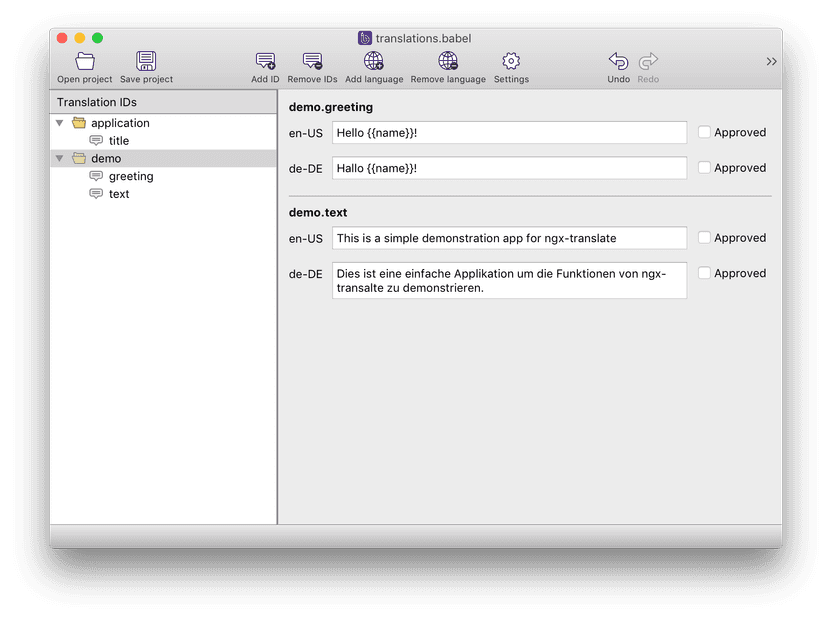
This is why we've created BabelEdit. It's a translation editor that can open multiple JSON files at once to work on them at the same time. Editing both translations from our example looks like this:

The left side contains a tree view with your translation ids, the right side the translations. The Approved checkbox allows you to mark translations as final. This additional information is stored in a BabelEdit project file (extension .babel).
The editor automatically reloads the files after they have been updated — e.g. from a new run of ngx-translate-extract.
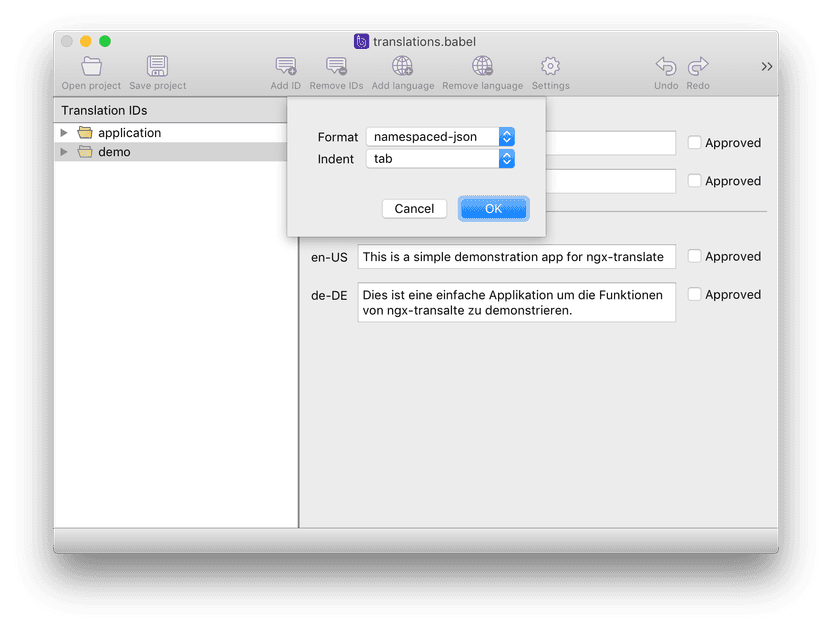
BabelEdit currently used the flat JSON file format as default (because it's default
in ngx-translate extract). If you use the namespaced-json format from our setup
you have to change the format in the settings:

Update JSON files with ngx-translate-extract
Keeping the JSON files and your app in sync might become a challenge for more complex applications.
The good thing: Kim Biesbjerg created a tool called ngx-translate-extract. It scans your Angular app for the use of translations and adds new translations to your JSON files.
Start by adding it to your project:
npm install @biesbjerg/ngx-translate-extract --save-devYou can add the following lines to your package.json to make using the tool more convenient:
"scripts": {
    "extract-translations": "ngx-translate-extract --input ./src --output ./src/assets/i18n/*.json --clean --sort --format namespaced-json --marker _"
}
Let's take a look at the parameters:
-
--input ./src
Sets the source directory in which to look for translations. The default is to scan all html and ts files. You can use an additional--patternsparameter to specify other file extensions. -
--output ./src/assets/i18n/*.json
This specifies which files to update. The example here updates all existing language files in your ./src/assets/i18n folder that end with json . To add new languages simply add a new (empty) file to the translation folder. You can also list individual files if you prefer being more precise about what to update. -
--clean
This option removes all translations that are not found in the source files. Usually it's a good idea to enable this to keep files consistent. -
--sort
Sorts the JSON files. -
--format namespaced-json
Creates the JSON files with the nested object structure as you used in this tutorial. -
--marker _
ngx-translate-extract can search your TypeScript files for strings to translate. You have to surround the strings with a marker function e.g.**_(** <span class="text-muted">'app.title'</span> **)**. See below.
A simple command now updates your JSON files:
npm run extract-translationsUsing translatable strings in your TypeScript files
Sometimes you have to add translatable strings to your TypeScript code. ngx-translate-extract needs a way to distinguish between these strings and all the other strings in your application.
This is where the marker function comes into play. The function itself does nothing — it only passes the string as a result.
import { _ } from '@biesbjerg/ngx-translate-extract';

{
    …
    var messageBoxContent = _('messagebox.warning.text');
    …
}
You can now use the pipe or directive to display the translated string:
<div>{{ messageBoxContent | translate }}</div>Conflicting marker function
In some cases using _() as a marker function might
lead to conflicts with other modules. The solution is to create your own function — e.g. TRANSLATE() .
The function's only job is to return the string that's passed to it as parameter:
export function TRANSLATE(str: string) {
    return str;
}
This is how you use the new translate marker:
var messageBoxContent = TRANSLATE('messagebox.warning.text');Also update your extract-translations command in package.json with --match TRANSLATE .
Pluralization
Sometimes it's not enough to simply add a value to your translations. There are cases where parts or event the whole sentence has to change.
Think about the following situation: You want to display the number of images a user has uploaded.
-
No image uploaded yet.
-
One image uploaded.
-
123 images uploaded.
Or you want to display a dynamic value:
-
My favorite color is green.
-
My favorite color is red.
-
My favorite color is blue.
The ngx-translate-messageformat-compiler is what you need now!
It parses messages using the ICU syntax.
Install the plugin using the following commands:
npm install ngx-translate-messageformat-compiler messageformat --saveNext you have to tell ngx-translate to use the message format compiler for rendering the translated messages in app.module.ts :
import {BrowserModule} from '@angular/platform-browser';
import {NgModule} from '@angular/core';
import {AppComponent} from './app.component';

// import ngx-translate and the http loader
import {TranslateCompiler, TranslateLoader, TranslateModule} from '@ngx-translate/core';
import {TranslateHttpLoader} from '@ngx-translate/http-loader';
import {HttpClient, HttpClientModule} from '@angular/common/http';

import {TranslateMessageFormatCompiler} from "ngx-translate-messageformat-compiler";

@NgModule({
    declarations: [
        AppComponent
    ],
    imports: [
        BrowserModule,
        HttpClientModule,
        TranslateModule.forRoot({
            loader: {
                provide: TranslateLoader,
                useFactory: HttpLoaderFactory,
                deps: [HttpClient]
            },
            compiler: {
                provide: TranslateCompiler,
                useClass: TranslateMessageFormatCompiler
            }
        })
    ],
    providers: [],
    bootstrap: [AppComponent]
})
export class AppModule {
}

// required for AOT compilation
export function HttpLoaderFactory(http: HttpClient) {
    return new TranslateHttpLoader(http);
}
Update app.component.html to render the new demo messages:
<h2>ngx-translate-messageformat-compiler demo</h2>

    <li translate [translateParams]="{ count: 0 }">pluralization.things</li>
    <li translate [translateParams]="{ count: 1 }">pluralization.things</li>- {{'pluralization.things' | translate:"{ count: 2 }"}}

    <li translate [translateParams]="{ gender: 'female', name: 'Sarah' }">pluralization.people</li>
    <li translate [translateParams]="{ gender: 'male', name: 'Peter' }">pluralization.people</li>- {{'pluralization.people' | translate:"{ name: 'Sarah + Peter' }"}}

<button class="btn btn-primary" (click)="useLanguage('en')">en</button>
<button class="btn btn-primary" (click)="useLanguage('de')">de</button>
Finally update the .json files with the new ICU syntax:
{
    "pluralization": {
        "things": "There {count, plural, =0{is} one{is} other{are}} {count, plural, =0{} one{a} other{several}} {count, plural, =0{nothing} one{thing} other{things}}",
        "people": "{gender, select, male{His name is} female{Her name is} other{Their names are }} {name}"
    }
}
Please note that the ICU templates used by the message parser use single braces {} to
enclose parameters — in contrast to the template format of ngx-translate.
You can read more about the ICU syntax here: ICU User Guide.
Conclusion
With ngx-translate it's easy to create a multilingual version of your Angular app.
Use ngx-translate-extract to keep your translation files up-to-date.
Finally BabelEdit helps you to mange and edit your translations.