How to translate your Flutter app and edit your .arb files
This is the updated version of the tutorial. It uses the current version of Flutter and the intl package. An older version supporting intl 0.13.1 is available here:
How to translate your Flutter app and edit your .arb files (using intl 0.13.1)
In this tutorial we explain how to quickly set up translations for your Flutter app. The first two sections explain how to set up a simple demo application — feel free to skip it ;-)
We've created this tutorial on a Mac using Flutter's web target. This means that the app will run in Chrome. We assume that it should be easy enough for you to adapt the steps to run on Windows or Linux and/or run the app on an iPhone or Android device; if a platform requires any additional steps, we'll mention them along the way.
Prepare a simple demo project
Install Flutter
git clone https://github.com/flutter/flutter.git
export PATH=$PATH:$(pwd)/flutter/bin
Alternatively Flutter can be downloaded as zip archive from flutter.dev
Create and launch the demo app in Chrome
flutter create myapp
cd myapp
flutter run
Setup internationalization
Add the required dependencies to your project
Add these lines to dependencies: in pubspec.yaml
dependencies:
  flutter:
    sdk: flutter
  flutter_localizations:
    sdk: flutter
  intl:
Run flutter pub get packages to download those packages to your project folder.
The other change inside pubspec.yaml is to enable the generate flag.
This is added to the section of the pubspec that is specific to Flutter, and usually comes a little further down.
# The following section is specific to Flutter.
flutter:
  generate: true
Next, import the flutter_localizations library in lib/main.dart and pass localizationsDelegates and supportedLocales to the MaterialApp constructor.
import 'package:flutter_localizations/flutter_localizations.dart';
...

class MyApp extends StatelessWidget {

  @override
  Widget build(BuildContext context) {
    return MaterialApp(
      ...
      localizationsDelegates: [
          GlobalMaterialLocalizations.delegate,
          GlobalWidgetsLocalizations.delegate,
          GlobalCupertinoLocalizations.delegate
      ],
      supportedLocales: [
          const Locale('en', ''), // English
          const Locale('de', ''), // German
      ],
      ...
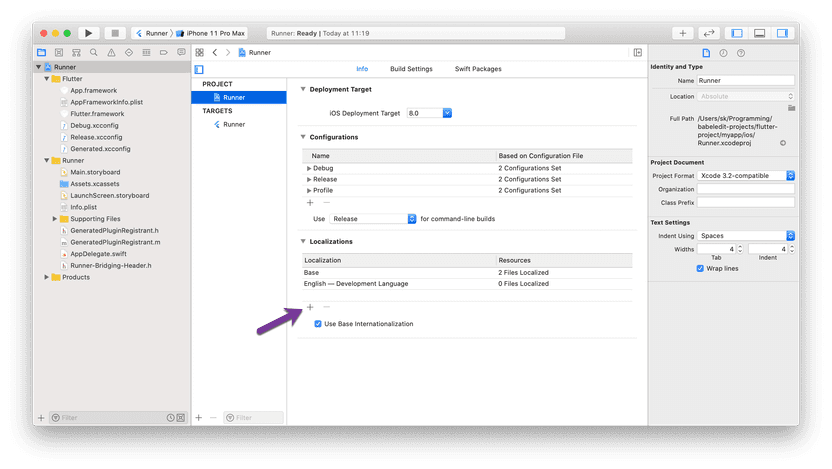
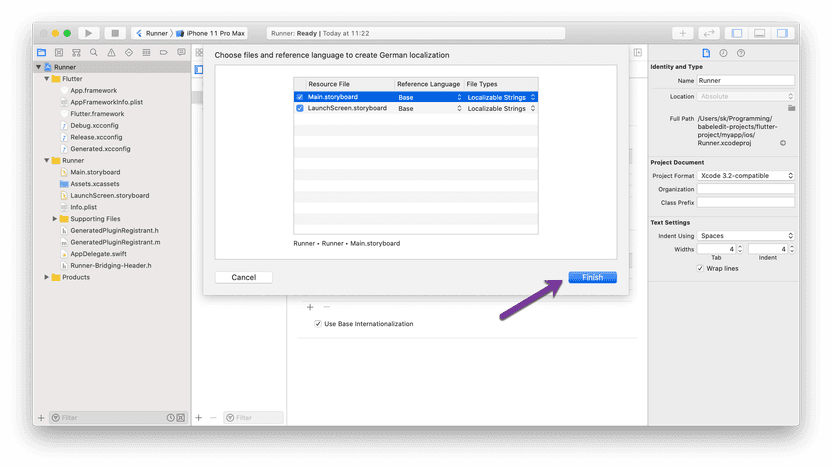
Beware that iOS requires us to specify the supported locales in the Xcode project, as well.
So, if you're deploying to iOS, open ios/Runner.xcodeproj with Xcode and add "German" to the Localizations of the project:
flutter run should still compile and run the app successfully.
Flutter texts are now localized, but localization of our own texts is still missing.
Set up templates for ARB files
Add a new yaml file to the root directory of the Flutter project called l10n.yaml.
Paste the following content:
arb-dir: lib/l10n
template-arb-file: app_en.arb
output-localization-file: app_localizations.dart
This configures where the specific localization files are going to be found.
- The input files (with all the translated data) will be found in
lib/l10n. - The file
app_en.arbwill contain the English Strings. It will act as a template for all other languages. - The class that provides access to the Strings at runtime will be generated in
app_localizations.dart.
Let's create that template file, lib/l10n/app_en.arb:
{
    "pushCounterText": "You have pushed the button this many times:"
}
That's the first text we're going to use in our app.
Let's add a German translation right away, via the new file lib/l10n/app_de.arb:
{
    "pushCounterText": "Du hast den Button so oft gedrückt:"
}
Now, run your app so that codegen takes place.
flutter runOf course, the text is still only English (we're not really loading our translation yet).
But you should see a few generated files in .dart_tool/flutter_gen/gen_l10n.
Add localization class
Import the auto-generated class into your code, right at the top of main.dart.
import 'package:flutter_gen/gen_l10n/app_localizations.dart';Now we need to update the MaterialApp constructor. That new generated class provides two helpers that simplify setting up delegates and locales. Let's make use of that:
return MaterialApp(
  title: 'Flutter Demo',
  localizationsDelegates: AppLocalizations.localizationsDelegates, // <- here
  supportedLocales: AppLocalizations.supportedLocales, // <- and here
  ...
Finally, we can make use of our translated text!
Look for this text widget inside the build-method of MyHomePageState:
Text('You have pushed the button this many times:'),Replace it with a call to the new AppLocalizations class:
Text(AppLocalizations.of(context)!.pushCounterText);(Note the !, which means our app is compiled with sound null safety, as is now the default in Dart.)
This code creates a widget that displays the corresponding German or English text. Each key in the arb-file is used as method name of the getter, which means you can comfortably access them via code completion.
Run localized app
Let's give this a test run to see if we were actually successful.
flutter runThis will compile your app and run it inside Chrome.
Unless German is your native language, the browser will probably still display the English text.
In that case, open a new tab and navigate here: chrome://settings/languages. Add "German" as a language and move it to the top of the list.
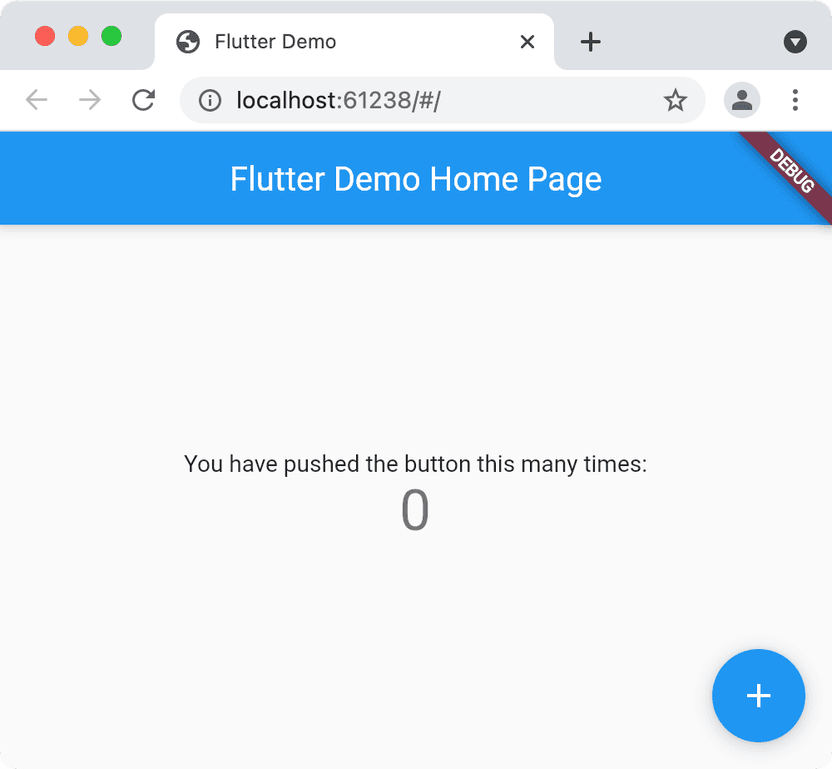
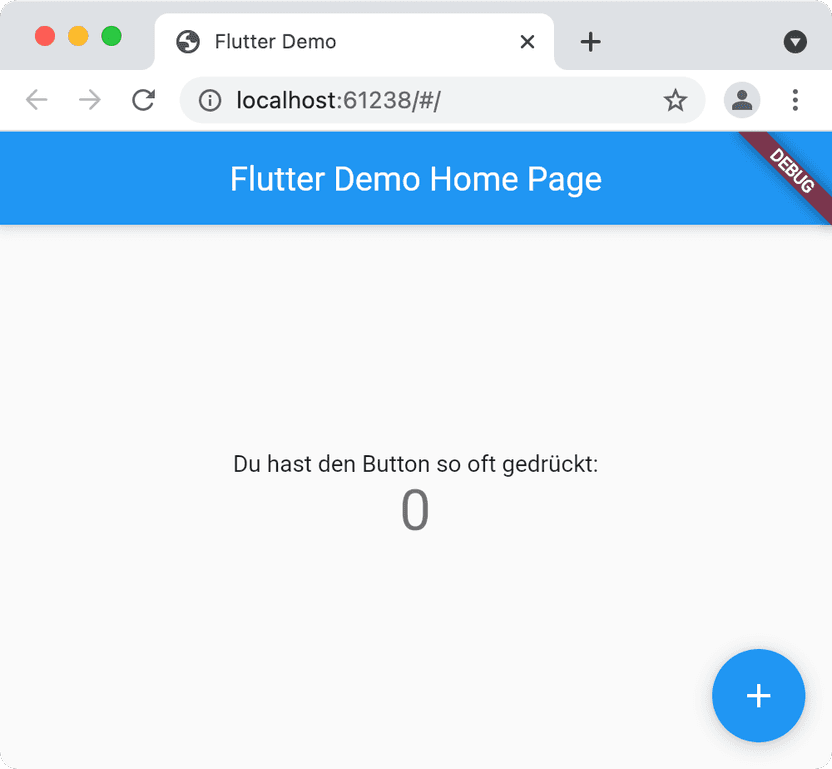
Hurray! The Flutter demo will immediately change the text.
How to add more translations
To add more translations, you simply edit app_en.arb and app_de.arb, adding new texts along the way, e.g.:
app_en.arb:
{
  "pushCounterText": "You have pushed the button this many times:",
  "appTitle": "Localization Hero"
}
app_de.arb:
{
  "pushCounterText": "Du hast den Button so oft gedrückt:",
  "appTitle": "Mehrsprachen-Held"
}
Then you can use the strings in your application:
// ...
appBar: AppBar(
  title: Text(AppLocalizations.of(context)!.appTitle),
),
// ...
When running the app after adding a new text, your IDE will likely present you with a warning that build errors exist in your project.
This is because the AppLocalizations class will need to be re-generated for the appTitle property to be available.
So it's recommended to first add the text resource, then compile your app — and only then start using it. Alternatively, you can ignore the error, as it will be fixed on first run, anyway. For example, in VSCode, you can run the Flutter app by selecting "Debug Anyway" in the build error dialog that appears.
Simplify your translation workflow
Editing the .arb translation files will get a bit cumbersome over the time:
- You have to escape the strings to write proper .json files.
- You have to open and update all language files manually.
- The .arb files may become difficult to read over time, especially if you add any metadata.
A much simpler workflow is possible if you use BabelEdit:
- BabelEdit automatically inserts the new translations in all files and keeps them in sync
- The nice user interface only displays relevant information
- Use features like pre-translate to automatically create translations for other languages
- Export and import into other formats (e.g. Excel) to send to translators
- Spellchecker
You can download BabelEdit for Windows, macOS and Linux from here:
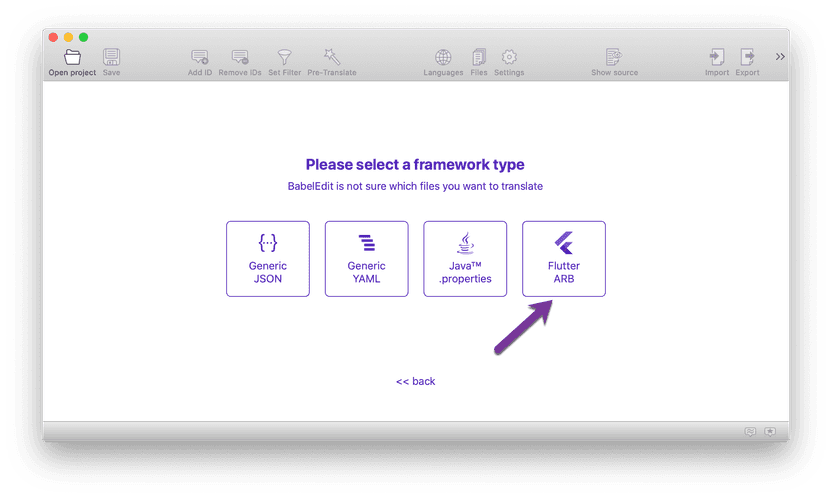
Start BabelEdit after the installation and simply drag & drop your project directory into the main window. Click on the Flutter ARB project:
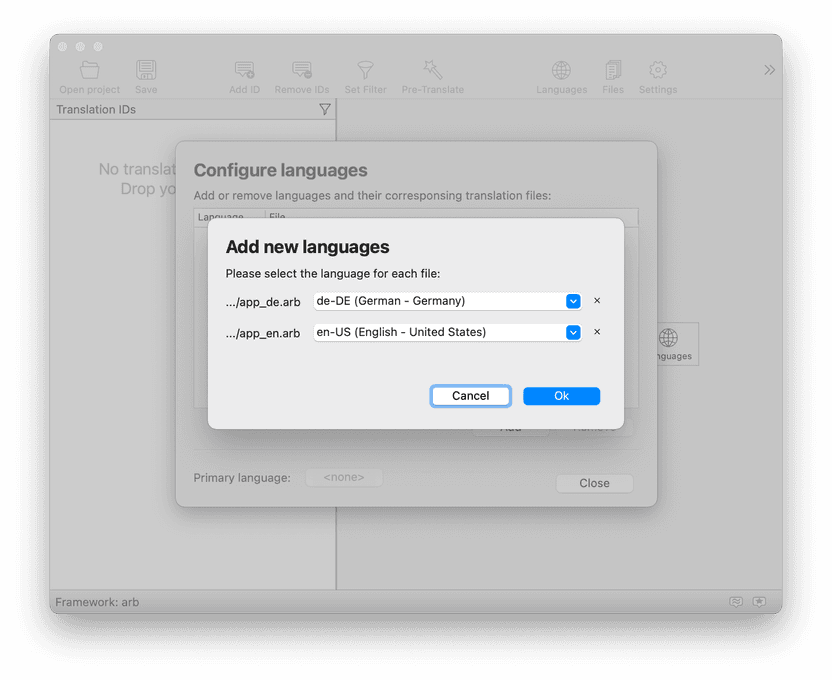
BabelEdit now searches the project folder for .arb files and presents them with a guess for the languages contained in the files. Confirm de and en.
Select your primary language — that is the language that you use in your main translations. It's used as the source language for features like pre-translate. Select en-US by clicking on the configure button:
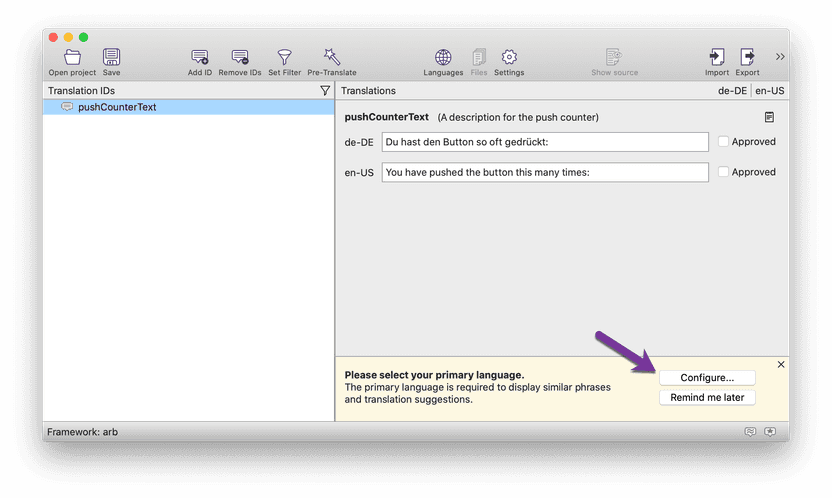
BabelEdit now automatically displays suggestions for your translations:
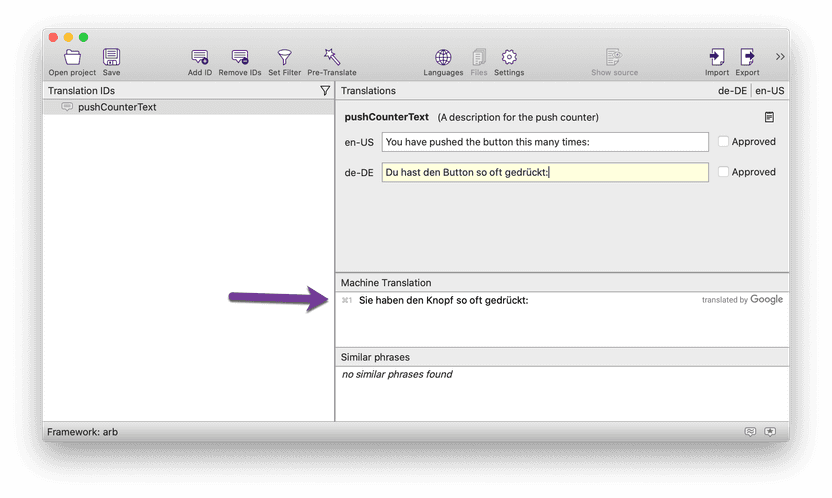
Finally, save the files using the save button from the toolbar. BabelEdit asks you for the name and location of a .babel file — BabelEdit's project file that contains all project relevant settings.
It also updates your .arb files with the translations.