How can I run TexturePacker during my Xcode build?
This tutorial shows you how to integrate TexturePacker in your Xcode build within less than 5 minutes. The advantage is that TexturePacker now updates the sprite sheets during compile time! No manual work needed! The internal update mechanism in TexturePacker is very smart - it detects changes and only updates sheets that are really changed - saving you time!
The screenshots in this tutorial are from an older version of Xcode, but the functionality is still the same - tested with Xcode 12. A small restriction is that the clean functionality does not work with the new build system
Advantages for you:
- Sprite sheets are up-to-date all the time
- Save memory on subversion/git by not checking in the sprite sheets
Saving memory on your version management server
You don't need to check in the complete sprite sheets in your version management system anymore. Assuming you have a bigger project, you end up easily with several megabytes of sprite sheets. Why check them in if they can be built on the fly? There is no need for that. Simply check in your source sprites and let TexturePacker do the work during the build phase.
This is even more useful for git users since git stores the complete repository on your local computer.
Project structure
For this tutorial I assume that you have a similar layout of your project like I have here:
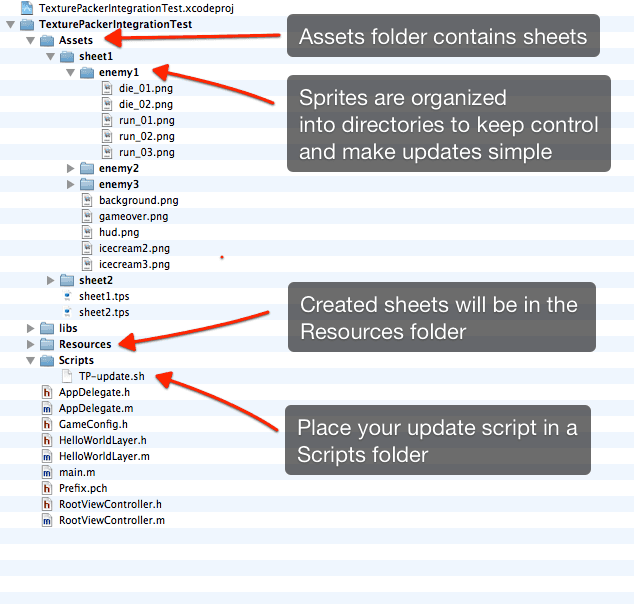
Your source sprites are all in an Assets folder, grouped into different directories to reflect the sprite sheets. If you have a different layout - you might need to modify the scripts a bit.
Two ways to accomplish the goal
There are two ways you can integrate TexturePacker into Xcode.
The easy way
The easy way is to create .tps files from TexturePacker and update them from the build phase. The advantage is that you can open the .tps files in the graphical user interface and change them. No need to do hard work on the command line.
If so please save the .tps files in your Assets folder, so the script can find them: If you want to go this way use this script for the next phase:
#! /bin/sh
TP=/usr/local/bin/TexturePacker
if [ "${ACTION}" = "clean" ]
then
    # remove sheets - please add a matching expression here
    rm ../Resources/sheet*.png
    rm ../Resources/sheet*.plist
else
    # create all assets from tps files
    ${TP} *.tps
fi
exit 0
You need to adjust the rm part to match your sheet's names during the clean phase.
From my point of view the most important feature of TexturePacker is the SmartFolders feature. It simply adds all sprites it finds in a directory structure to your sprite sheet. This allows you to do fast updates by simply throwing the new sprites into the folder without the need of adding single sprites.
If you create your sprite sheet use Add Folder button in the toolbar, or simply drag the folder onto the right "Sprites" panel.
TexturePacker also allows you to organize your sprites into sub-folders. This is very helpful to keep sprites grouped - e.g. by making a separate directory for each enemy.
The way of the power-user
Instead of creating .tps files you can simply use the command line interface of TexturePacker:
#! /bin/sh
TP=/usr/local/bin/TexturePacker
if [ "${ACTION}" = "clean" ]
then
    # remove all files
    rm ../Resources/sheet*.png
    rm ../Resources/sheet*.plist
else
    # create hd & sd assets
    ${TP} --smart-update sheet1 \
          --auto-sd \
          --format cocos2d \
          --data ../Resources/sheet-hd.plist \
          --sheet ../Resources/sheet-hd.png

    # create ipad assets from same sprites
    ${TP} --smart-update --scale 1.066 sheet1 \
          --format cocos2d \
          --data ../Resources/sheet-ipad.plist \
          --sheet ../Resources/sheet-ipad.png

    ... add more sheets ....
fi
exit 0
This example here creates hd and sd plist files and additionally resources for iPad (Remark: this is not the best option for iPad since this uses up-scaling. It would be better to scale things down....).
Integration into Xcode
This is now the main integration into Xcode. First thing is to save the script from the previous chapter
as Scripts/build-sheets.sh
The usual way to continue with the integration would be to add a "Run script" build phase - but this would require adding all the sprites as dependencies which has no practical use. We create a new target instead and let TexturePacker decide what needs to be updated:
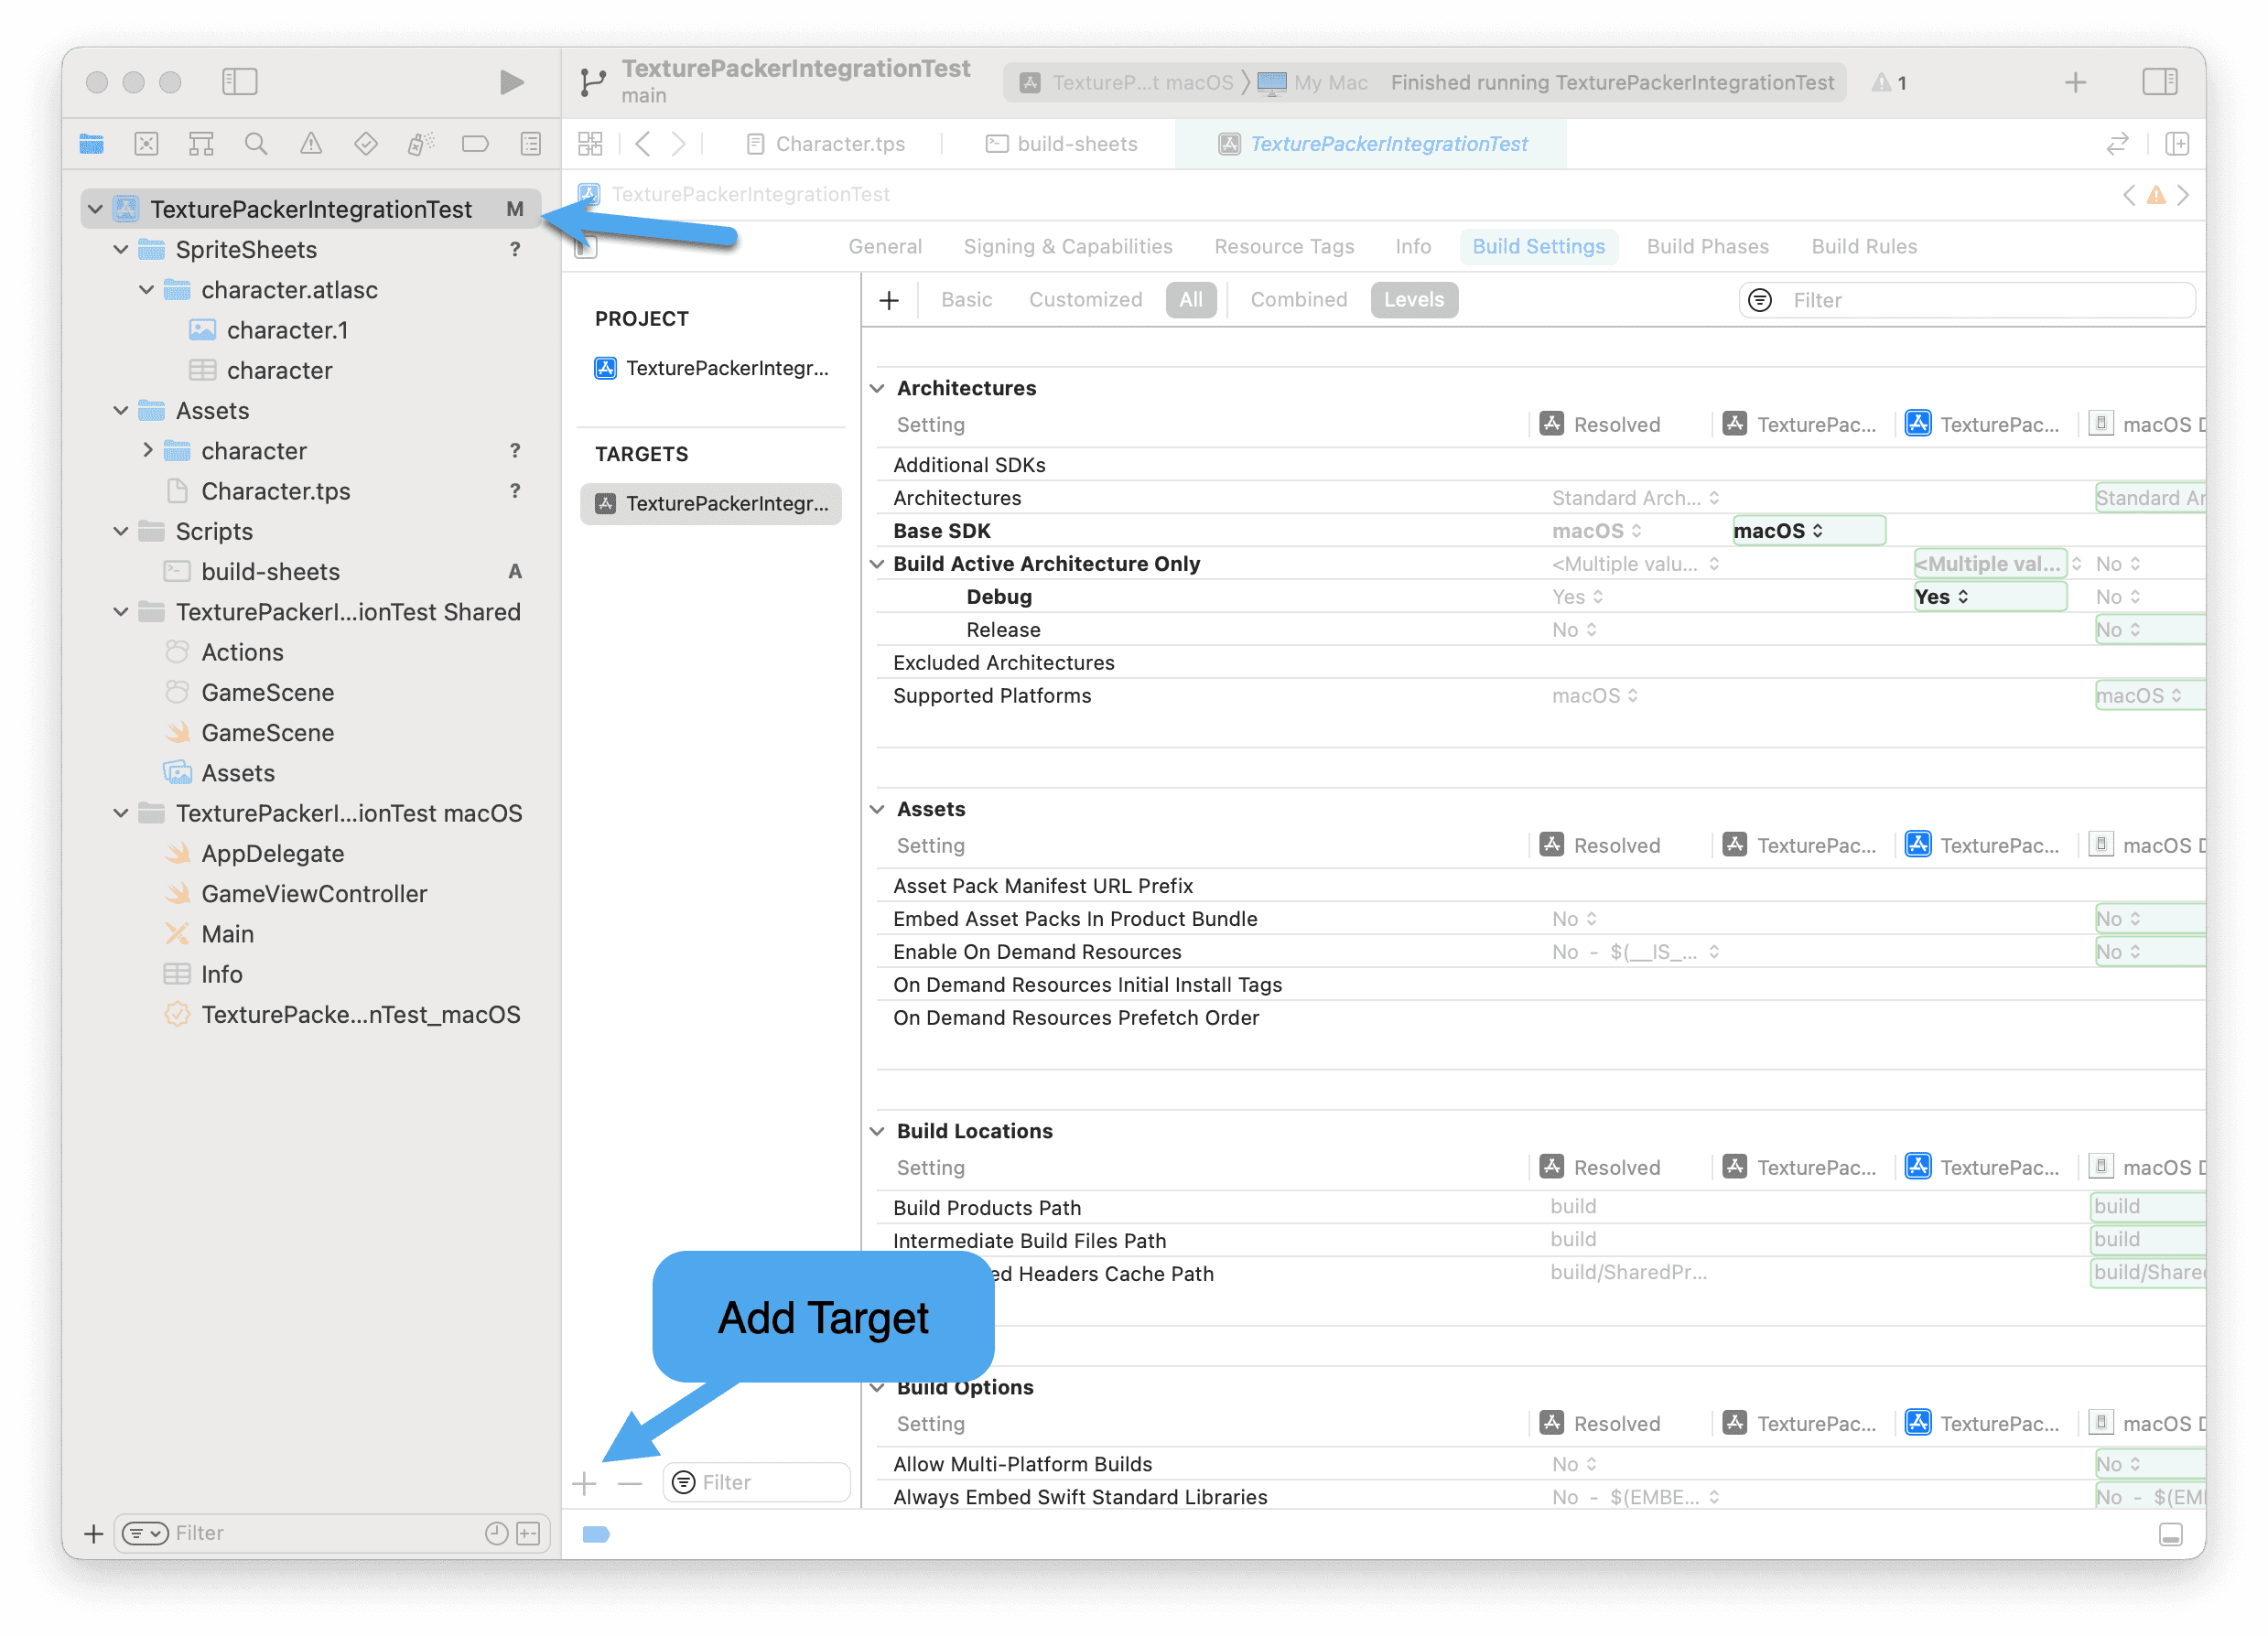
Choose Other / External Build System:
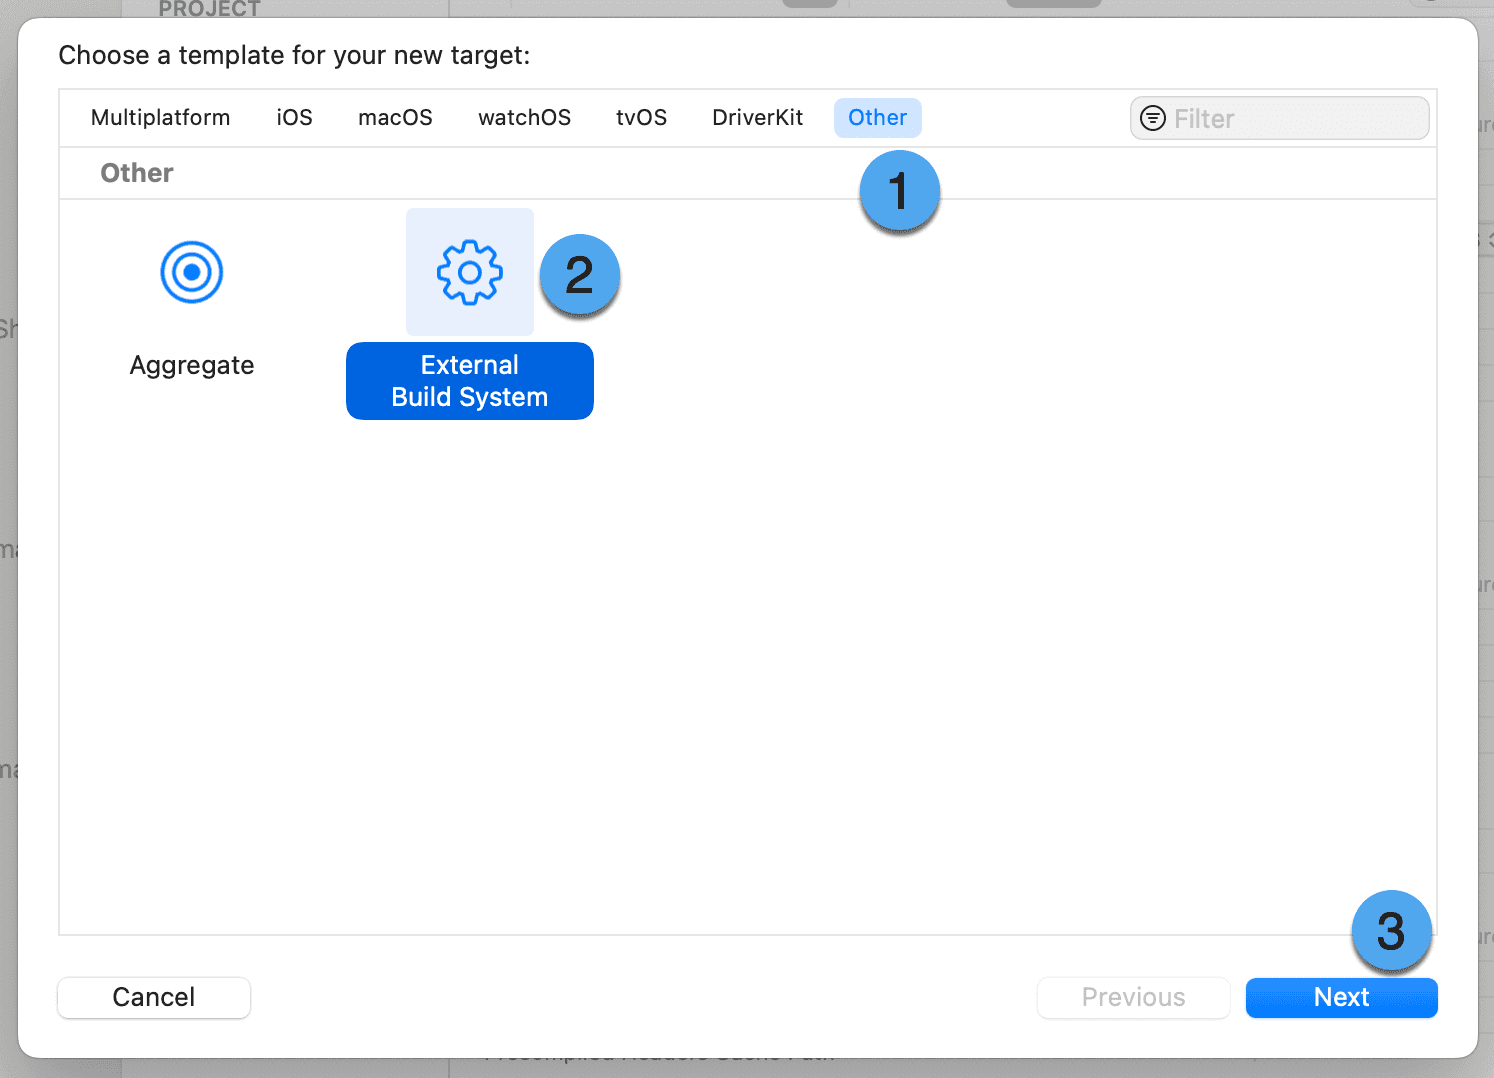
Choose a name for the target e.g. "SpriteSheet" and use /bin/bash as build tool:
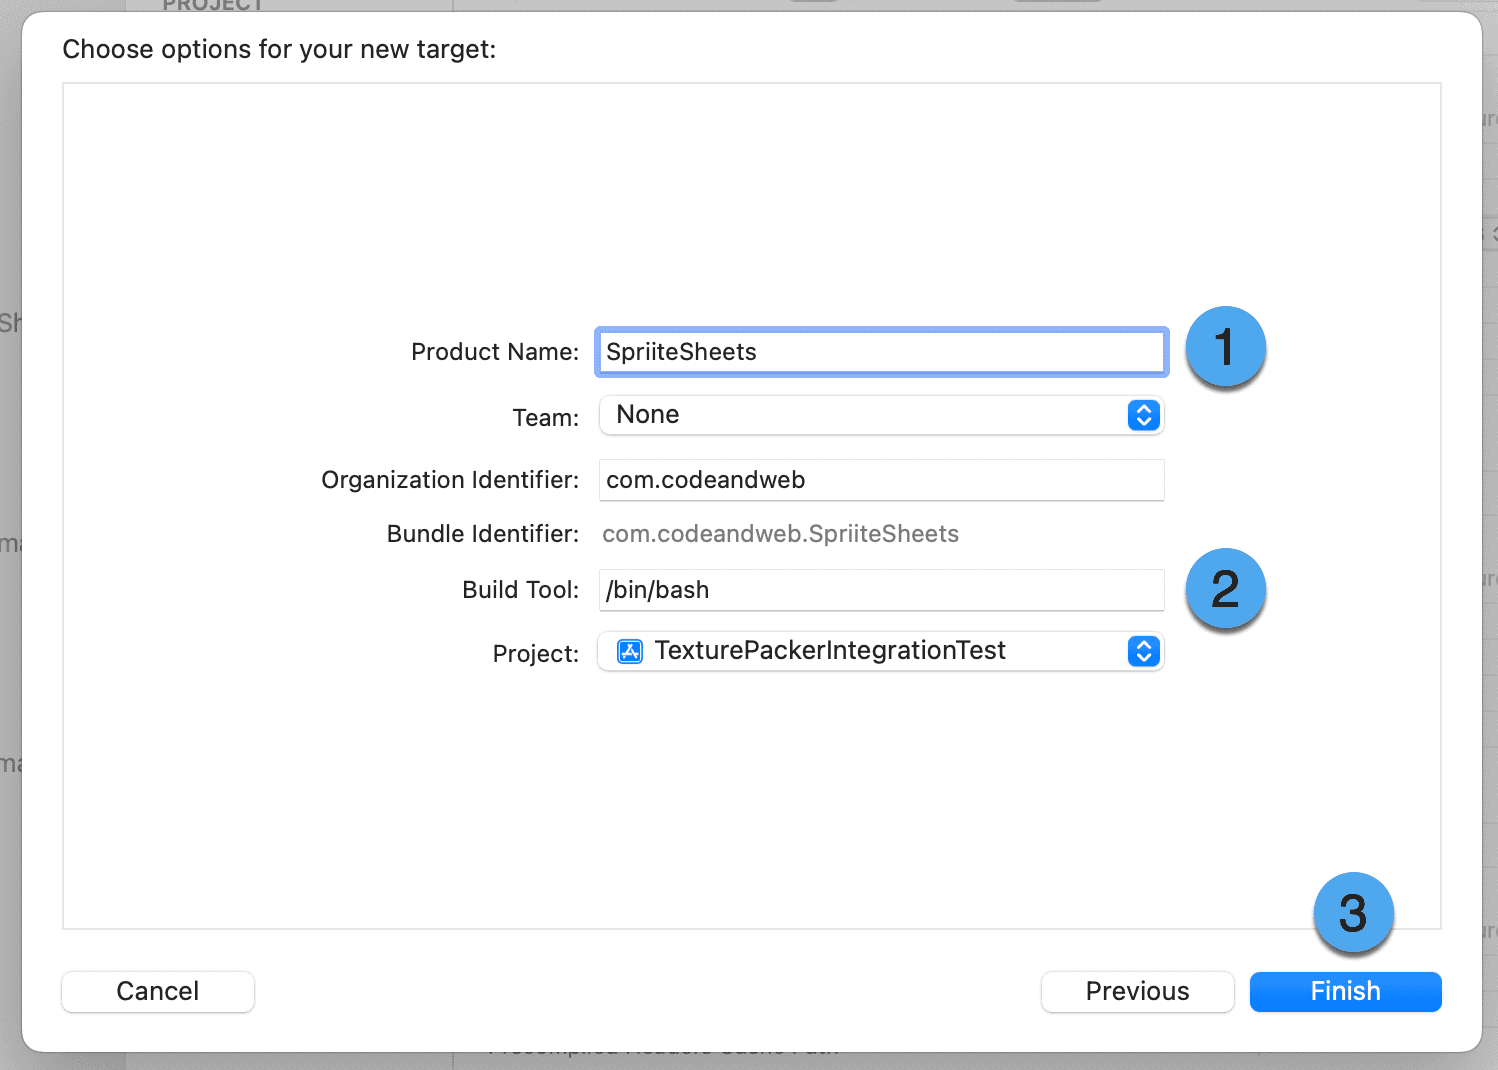
Next edit the target:
- BuildTool:
/bin/bash - Arguments:
../Scripts/TP-update.sh - Directory:
${SRCROOT}/TexturePackerIntegrationTest/Assets(adjust this to your project's name and path)
The reason for an error like unable to spawn process '/bin/bash' (No such file or directory) during
the build is most likely that the path in Directory is not set correctly.
E.g. if the SRCROOT is set to a higher level directory or your project directory is in a sub-folder.
You can also use the Folder button at the end of the Directory line edit to select the assets folder directly.

Now we have a target that we can build. To make things automated we need to set dependencies from the main project to the sheet target:
Click the + button in the Build Phases tab of the main target:

And select the SpriteSheets target:
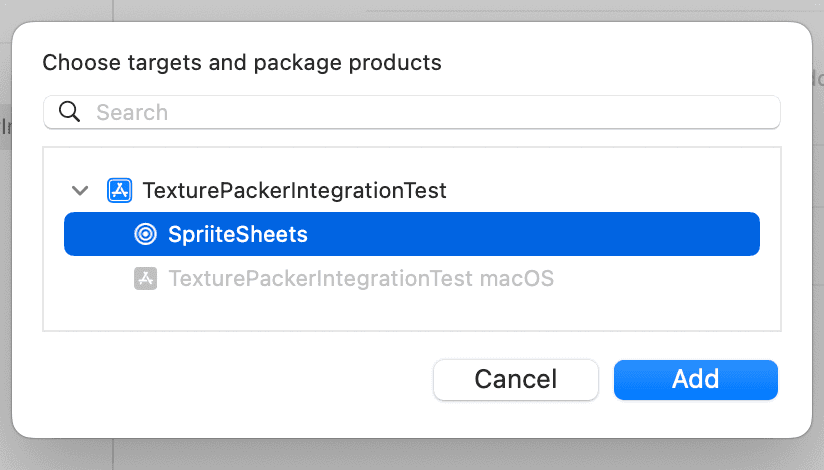
That's all.
How can I use TexturePacker with the "new build system"?
The "new build system" — which is now the default in Xcode — makes several changes. The most important one is that the build system does no longer support the clean action.
The scripts above are still working with this except that the clean phase is no longer working. You have to manually delete the generated sprite sheets.