How to create sprite sheets and animations with Monogame
Learn how to use sprite sheet animations in MonoGame:
- Creating sprite sheets with TexturePacker
- Using Monogame Spritesheet loader
- Create a cross-platform desktop application with Visual Studio (Windows & Mac)
- Create a complete demo scene with animations
The complete tutorial code is available on GitHub.
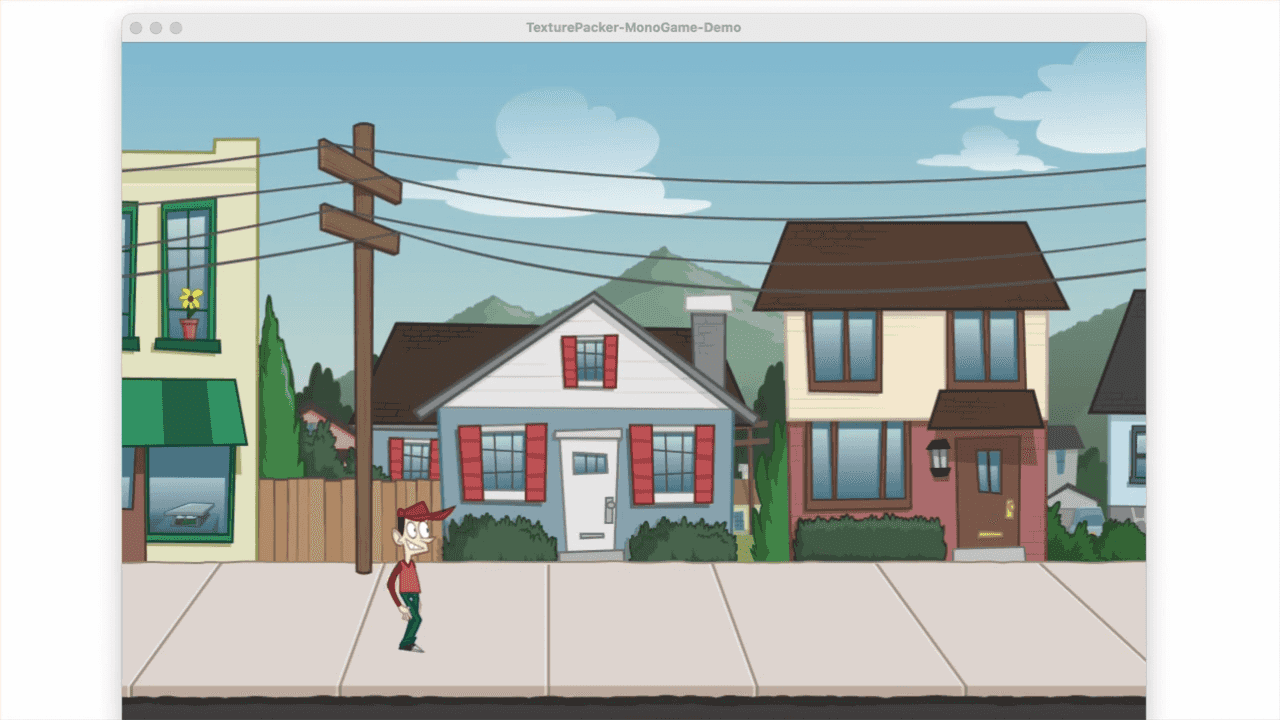
In this article we will go through, step by step, how to produce the animation shown in the video below:

TexturePacker
TexturePacker allows you to easily create sprite sheets and texture atlases, greatly simplifying the process of in-game animation. Here’s how it works – you take your individual animation frames (of characters, objects, etc.), and drag and drop them into TexturePacker. Then TexturePacker combines them into sprite sheets, which you can then load into your game. Using sprite sheets rather than individual images is a much more efficient process, making development quicker and easier for you! Here’s a video to explain how it all works:

TexturePacker has always been quite versatile, and compatible with numerous formats. However, we’ve now added the ability to save your sprite sheets and data files in a format compatible with MonoGame, as well as the source code to properly manage and use these files in your MonoGame app.
Start by downloading TexturePacker from here:
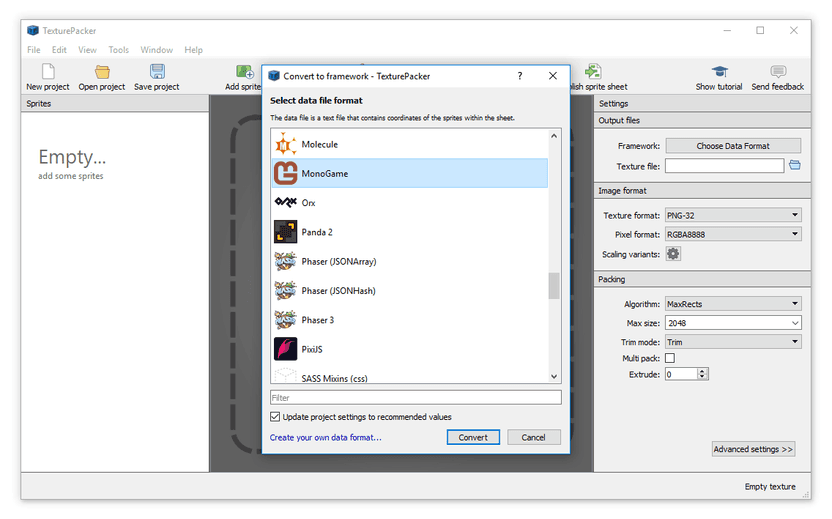
After opening it, use the Choose data format button to select the MonoGame framework and press the Convert button:
Before continuing, make sure that all the images you plan to import are in a logical folder structure (folder names based on animation type is recommended). Once your images are properly organized, drag and drop the parent folder into TexturePacker. The images that we’re using for this demonstration can be found here on GitHub.
TexturePacker will automatically group images together, as seen below:
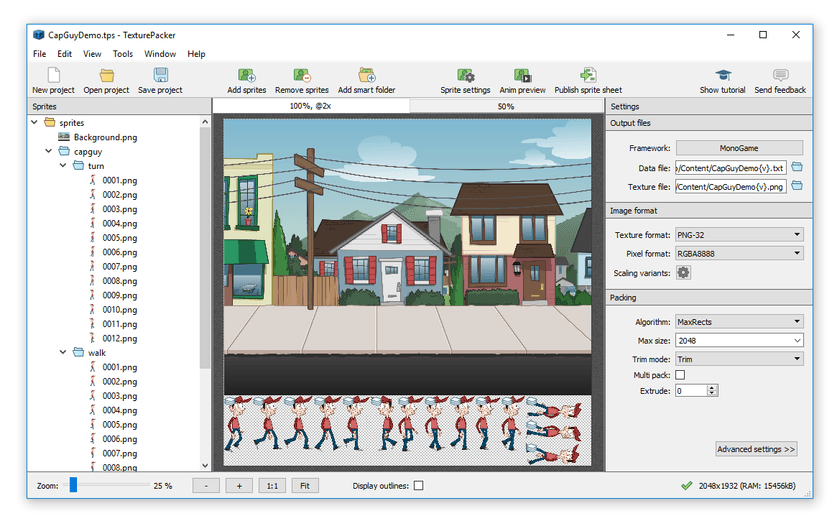
Now that your images are in TexturePacker, you may need to alter some settings – this depends on your individual requirements and how you intend to use these images. We’ll explain all the settings used for this tutorial, but complete documentation can be found here.
Scaling Variants
If you’ve done development for iOS before, then you’re familiar with having to create two sets of graphics files – a normal set for standard resolution, and a high-resolution set for Retina displays. The operating system determines which set to use at run-time by the @2x appended to the high-resolution set.
When using MonoGame on an iOS device, it works the same way – Retina devices will load the @2x graphics automatically, while non-Retina devices will use the standard versions.
However, TexturePacker has a Scaling Variants feature that eliminates the need to create two separate sets of graphics. With this automated process, you can produce both Retina and non-Retina versions of your graphics without having to do all your work twice!
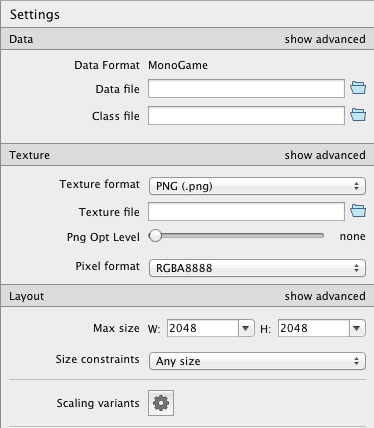
Let’s try it out! Start by clicking on the Scaling Variants gear, and the following screen will appear:
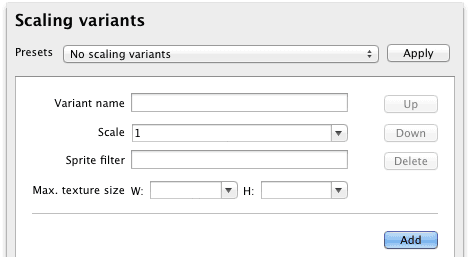
In the Presets box, select generic @2x and then click Apply. The Scaling variants are automatically filled in as seen below:
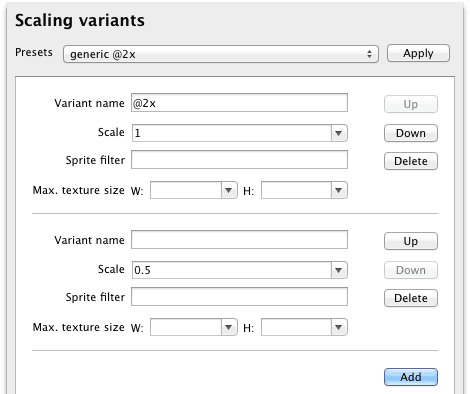
By entering this information into these fields, we are telling TexturePacker that we want two versions of the sprite sheet. Scale: 1 refers to the high-definition Retina version, and the Scale: 0.5 is the standard-definition non-Retina version. Variant name: @2x simply indicates that @2x will be appended onto the variant version’s filename.
Once you’ve finished entering the information, click Close.
If your app is intended for a specific device that is only available in either Retina or non-Retina (but not both) then there is no need for you to use the Scaling Variants feature.
Trim Mode
In TexturePacker’s Sprites section, look for Trim mode.

This should be set to Trim by default. This option crops all empty space surrounding your sprites, reducing the sprite sheet’s size. If you’d prefer not to use this option, Trim mode can be set to None.
Pivot Points
To edit the pivot points of your sprites click Sprite Settings in the toolbar. Pivot points have two functions:
-
Pivot points are used to determine which point of the frame will be positioned at a particular location when that frame is rendered. For example, if you choose “100, 100” as your frame location, and set your pivot point to “center,” then the center of the sprite will be located at “100, 100”. In contrast, if you set your pivot point to “bottom right,” then the lower right corner of your sprite will be located at “100, 100”.
-
Pivot points also define the sprite’s point of rotation.
Export Files
Now let’s examine the files that are created when TexturePacker converts our images into sprite sheets.
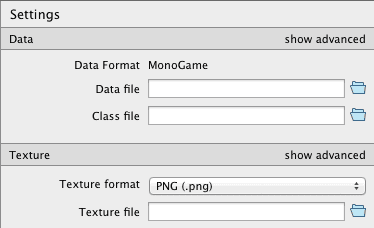
You will initially see a Settings screen with mostly empty fields.
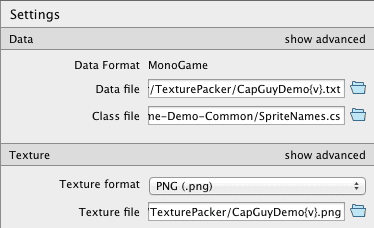
The {v} seen in both the Data file and Texture file fields above represents variant file names for the scaled variants. When the sprite sheet is exported, the {v} will be replaced with the variant name – in this case it will be replaced by @2x for the Retina display version, and will simply be removed for the non-Retina display version.
The Data file is a text file which contains information about each sprite in the sheet. This includes:
- Location
- Trim
- Rotation
- Pivot Point
The Class file contains a C# class consisting of constants that are used to refer to each frame in the series. A little later we’ll go into more detail on this, but basically, in MonoGame each frame must be referenced by a string name. These must be exact, as any typo would cause a runtime error. However, with the use of const strings, errors become evident as compile time errors, allowing us to discover and correct these errors much earlier in the process.
/*
 * Class auto generated by TexturePacker
 *
 * Contains references to each image within the sprite sheet.
 *
 * https://www.codeandweb.com/texturepacker
 * $TexturePacker:SmartUpdate:2044216056b85e7707659a24b50ece03...
 *
 */
namespace TexturePackerMonoGameDefinitions
{
    public class CapGuyDemo
    {
        public const string Background = "Background";
        public const string Capguy_turn_0001 = "capguy/turn/0001";
        public const string Capguy_turn_0002 = "capguy/turn/0002";
        public const string Capguy_turn_0003 = "capguy/turn/0003";
        public const string Capguy_turn_0004 = "capguy/turn/0004";
        public const string Capguy_turn_0005 = "capguy/turn/0005";
        public const string Capguy_turn_0006 = "capguy/turn/0006";
The Texture file is the file that actually contains the sprite sheet. Notice that this field also has a {v} in it. Therefore, because the name of the file listed here is CapGuyDemo{v}.png, when exported, this will produce two variants: a non-Retina version called CapGuyDemo.png and a Retina version called CapGuyDemo@2x.png.
At this point you may want to consider the location of these files. The Data file and Texture file both need to be in the Content folder in order for the app to run properly, so to save yourself the trouble to saving them in some other location and then copying them to Content, you could just save them there now. Additionally, the Class file will need to be saved within the app’s source tree. You might save it in the Content folder, too, or in another folder together with your source files.
As mentioned, there are other options in addition to the ones explained here, but because these are the only ones you need for this tutorial, we’ll move on now. However, feel free to explore other options on your own here.
At this point, you should save your work in TexturePacker and click Publish. This will export your sprite sheets, class files, and data files.
TexturePacker Loader
Before starting work on our demo app, let’s take a minute to look at the TexturePacker Loader. This can currently be downloaded freely, you can either add it as NuGet package to your VisualStudio project, or you can download its source code from GitHub.
The TexturePacker Loader source code is composed of just four files. Therefore, it’s easy for beginners to understand, and it’s easy for pros to make modifications.

Instead of covering every detail of the TexturePacker Loader, right now we’re just going to go over what’s relevant for this demo.
Sprite Sheet Loader
Since we’ll be creating a new MonoGame app, we want to start by loading our sprite sheets (and any other assets). This is usually done in the LoadContent method of our main Game class.
To do this, we’ll need to instantiate a new instance of the SpriteSheetLoader class and call the Load method passing in the name of your sprite sheet (as produced by TexturePacker). Below is an example:
var spriteSheetLoader = new SpriteSheetLoader(Content, GraphicsDevice);
spriteSheet = spriteSheetLoader.Load("CapGuyDemo.png");
This will create a reference to a sprite sheet. We’d suggest this is a class level variable as it will be required in your draw method as described below:
Sprite Render
We also must utilize the SpriteRender class, which controls the drawing and positioning of on-screen sprites. Beginning users need only to identify which image they wish to use and what position it should be in. More advanced users, however, have the ability to greatly customize the rendering, with the ability to control the image’s color, rotation, and scale, as well as flip the image.
We would recommend instantiating one instance of this class in your LoadContent method, as seen below:
this.spriteBatch = new SpriteBatch(GraphicsDevice);
this.spriteRender = new SpriteRender(this.spriteBatch);
And then in your draw method you simply render frames on screen, something like this:
this.spriteBatch.Begin();

this.spriteRender.Draw(
    this.spriteSheet.Sprite(
        TexturePackerMonoGameDefinitions.CapGuyDemo.Capguy_turn_0002
    ),
    new Vector2(350, 530)
);

this.spriteBatch.End();
As you can see in the example above, we are drawing Capguy_turn_0002 at location 350, 530.
When we originally exported the TexturePacker files, one of the files we exported was the Class file, which defined each individual sprite’s constant values. Here’s where that comes into play. Using this method rather than the string value ensures that, should an image file be missing from the sprite sheet, a compile-time error will occur. This is preferable to a runtime error, which may not occur until deployment, and therefore, may be more complicated to fix.
This is all we need to know in order to get started with rendering. TexturePacker Loader’s code ensures that sprites appear correctly, even if they’ve been rotated or trimmed on the sprite sheet itself. All we need to do is let it know which frame to render and where we want it!
Now that we have a better understanding of TexturePacker and TexturePacker Loader, we can start integrating it with MonoGame!
MonoGame
The main goal of MonoGame is to enable simpler cross-platform game development. Instead of using different standards for each platform, MonoGame allows C# development for one platform, and then requires only minor adjustments to make it compatible with other platforms.
MonoGame is incredibly versatile, and can currently be used for such powerhouse platforms as Windows, macOS, Linux, iOS/iPadOS, Android, PlayStation 4+5, Xbox and Nintendo Switch.
In the demo app we are going to create here, we will animate “CapGuy” walking across the screen. In our example we use Visual Studio 2022 on Windows 11, if you are working with a Mac the steps with Visual Studio for macOS are almost the same.
Cross Platform Desktop App with Visual Studio
First you have to install Visual Studio 2022 if you're not already using it. You can download it on visualstudio.microsoft.com. For our example the Community Edition is sufficient.
Additionally, please install the MonoGame project templates ( www.monogame.net/downloads).
- on Windows, you can use the menu item Extensions -> Manage Extensions, search for "monogame" and install the "MonoGame Framework C# project templates"
- on macOS, download the "MonoGame.Templates.VSMacExtension_x.x.x.mpack" of the latest MonoGame release and install it with menu item Visual Studio -> Extensions -> Install from file...
This will add an option for MonoGame in Visual Studio's template list for new projects. Just select "MonoGame Cross Platform Desktop Application" to quickly and easily get started on your project!
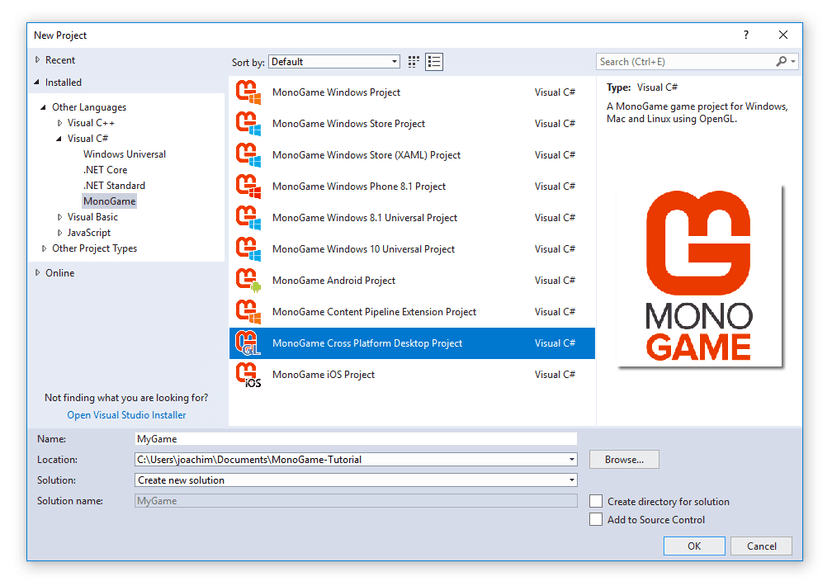
Now we can build and run the solution, resulting in a “cornflower blue” screen. If that’s what you get, then everything is working correctly!
Next we need to add our Texture, Data, and Class files from TexturePacker.
To do this, first add the Texture file and Data file to the Content folder using the context menu:
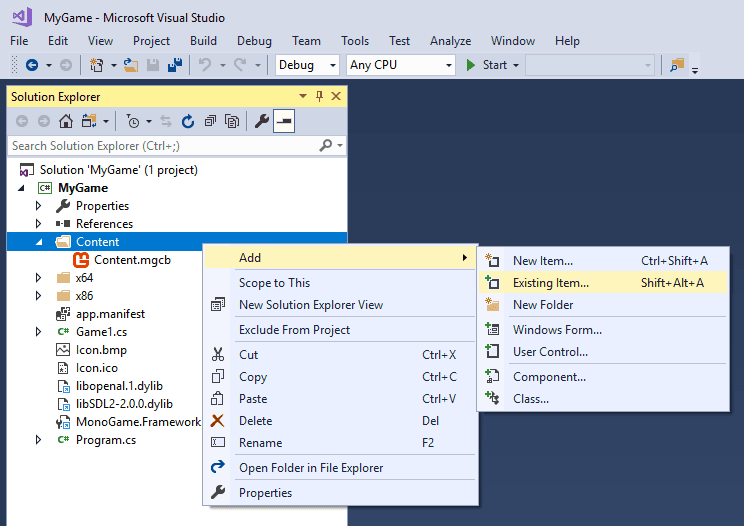
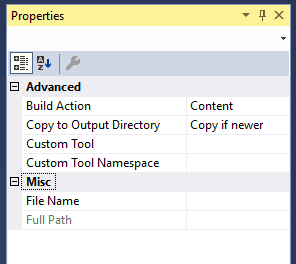
Visual Studio will automatically set their Build Action property to “Content” (macOS: you have to do this manually). Doing this guarantees that we’ll be able to access this data at run-time. Additionally, you have to set the Copy to Output Directory property to "Copy if newer":
The SpriteNames.cs file is not required to be in any specific location – it can go anywhere you choose.
In order to work with the data files from TexturePacker, we now need to use the TexturePacker Loader. We can get this from NuGet, so select Manage NuGet Packages in the Project menu and enter the search term "texturepacker".
Then simply install the TexturePacker-MonoGameLoader package:
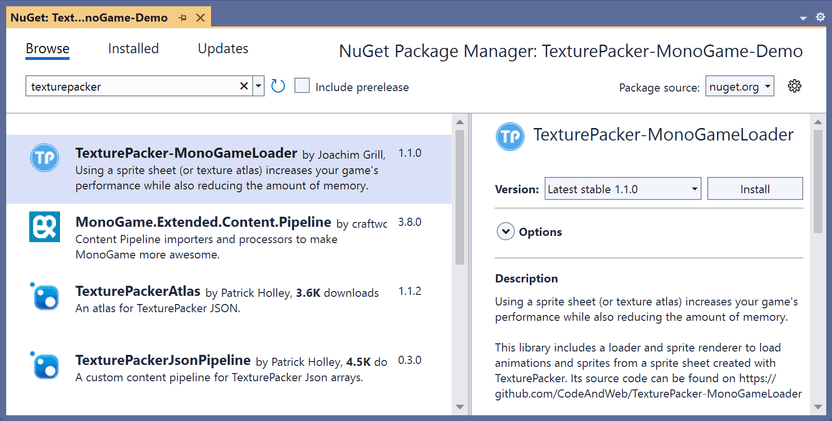
At this point we’ve got everything we need from TexturePacker – all of our files (texture, data, and class) as well as the TexturePacker Loader, so let’s start using it! Now let’s download GitHub’s demo package.
Once you’ve loaded up the solution, this is what you should see:
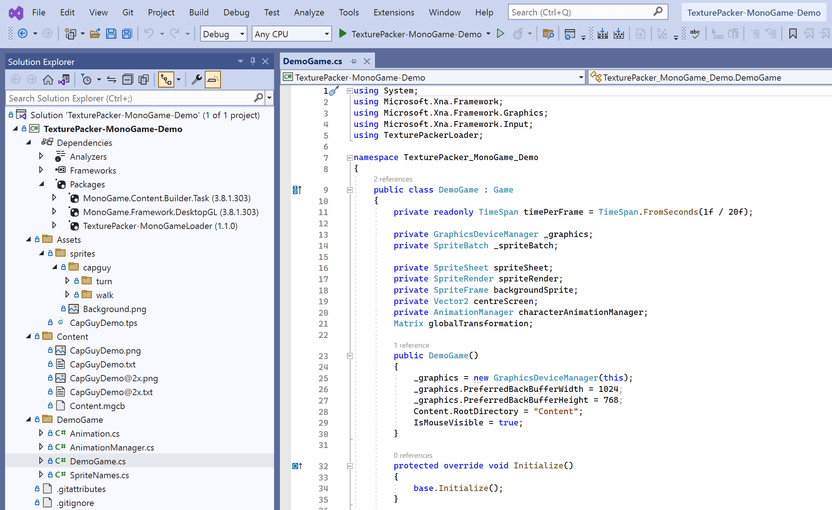
All you need to do is hit the F5 key to make CapGuy walk back and forth across the screen. It may not seem like much, but considering the minimal amount of code used here, it’s really pretty impressive!
DemoGame
Congrats on your demo! We hope you’ve been enjoying this exercise!
This section of the tutorial doesn't focus on TexturePacker or MonoGame, but on the demo app itself. Here we cover some other classes that you may want to use for other projects.
Most of the code in the demo should be pretty easy to understand, but what about the InitialiseAnimationManager() method?
This is what defines CapGuy’s animation. It controls where on the screen he starts as well as his speed.
var characterStartPosition = new Vector2(backgroundSprite.Size.X / 4,
                                         backgroundSprite.Size.Y * 0.7f);
var characterVelocityPixelsPerSecond = backgroundSprite.Size.X / 9;
Here two local variables are created that consist of arrays of frame names. These arrays define the frames that compose movement sequences, like walking or turning.
var turnSprites = new [] {
    TexturePackerMonoGameDefinitions.CapGuyDemo.Capguy_turn_0001,
    TexturePackerMonoGameDefinitions.CapGuyDemo.Capguy_turn_0002,
    TexturePackerMonoGameDefinitions.CapGuyDemo.Capguy_turn_0003,
    TexturePackerMonoGameDefinitions.CapGuyDemo.Capguy_turn_0004,
    ...
In addition to the sequence of frames, there are also a number of other variables that we can control here. We can specify the sprite’s velocity, amount of time before switching frames, and flipping the frames (which direction the sprite is facing). This is everything we need to define our animation. Here’s what the code looks like:
var animationWalkRight = new Animation(
    new Vector2(characterVelocityPixelsPerSecond, 0),
    timePerFrame, SpriteEffects.None, walkSprites
);
var animationWalkLeft = new Animation(
    new Vector2(-characterVelocityPixelsPerSecond, 0),
    timePerFrame, SpriteEffects.FlipHorizontally, walkSprites
);
var animationTurnRightToLeft = new Animation(
    Vector2.Zero,
    timePerFrame, SpriteEffects.None, turnSprites
);
var animationTurnLeftToRight = new Animation(
    Vector2.Zero,
    timePerFrame, SpriteEffects.FlipHorizontally, turnSprites
);
So we now defined four types of animation – walking left, walking right, turning left, and turning right. By putting this together in sequence, we can create a continuous loop of CapGuy walking back and forth across the screen.
var animations = new[]
{
    animationWalkRight, animationWalkRight, animationWalkRight,
    animationWalkRight, animationWalkRight, animationWalkRight,
    animationTurnRightToLeft,
    animationWalkLeft, animationWalkLeft, animationWalkLeft,
    animationWalkLeft, animationWalkLeft, animationWalkLeft,
    animationTurnLeftToRight
};
In this example, the “walk right” animation will repeat six times before he turns and the “walk left” animation will repeat six times, and so on.
We now need to create an instance of the AnimationManager class passing in all of this information.
this.characterAnimationManager = new AnimationManager (
    this.spriteSheet, characterStartPosition, animations
);
After that’s done, we can just call the AnimationManager’s update method each game loop.
protected override void Update(GameTime gameTime)
{
    this.characterAnimationManager.Update(gameTime);
    base.Update(gameTime);
}
Then we just need to use AnimationManager to make sure that our images are correct – proper sprite and effects in the proper position and Draw method.
protected override void Draw(GameTime gameTime)
{
    GraphicsDevice.Clear(Color.Black);

    spriteBatch.Begin(blendState: BlendState.NonPremultiplied,
                      transformMatrix: globalTransformation);

    // Draw the background
    spriteRender.Draw(backgroundSprite, centreScreen);

    // Draw character on screen
    spriteRender.Draw(
        characterAnimationManager.CurrentSprite,
        characterAnimationManager.CurrentPosition,
        Color.White, 0, 1,
        characterAnimationManager.CurrentSpriteEffects);

    spriteBatch.End();

    base.Draw(gameTime);
}
There are other ways to handle the animation, and there may be other methods that you prefer, but you’re welcome to use this code, if you’d like!
The End
We hope you enjoyed this tutorial and were able to learn something new, or just get a little more practice! If you’d like to see the finished product without having to build it yourself, here’s a video of the completed demo:
