How to convert vue-i18n from single file components to JSON

Introduction
In this guide, you'll learn a streamlined process to transition your Vue.js internationalization
from <i18n> blocks within single file components (SFCs) to external JSON files.
For context on why this
is beneficial, here's an insightful article.
I assume that you have a basic understanding of Vue.js and its file structure.
How to convert vue-i18n from single file components to JSON
This tutorial guides you through the following steps
Download BabelEdit 3.0.1
You can even use a trial version of BabelEdit to do this - no license required. Ensure you have BabelEdit 3.0.1, as newer versions will not support the vue-sfc format required for this transition.
You need BabelEdit 3.0.1 to do this. Newer versions do not work for this procedure!
Import your project into BabelEdit
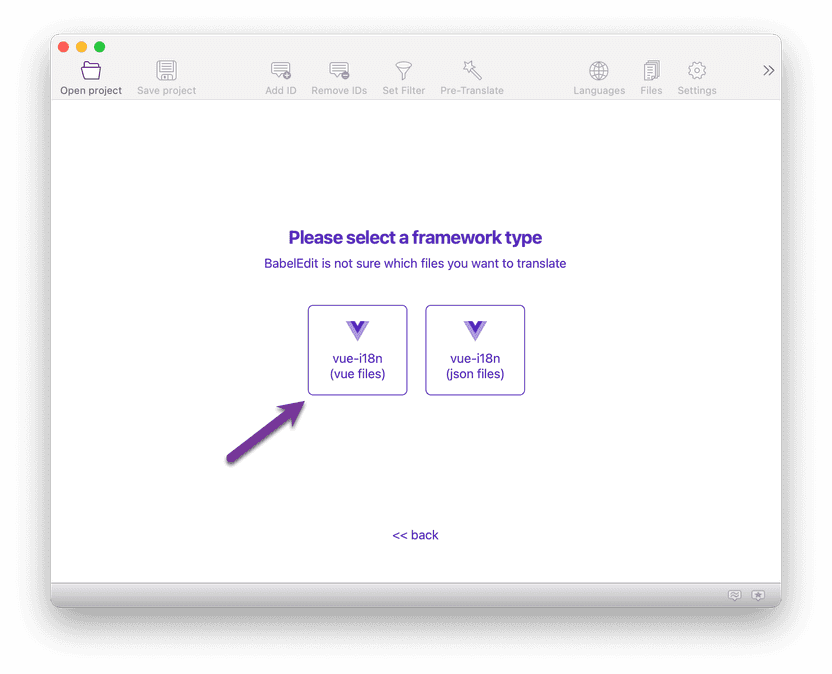
Drag and drop your project's root folder into BabelEdit. The application should automatically detect the project type. If prompted, select vue-i18n (vue files).
Confirm your project's languages when asked. BabelEdit usually auto-populates this data correctly.
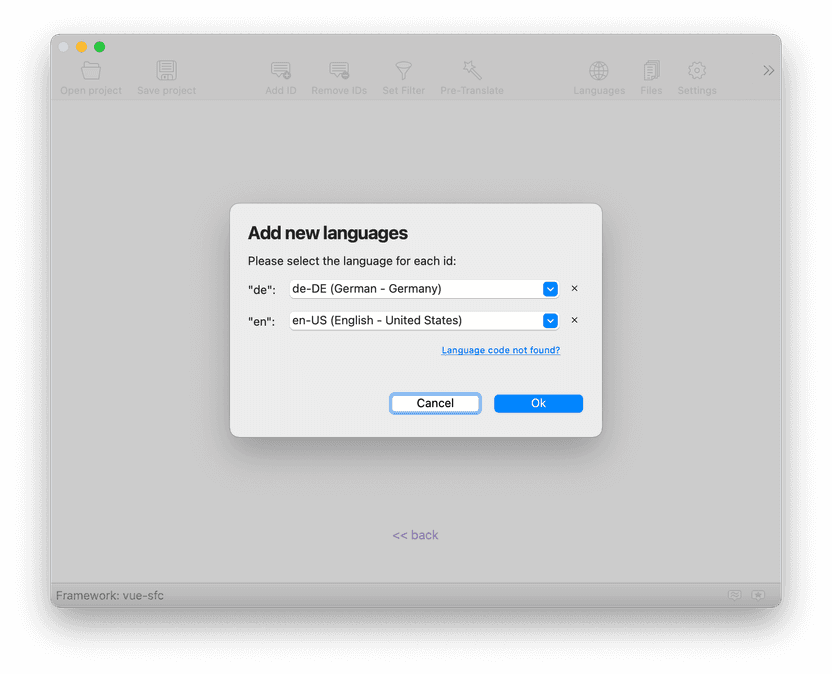
Click Ok.
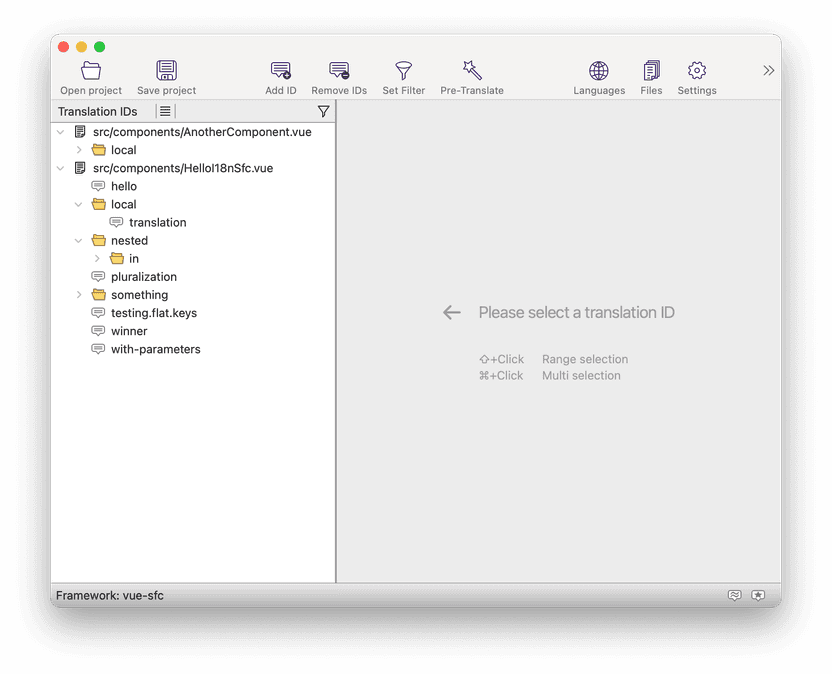
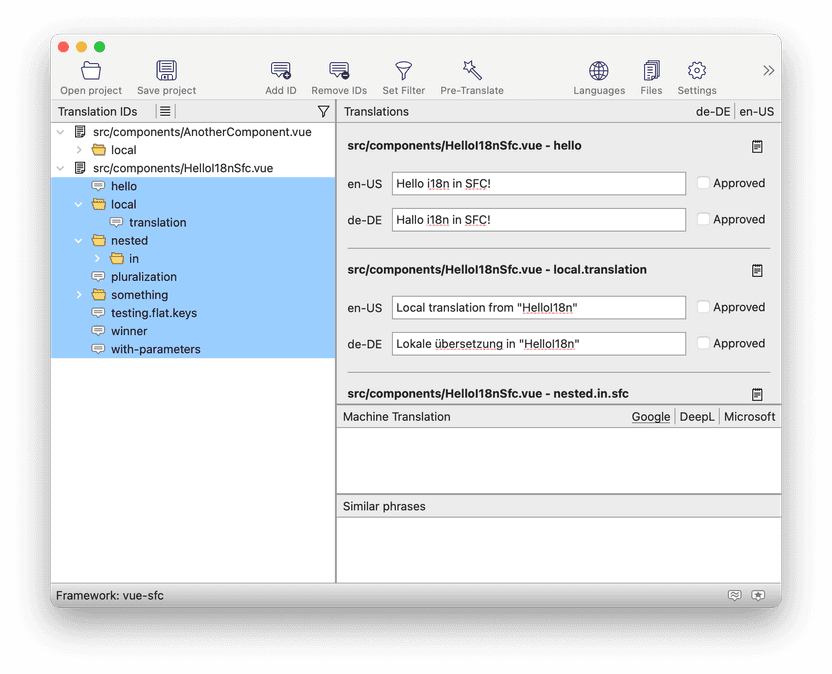
You should see something similar to the screenshot below: Your Vue.js components appear top-level in the tree on the left side. Below them, you see the translations.
Keep your project open in BabelEdit.
Create a new Vue.js project in BabelEdit
From the BabelEdit menu, select New project. Choose vue-i18n (json files) for the project
type and place your JSON files in src/locales.
For each language in your original project, add the corresponding JSON file. If you already have JSON files for some languages, select Existing file...; otherwise, choose New... and define the file name and language.
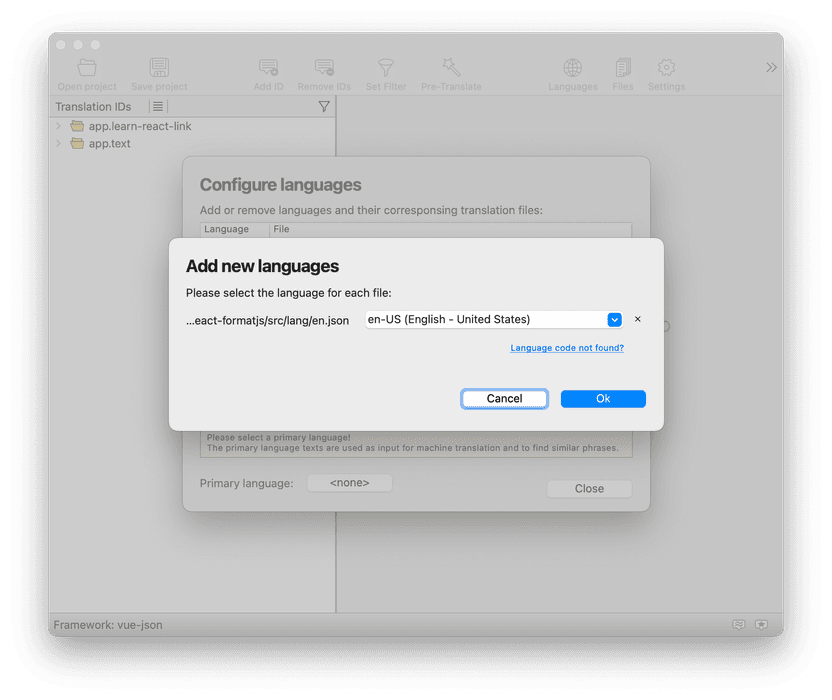
Set a Primary Language for your project to enable machine translation and other features in BabelEdit.
Transfer the translation from the vue-sfc project to the Vue.json project
Depending on whether your translation IDs are unique or duplicated across
components, you'll either copy all translations under each .vue file or the entire tree structure, respectively.
Most translation IDs are unique
If your translation IDs are unique, you can simply select all items below the .vue file node in the tree on the left side of BabelEdit.
E.g.
- 📄 src/components/main.vue
- 💬 title
- 💬 text
- 📄 src/components/about.vue
- 💬 another-title
- 💬 another-text
Here it's the easiest way to just copy title, text, another-title and another-text.
Many translation IDs are used in different components
If your translation IDs are not unique, you can either rename the IDs to make them unique or copy the whole tree including the file nodes. They'll show up in the target project, too.
E.g. if your structure looks like this:
- 📄 src/components/main.vue
- 💬 title
- 💬 text
- 📄 src/components/about.vue
- 💬 title
- 💬 text
And you copy it over to the JSON project, you'll see the same items. It's important that you
now replace src/components/main.vue with main and src/components/about.vue with about in the
JSON project afterwards.
You'll also have to change the parts of your code where you reference the IDs from title to main.title in
main.vue and title to about.title in the about.vue.
Copying the nodes
Use CTRL+C (Windows) or ⌘+C (Mac) to copy the translations.
Switch to the Vue.json project, click in the left panel with the tree view and press CTRL+V (Windows) or ⌘+V (Mac) to paste the translations.
If you don't want to use the shortcuts, use the context menu (Right mouse button, Copy and Paste).
Cleanup your new project
You might see nodes in the translation tree, that have a number in ´()´ — this happens when identical parts of a path are found. BabelEdit does not interleave the translation IDs.
You can easily move nodes or subtrees using copy and paste or the Move to... command in the tree's context menu.
Finally, save the new project. It'll ask you to save a .babel file - that's the project configuration for BabelEdit. After it's saved, it'll also store your .json files in the location specified during setup.
Remove <i18n> sections from your components
Edit your .vue files to remove the <i18n> sections manually.
Load the .json files in your project
Modify the VueI18n initialization in your main.js file to load the JSON files from the ./locales directory.
The example code below should give you an idea how to do that.
Vue.use(VueI18n)

function loadLocaleMessages () {
  const locales = require.context('./locales', true, /[A-Za-z0-9-_,\s]+\.json$/i)
  const messages = {}
  locales.keys().forEach(key => {
    const matched = key.match(/([A-Za-z0-9-_]+)\./i)
    if (matched && matched.length > 1) {
      const locale = matched[1]
      messages[locale] = locales(key)
    }
  })
  return messages
}

export default new VueI18n({
  locale: process.env.VUE_APP_I18N_LOCALE || 'en',
  fallbackLocale: process.env.VUE_APP_I18N_FALLBACK_LOCALE || 'en',
  messages: loadLocaleMessages()
})
Conclusion
Migrating your Vue.js project to use JSON files for internationalization simplifies translation management. Follow this guide to make the transition smoothly.
In the end, the effort is worth it, as the use of JSON files significantly simplifies the handling of translations in the long run.
If you are still in doubt: Read Why using i18n sections in Vue.js single file components is a bad idea.