Automated Sprite Sheet Cutter

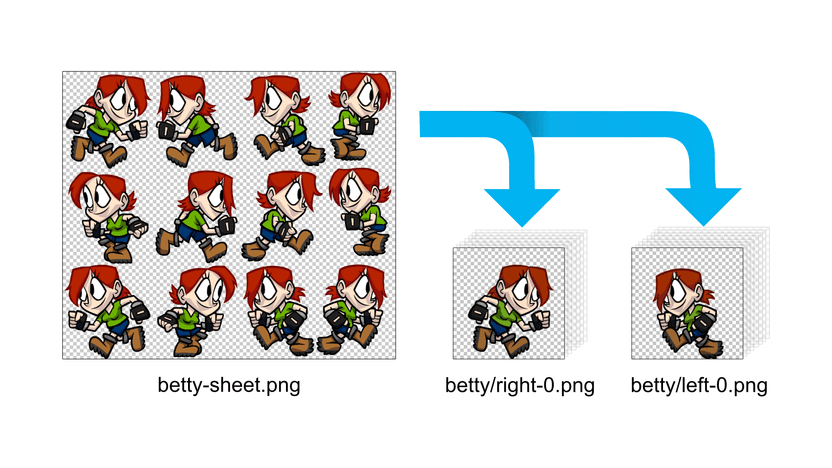
Use TexturePacker's automated sprite sheet cutter to slice sprite sheets into individual images.
This easy-to-use tool detects grid, strip and rectangle packed sprite sheets. It automatically configures the slicing parameters based on gaps between sprites which makes it a one-click-solution for most sprite sheets.
Save all sprites with sequence numbers or select individual sprites or animations to name them as needed.
The complete processing is done locally on your computer without compromising your privacy or uploading the sprite sheets to any servers.
Starting the Splitter and Adding Sprite Sheets
- Click the Split Sheet button in TexturePacker's toolbar
- Drag and drop a sprite sheet onto the center view.
The splitter now detects the layout of the sprites. This works well if your sprites have some space in between — no matter if the background is transparent or solid. In cases where it does not work automatically — or the detection does not slice the sprites as you wanted — use the parameters to adjust the splitter settings.
Cutting Sprite Sheets with Different Layouts
Cutting Grid/Strip-Based Sprite Sheets
For example, if your sprites are arranged in a clean grid or strip, they should be sliced automatically. Sometimes, if sprites are too close to each other, manual adjustment might be required.
You can use the following settings:
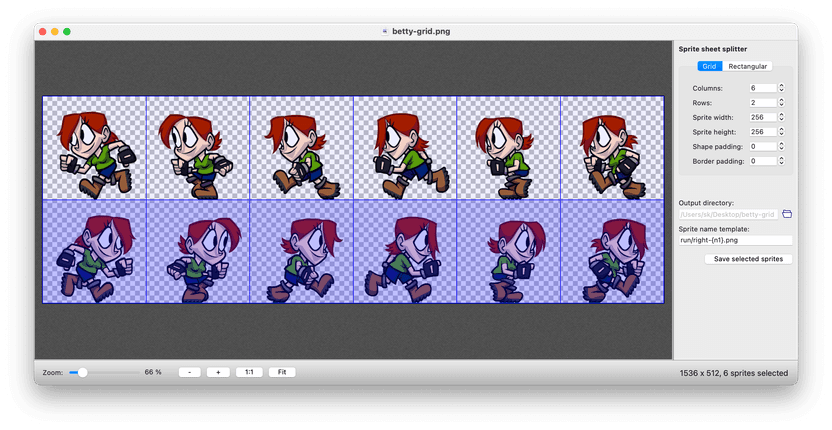
- Columns and Rows: Count the sprites in each column and row and set these parameters. Sprite size is updated automatically according to these settings.
- Sprite Width and Sprite Height: If you know the size of the sprites, use these settings.
- Shape Padding: Adjust this to the size of the gap between sprites.
- Border Padding: Adjust this to the size of the space from sprite to border.

Cutting Tile Sheets
The tile size might not be detected automatically by the sprite sheet slicing tool. If this is the case, switch to the Grid mode. You can either set the number of columns and rows — or set the tile size using the Sprite Width and Sprite Height settings. Adjust the Shape Padding and Border Padding if your individual tiles are surrounded by transparency or repeating pixels.
Cutting Irregular Sprite Sheets
The sprite sheet splitter automatically switches to rectangular mode if no clear grid layout is detected. In this mode, it tries to find rectangles that cover a sprite completely. If you know that the sprites were packed with transparency in between, you can increase the Padding value. This allows the cutter to combine, for example, smaller particles into a bigger sprite.

Cutting Sprite Sheets with Solid Color
The sprite cutter automatically works with sprites on a non-transparent solid background color. Sprites are sliced according to the layout of the sheet — but the transparency is not removed in the sprite itself.
Naming and Exporting Sprites
Set the Output Directory where you want to save your sprites. By default, a folder is created with the same name as the sprite sheet, but without the file extension.
In the center, you can select the sprites you want to export:
- Use CTRL (Windows) or CMD (macOS) with the left mouse button to add or remove sprites from the selection.
- Press and drag the mouse to use a rubber band selection.
Set the Sprite Name Template for the sprites you want to export. The name can consist of all characters allowed in regular file names,
including / to create subfolders. Use the following placeholders to add numbers to your sprite names, which is useful for naming animation phases:
{n}to add a number starting with 0.{n1}to add a number starting with 1.
For example, using betty/run-{n1}.png creates a folder named betty inside the output directory. The sprites will be
named run-1.png, run-2.png, and so on. Sprite numbers are automatically assigned from the top left to bottom right.
Finally, press Save Selected Sprites (or Save Sprites).
If you have multiple animations or different sprites, repeat the process of selecting, setting the name, and saving.
Repacking and Converting Sprite Sheets
Why Should You Repack a Sprite Sheet?
There are several reasons:
- You have multiple sprite sheets you want to combine into a single one.
- Your sprite sheets are inefficiently packed, containing a lot of transparency.
- You want to create a scaled-down version for different platforms.
- You want to reduce the file size.
- You want to port them from one game engine to another.
How to Repack an Existing Sprite Sheet
Use the sprite sheet cutter to extract the sprites from the sheet. Organize them in a folder structure that fits your project's needs. E.g. by grouping animation phases or objects in a sub folder.
Create a new project in TexturePacker, add your top-level sprite folder, select your game engine for the export and publish the new sprite sheet.
Extracting Animations from a Sprite Sheet
Animations in grid/strip layout are easy to handle. They contain transparency for proper alignment — which means they should work out of the box.
In a rectangle-packed sheet, transparency around the sprites might have been trimmed (removed). Manual work is required here to properly re-align the animation frames.
If the game engine you are creating the new sprite sheet for supports pivot points, it's also really easy to handle animations in TexturePacker. After adding the sprites, switch to the sprite editor panel and use the pivot point tool to align the animations. Use the animation preview window to adjust the alignment in real-time.