Creating spritesheets for Phaser 2 with TexturePacker
What you are going to learn
- Creating sprite sheets with TexturePacker
- Loading sprite sheets in Phaser
- Optimizing start up time and reducing download size
- Using static sprites in Phaser
- Playing animations from the sprite sheet
The complete tutorial code is available on GitHub.
This tutorial covers Phaser 2. For the updated version covering Phaser 3 visit How to create sprite sheets for Phaser 3.
Why should I use a sprite sheet?
The first step is to create a sprite sheet. Using sprite sheets with Phaser serves two primary purposes:
Speed up loading of the game:
By loading all graphics at once instead of numerous single images from a web server, the loading time of your game is significantly reduced.
Improve frame rate:
Using a sprite atlas enhances the game's performance. With WebGL, textures only need to be set once for rendering, resulting in improved frame rates.
“TexturePacker is an essential part of our daily workflow. Every bit of GPU memory helps when dealing with mobile html5 games, so intelligent packing of assets is a must. And Texture Packer has all the features we need to effortlessly create atlases for our games.”
Creating sprite sheets - the easy way
The easiest way to create your sprite sheets is using TexturePacker. Download and install the application here:
When starting the application choose Try TexturePacker Pro. In the main window use the Choose Data Format button and select Phaser (JSONHash) from the list. You can use the filter to find it faster.
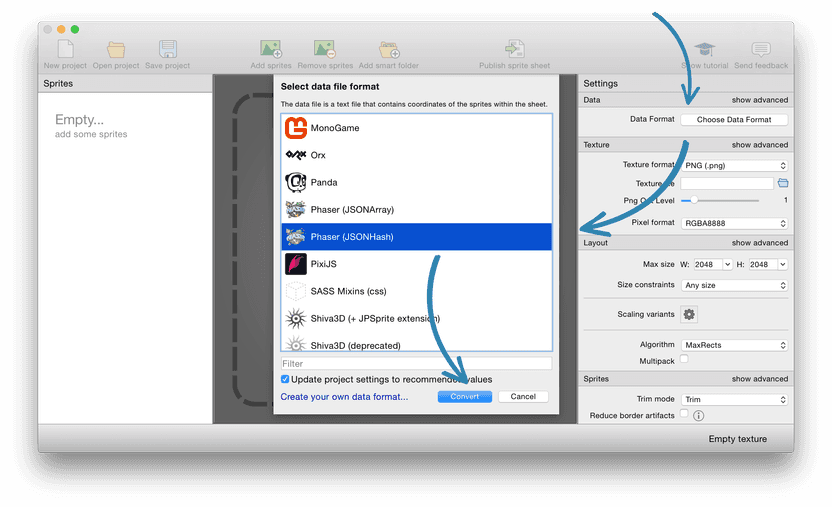
Which of the two Phaser exporters you choose does not really matter. They contain the identical data with some
different layout. If you use the Phaser (JSONArray) you'll have to load your sprite sheet
using game.load.atlasJSONArray() instead of game.load.atlasJSONHash() .
The project folder already contains some artwork in the assets-folder. Simply drag and drop the cityscene folder into TexturePacker.
Adding folders has two main advantages over adding single sprites
- Adding or removing sprites in the folder also adds or removes them from the sprite sheet.
- Sub folder names become part of the sprite names — e.g. capguy/walk/0001.png and not just 0001.png
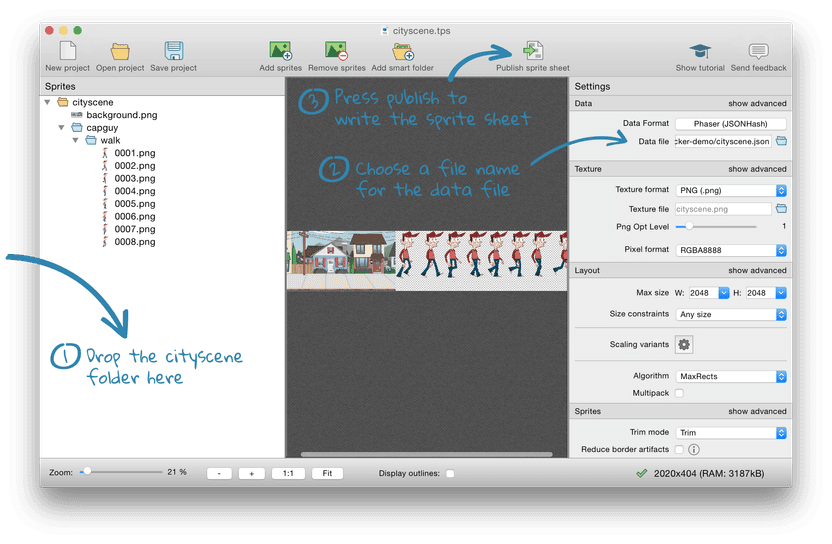
After that use the file selection button to enter a Data file. Name it cityscene.json and place it in the folder of the html and js file.
Choose cityscene.png in Texture file 's file selector and also place it in the main folder.
Finally, press Publish sprite sheet to create and save the sprite sheet.
We are now finished in TexturePacker. That's all it takes to create a sprite sheet.
Loading the sprite sheet in Phaser
You can get Phaser directly from their GitHub page. For a simple setup download the version you would like to use as single Javascript file: phaser/v2.6.2/build/phaser.min.js. Place the file in the location where you want the demo to run from.
Save the following HTML as file as index.html. Make sure that phaser.min.js, cityscene.png and cityscene.json are in the same directory.
<!doctype html>
<html>
    <head>
        <meta charset="UTF-8" />
        <title>TexturePacker+Phaser Demo!</title>
        <script src="phaser.min.js"></script>
    </head>
    <body>
        <script>
            window.onload = function() {

                var game = new Phaser.Game(800, 400, Phaser.AUTO, '', { preload: preload });

                function preload () {
                    game.load.atlasJSONHash('cityscene', 'cityscene.png', 'cityscene.json');
                }

            };
        </script>
    </body>
</html>
The function preload() loads the data file and the texture.
Now check that everything works as expected. You should just see a black rectangle, since you are not yet adding the sprites to the scene. Check the Javascript console for errors.
Adding a static background image from the sprite sheet
Add this new function to create the scene:
function create () {
    var background = game.add.sprite(0, 0, 'cityscene', 'background');
}
Edit the Phaser.Game call in the startup function to call the create() method:
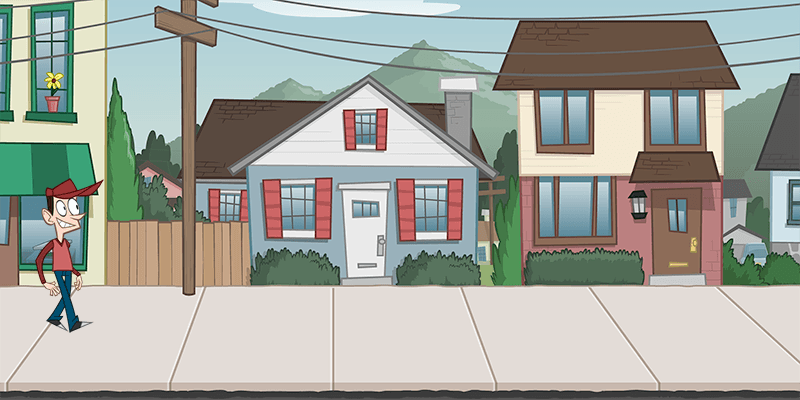
var game = new Phaser.Game(800, 400, Phaser.AUTO, '', { preload: preload, create: create });Your current game state should look like this:
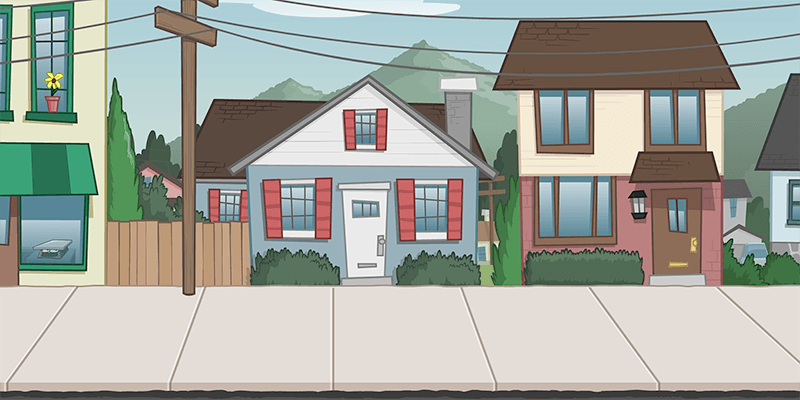
This code creates a sprite from the cityscene sprite sheet and uses the image called background. The background is positioned in the top left corner of the scene.
Adding an animation
First you'll have to add a variable that you can use to reference the sprite:
...
var game = new Phaser.Game(800, 400, Phaser.AUTO, '', { preload: preload, create: create });

var capguy;
...
Now extend the create function to load and play the animation
function create () {

    // background
    var background = game.add.sprite(0, 0, 'cityscene', 'background');

    // sprite
    capguy = game.add.sprite(0, 180, 'cityscene', 'capguy/walk/0001');
    capguy.scale.setTo(0.5,0.5);

    // animation
    capguy.animations.add('walk', Phaser.Animation.generateFrameNames('capguy/walk/', 1, 8, '', 4), 10, true, false);
    capguy.animations.play('walk');

}
This creates a sprite with the first frame of the animation: capguy/walk/0001.
The next line scales the sprite down by 50% because it would otherwise be a bit too big for your scene.
Phaser.Animation.generateFrameNames('capguy/walk/', 1, 8, '', 4) creates a bunch
of frame names. 1 is the start index, 8 the end index and the 4 is the number of digits to use
for the animation name. The resulting names are:
- capguy/walk/0001
- capguy/walk/0002
- …
- capguy/walk/0008
This list of names is used to create an animation called walk . The last line starts the animation on the sprite.
The result is Capguy walking on the spot:
Moving CapGuy
There are several ways to move a sprite in Phaser. You are going to do a simple animation - just pushing the sprite along and resetting it after Capguy left the scene.
Extend the startup code again to now also call a function called update :
...
var game = new Phaser.Game(
        800, 400, Phaser.AUTO, '', { preload: preload, create: create, update: update }
    );
...
Add the update function like this:
function update()
{
    capguy.x += 3;
    if(capguy.x > 800)
    {
        capguy.x = -50;
    }
}
Not much to say about that: It increases Capguys position by 3 and after reaching the right border resets the sprite to the left border.
Optimizing your game
The resulting cityscene.png is 360kb — Not much for a fast internet connection but for a mobile device it might be a good idea to optimize the loading time.
TexturePacker allows you to dramatically reduce the amount of memory used by your sprite sheets — while keeping the sprite quality almost like the original.
To enable this optimization select INDEXED from the Pixel format
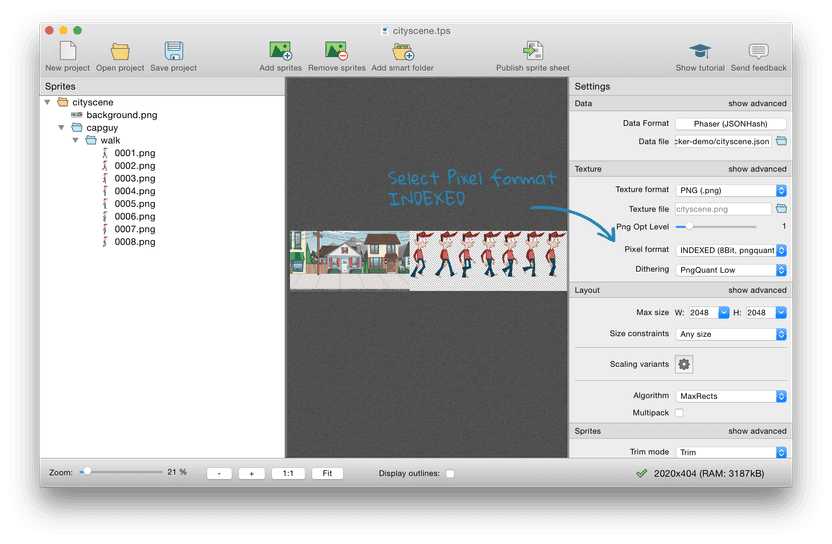
Here's the original sheet: 360kb

Here's the optimized sheet: 90kb - that is 75% less!

Finally
That's all for this tutorial. You should now have learned how you can easily add animations to Phaser using TexturePacker. You also saw how easy it is to optimize your game to improve the startup time.