How to create sprite sheets & animations for PixiJS 4

This tutorial uses PixiJS 4.x. An updated version of the tutorial is available here: How to create sprite sheets and animations for PixiJS 8.x
Are you making this mistake?
If you're start developing your first simple app using PixiJS you're probably loading your sprite images from separate files: You're passing all file names to the Pixi loader...
const capguyFrames = [
    "images/sprites/capguy_01.png",
    "images/sprites/capguy_02.png",
    "images/sprites/capguy_03.png",
    // ...
];

PIXI.loader
    .add("images/sprites/background.png")
    .add(capguyFrames)
    .load(setup);
... and as soon as the loader has finished its job, you're initializing your sprites and animations with the loaded textures:
function setup() {
    // the resources hash provided by the loader:
    let resources = PIXI.loader.resources;

    // initialize background image
    background = new PIXI.Sprite(resources["images/sprites/background.png"].texture);

    // create an animated sprite
    animatedCapguy = PIXI.extras.AnimatedSprite.fromFrames(capguyFrames);
As loading of many individual image files is quite time consuming because the browser makes a new network connection for each single image. Not a big deal if you only have hand full of images — but that's usually not the case for a game.
So — what's the solution to this?
The better solution is to create a sprite sheet. This means putting all your images into one big image. The browser can load this image by faster by only making one connection to your web server.
It also has additional benefits: Using a single sprite sheet might also decrease the memory consumption and speed up rendering of your game.
How to create a sprite sheet?
One way is to use your favorite graphics tool and place all the sprites into a big sheet manually... But this is not an ideal solution. It's time consuming and requires a lot of manual work because you have to tell PixiJS where each sprite is located on the sprite sheet.
The easiest way to create a sprite sheet is using TexturePacker, which you can download from here:
TexturePacker is a sprite sheet packer which is directly supported by PixiJS. But it does not only pack the sprite sheets for you, it also makes your life easier in several ways:
- removes obsolete transparency around your sprites to speed up rendering and create better packed sprite sheets
- converts images to 8-bit png for faster loading
- contains a visual pivot point editor with real time preview
- collects animation frames in a way that you can playback animation easily in PixiJS
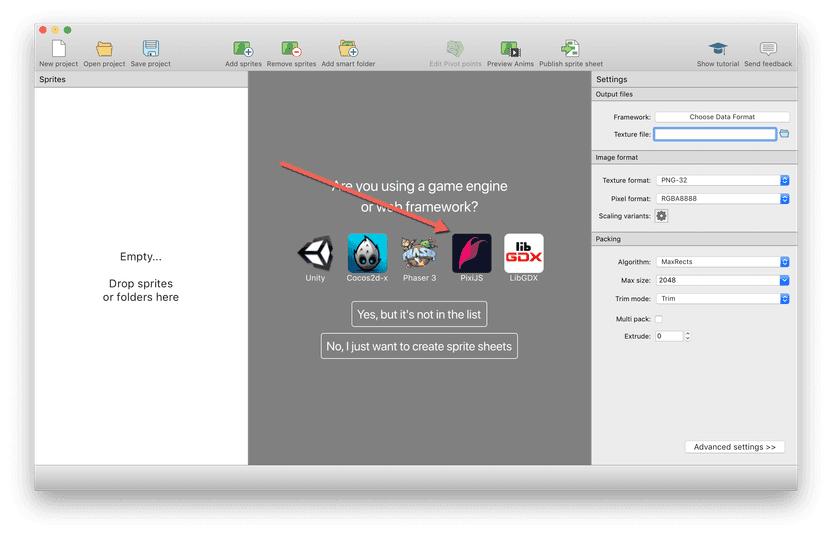
After installing and starting TexturePacker select the PixiJS framework from the start screen:
Drop the folder containing your sprites onto TexturePacker:
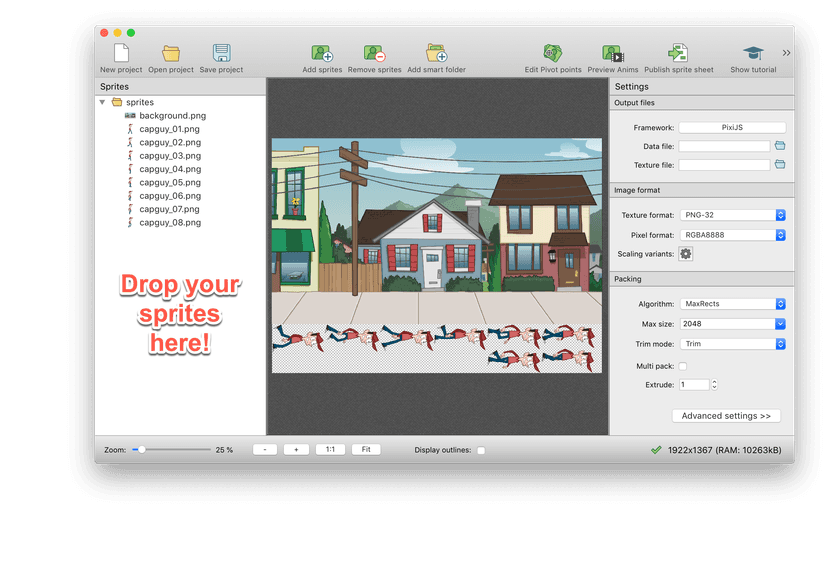
TexturePacker packs the sprite sheet for your and displays it in the center of the screen. Some sprites might be rotated to allow tighter packing — and some sprites might appear without transparency. Don't worry — that's fine because PixiJS knows about these optimizations.
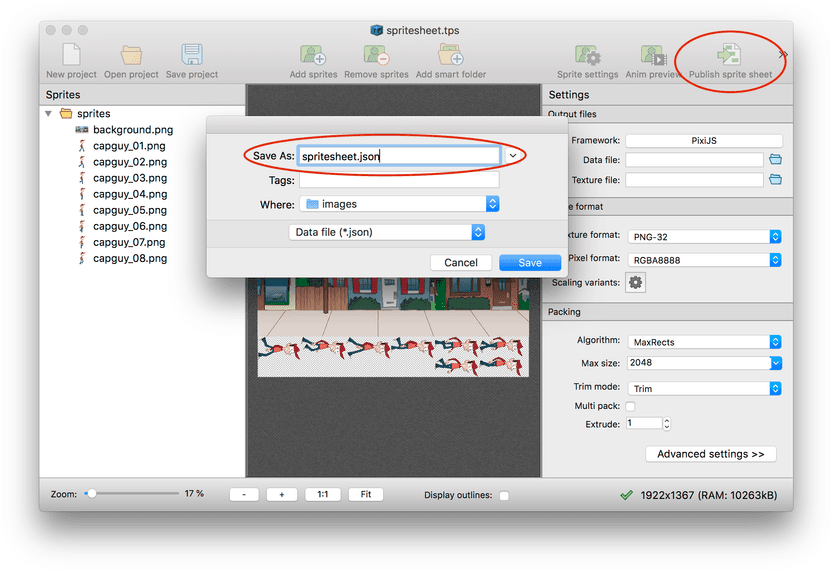
Finally, press Publish sprite sheet to create the sprite sheet in PixiJS format:
Loading and using a sprite sheet with PixiJS
Instead of passing all your image file names to the Pixi loader, it's now sufficient to just pass the name of the JSON data file TexturePacker has generated. The sprite sheet file is loaded automatically:
PIXI.loader
    .add("images/spritesheet.json")
    .load(setup);
The texture objects for the individual images of the sheet can be fetched from the Spritesheet resource:
function setup() {
    // get a reference to the sprite sheet we've just loaded:
    let sheet = PIXI.loader.resources["images/spritesheet.json"];

    ...
}
Creating a single sprite form a sprite sheet
To create a sprite simply retrieve its data from the sheet using sheet.textures['<name>']:
    // initialize background sprite
    background = new PIXI.Sprite(sheet.textures["background.png"]);

    // add it to the stage
    app.stage.addChild(background);
Creating an animation from a sprite sheet
Another incredible useful feature is that TexturePacker detects sprite animations.
It checks for sprite names that contain numbers and follow this pattern <name>_<number>.png.
E.g.
capguy_01.pngcapguy_02.pngcapguy_03.pngcapguy_04.png
The frames are stored as array in the sheet data. You can access the animation simply by using sheet.animations['<name>']:
    // create an animated sprite
    animatedCapguy = new PIXI.extras.AnimatedSprite(sheet.animations["capguy"]);

    // set speed, start playback and add it to the stage
    animatedCapguy.animationSpeed = 0.167;
    animatedCapguy.play();
    app.stage.addChild(animatedCapguy);
You don't have to list each frame manually anymore. And if your artist decides to add more frames the animation also updates automatically.
Settings pivot points
If you're using sprite sheets you can also use TexturePacker's graphical pivot point editor. Just click on Sprite settings and select the sprites you want to edit:
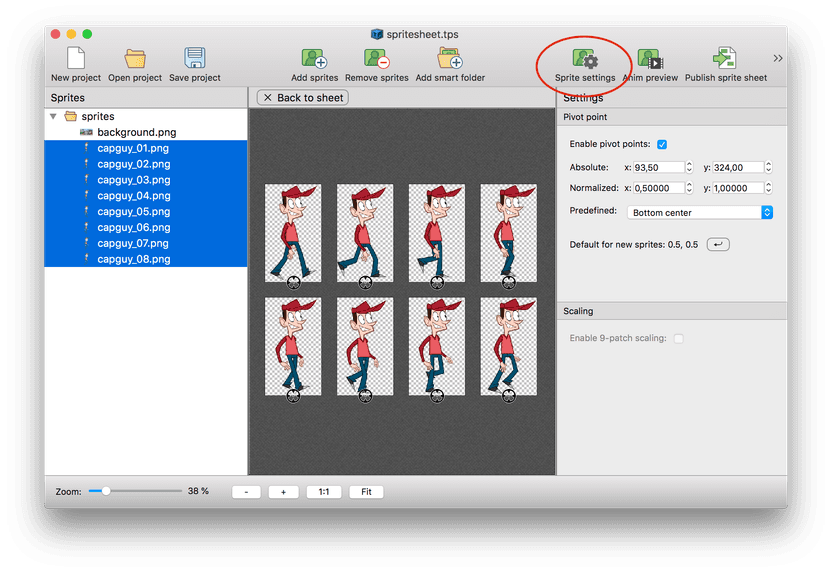
The pivot point is the circle displayed with each sprite. You can move it by dragging it with your mouse or by setting it to fixed position like in the right panel.
The pivot point coordinates are written to the sprite sheet data file and automatically used as default anchor point if a sprite is initialized with a sprite sheet. Of course, you can overwrite the anchor point default in your javascript code.
To load sprite animations and pivot points from the sprite sheet file, make sure that you are using the latest version of PixiJS and TexturePacker.
In TexturePacker select the PixiJS framework, don't use the generic JSON formats — they can't be used with the pivot point editor.
Loading the sprite sheet faster: Optimizing PNGs
TexturePacker can optimize your sprite sheets even further by reducing the number of colors and writing 8-bit png files instead of 32 bit.
It uses an algorithm based on pngquant for this which can easily reduce the download size by 50% without sacrificing too much of the visual quality of your game.
To enable 8-bit pngs simply change the file format from PNG-32 to PNG-8.