Your goals for this tutorial:
- Learn why you should use sprite sheets in your melonJS game
- Use TexturePacker to create a sprite sheet
- Optimize the sprite sheet to improve startup time and performance of your game
- Add a static background
- Create and play an animation
The complete tutorial project is available on GitHub.
Why you should use sprite sheets
Using a sprite sheet instead of a bunch of single images comes with some advantages:
- Saving memory — the sheet uses less memory
- Faster startup time — only one file has to be loaded from the server
- Increased frame rate — melonJS optimizes GPU usage and makes your game faster
Creating a sprite sheet
The easiest way to create an optimized sprite sheet is using TexturePacker — available for Windows, macOS and Linux. You can test it within a 7-day trial period before purchasing a license:
Selecting your data format
You should see a screen similar to the one below after you've installed and started TexturePacker:
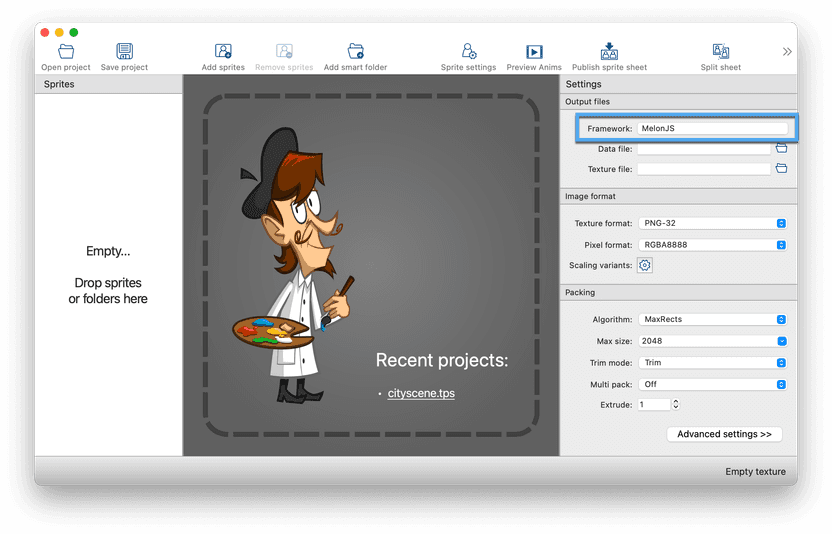
TexturePacker supports various game and web development frameworks. Start by selecting melonJS as your Framework.
TexturePacker has a free mode that is automatically activated after the trial. It works with melonJS if you use the generic JSON (Array) data format but does not contain the optimizations and presets for melonJS.
Adding sprites
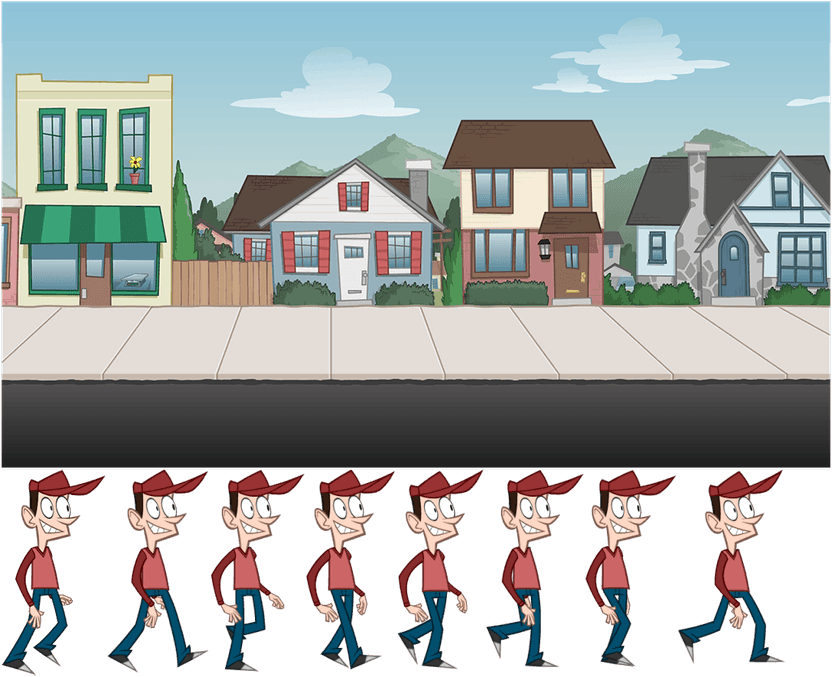
Next, add your sprites by dropping the cityscene folder onto the center of TexturePacker. All recognized image formats (such as PSD, PNG, JPG, ...) within the folder are automatically added to the sprite sheet. New or modified files will update the sprite sheet as soon as you re-enter the application.
Setting pivot points
The pivot point (in melonJS, it is called anchor point) determines the position of the sprite, which is placed on a given x and y coordinate. It is also the point around which the sprite rotates and scales.
For properly aligned sprites and animation frames, it is recommended to enable pivot points in TexturePacker!
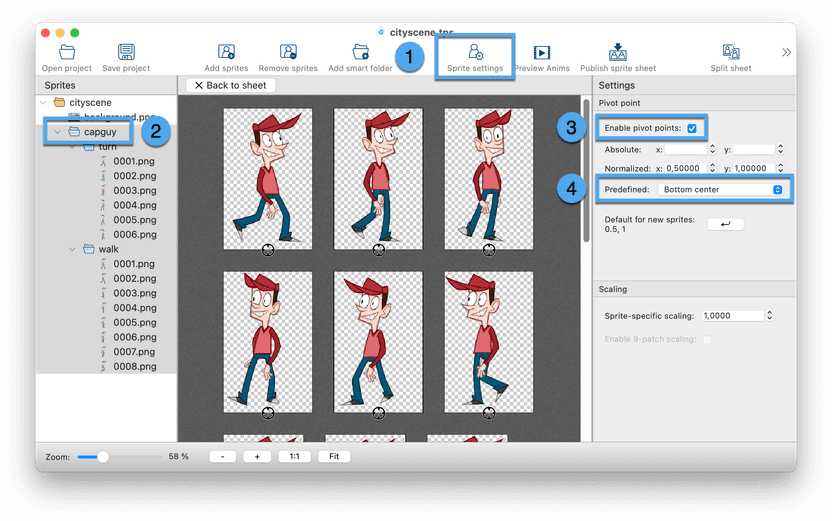
In our example, we set the pivot points of the Capguy sprites to bottom/center:
- Click on Sprite settings in the toolbar
- Select capguy subtree in Sprites list
- Check Enable pivot points
- Select Bottom center in the Predefined dropdown
Optimizing your sprite sheet for speed and size
Your sprite sheet has already been optimized by TexturePacker, using Trim. If you enable Display outlines, you will notice the string "85% overdraw" below the texture. The missing 15% are transparent pixels that have been removed. They are not needed in the sprite sheet — keeping them would waste memory and require more rendering. melonJS gets the information about the removed pixels through the data file and keeps your animations aligned.
Reduce the file size to improve the download speed of your game by setting Texture format to PNG-8 (indexed). This enables the pngquant — storing the image as an 8-bit indexed png. This decreases the file size from 383kb to 102kb while keeping the image quality almost identical. If you see color bands in gradients, set Dithering to PngQuant High.
Original scene with 32-bit colors, 383kb:
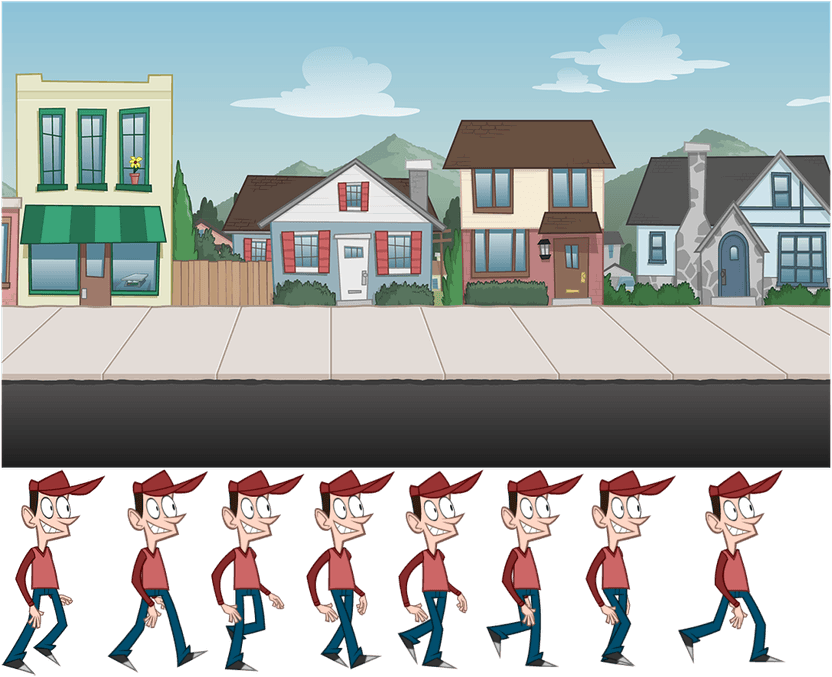
Optimized scene with indexed colors, 102kb:
Creating the sprite sheet
You can now press Publish sprite sheet from the top toolbar to create a data file and the sprite sheet image. Enter cityscene.json as file name and save it in the data/img folder. You can change the file name under Data file if needed.
Importing and using the sprite sheet in melonJS
To start a new project, clone the melonJS boilerplate template from
GitHub. Then, use the command npm run dev
to launch a development server at localhost:9000:
git clone https://github.com/melonjs/es6-boilerplate.git melonjs-sprite-sheet-example
cd melonjs-sprite-sheet-example
npm install
npm run dev
Start by configuring the canvas size to match the dimensions of the background image we're going to use.
You can do this with the video.init() call in index.js:
    if (!video.init(2000, 1300, {parent : "screen", scale : "auto"})) {
        alert("Your browser does not support HTML5 canvas.");
        return;
    }
Next, include the sprite sheet and data file in the list of assets to be loaded in manifest.js:
const DataManifest = [
    { name: "cityscene", type: "json",  src: "data/img/cityscene.json" },
    { name: "cityscene", type: "image", src: "data/img/cityscene.png" }
];
Keep in mind that manifest.js is automatically managed by the melonJS boilerplate in index.js.
It preloads the resources, making them accessible through the loader.get...() methods.
By default, the boilerplate code activates the PLAY state, which is implemented in play.js. In this state, we create a TextureAtlas object using the sprite sheet image and data file resource:
onResetEvent() {
    // load the texture atlas file
    const atlas = new TextureAtlas(
        loader.getJSON("cityscene")
    );

    ...
}
All subsequent code snippets will also be added to this onResetEvent() method:
Add the static background
Adding a static background is quite straightforward:
    // viewport width and height
    const w = game.viewport.width;
    const h = game.viewport.height;

    // create background sprite
    const background = atlas.createSpriteFromName("background");

    // set its position to the middle of the viewport
    background.pos.set(w/2, h/2);

    // add sprite to the scene
    game.world.addChild(background, 1);
The code uses the "background" texture from the sprite sheet and places it on the screen. Since we haven't changed the sprite's anchor point in TexturePacker before, it defaults to the sprite's center. That's why we position the sprite at the center of the viewport.
Another way to create a sprite object is by using the Sprite constructor. This constructor requires the sprite's position as its first and second parameters:
    // create background sprite
    const background = new Sprite(w/2, h/2, { image : atlas, region : "background" });

    // add sprite to scene
    game.world.addChild(background, 1);
Add the Capguy animation
Let's add an animation for the player sprite.
To do this, we'll inherit from the Entity class and implement it in js/renderables/player.js:
class PlayerEntity extends Entity {

    constructor(x, y, atlas) {
        // call the parent constructor
        super(x, y, { width: 210, height: 330 });

        // use animation arrays exported by TexturePacker
        const animations = loader.getJSON("cityscene").animations;
        const walkFrames = animations["capguy/walk"];
        const turnFrames = animations["capguy/turn"];

        // create animated sprite, specify all used animation frames
        this.renderable = atlas.createAnimationFromName([...walkFrames, ...turnFrames]);

        // define animations, pass frames to be used in each animation
        this.renderable.addAnimation("walk", walkFrames, 125);
        this.renderable.addAnimation("turn", turnFrames, 125);

        this.body.setStatic(true);
    }

});
This code initializes a basic entity and adds a Sprite as renderable component.
TexturePacker 7.1 (and newer) detects sprites which differ only in a sequence number and
exports them as animations. You can use the generated
sprite name arrays to create a Sprite object with createAnimationFromName().
The addAnimation() method adds a new animation to the sprite, expecting three parameters:
- The animation name: It's used to activate the animation, as we'll see later.
- The frames to use for the animation.
- The frame delay in milliseconds; in the following example: 1000 / 125 = 8 fps
In melonJS, when you create an entity, it usually follows the laws of physics and gravity.
This means that the entity will fall down unless you disable gravity for it.
This is done with the setStatic(true) call.
Adding the animated sprite to the game is now quite simple, add the following lines to play.js:
    const capguy = new PlayerEntity(w/2, h*0.9, atlas);
    game.world.addChild(capguy, 2);
If you run the demo now, you'll see CapGuy walking in place, but he's not yet moving. To make CapGuy move to the right, include the following code block in player.js
    update(dt) {
        // just manually change the guy position
        this.pos.x += 0.3*dt;

        // repeat once leaving the viewport
        if (this.pos.x >= game.viewport.width) {
            this.pos.x = 0;
        }

        // call the parent method
        super.update(dt);
        return true;
    }
}
This block shifts CapGuy slightly to the right. dt is the time difference between the last frame
and the current frame. Using this as a basis for the update keeps the animation speed constant.
The if block resets CapGuy to the left border after he left to the right.
Summary
You've now learned how to create sprite sheets and use them in your melonJS project. TexturePacker makes it easy to handle your assets and optimize your game for size and speed.
